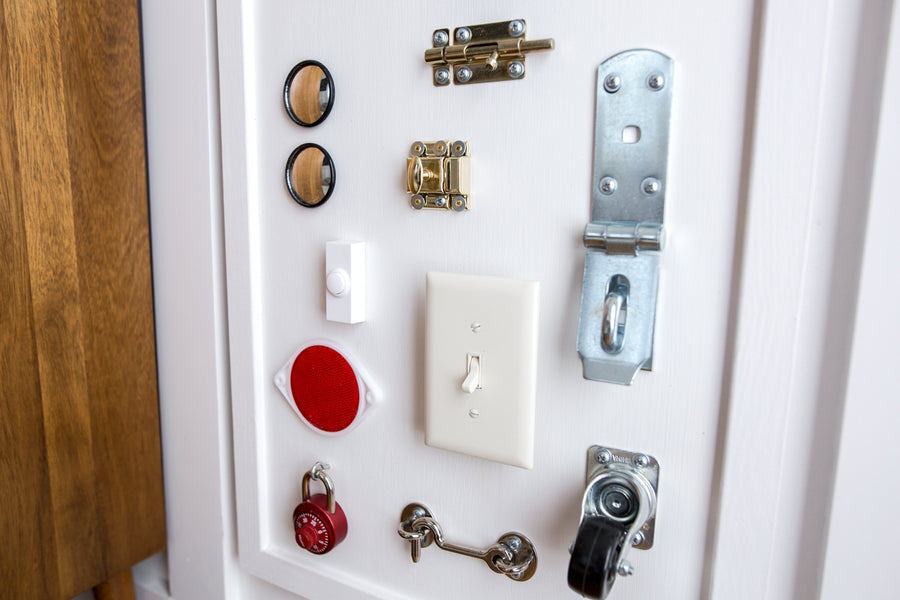

If this DIY has anything to do with it, Moon is going to grow up to be an amazing builder, just like Joey! We wanted to add some interactive elements in his nursery, and this project was the perfect way to engage his curiosity and playful side while introducing him to a lot of elements we #creativeweirdos use all the time in our designs!
Check out the supplies and steps below!

Prep It!:
Wood board
Saw
White paint
Paintbrush
Various sensory items like light switches, latches, combination locks, wheels, and rug squares
Drillh
Glue
Power screwdriver
Small wall hooksh


Do It!:
- Start by cutting your wood board down to the size you need it to be for your room. Since this nursery has wainscoting, we wanted ours to fit in between the panels.
- Build a frame for the board using the technique in this DIY, except planning for it to be the same height and width as the board so it can fit on top and add some depth.
- Paint your board and frame white and let dry!
- Secure your frame to the board by screwing it in from behind, so no hardware shows on the front.
- Now it's time to add your sensory accessories! Screw on locks, switches, reflectors, and other items on your board! Adhere fabric items, like rug swatches, with glue.
- Secure your wall hooks to the wall and measure how far apart they are. Drill holes in the board (right beneath the frame) at that same distance and hang the board on these hooks!