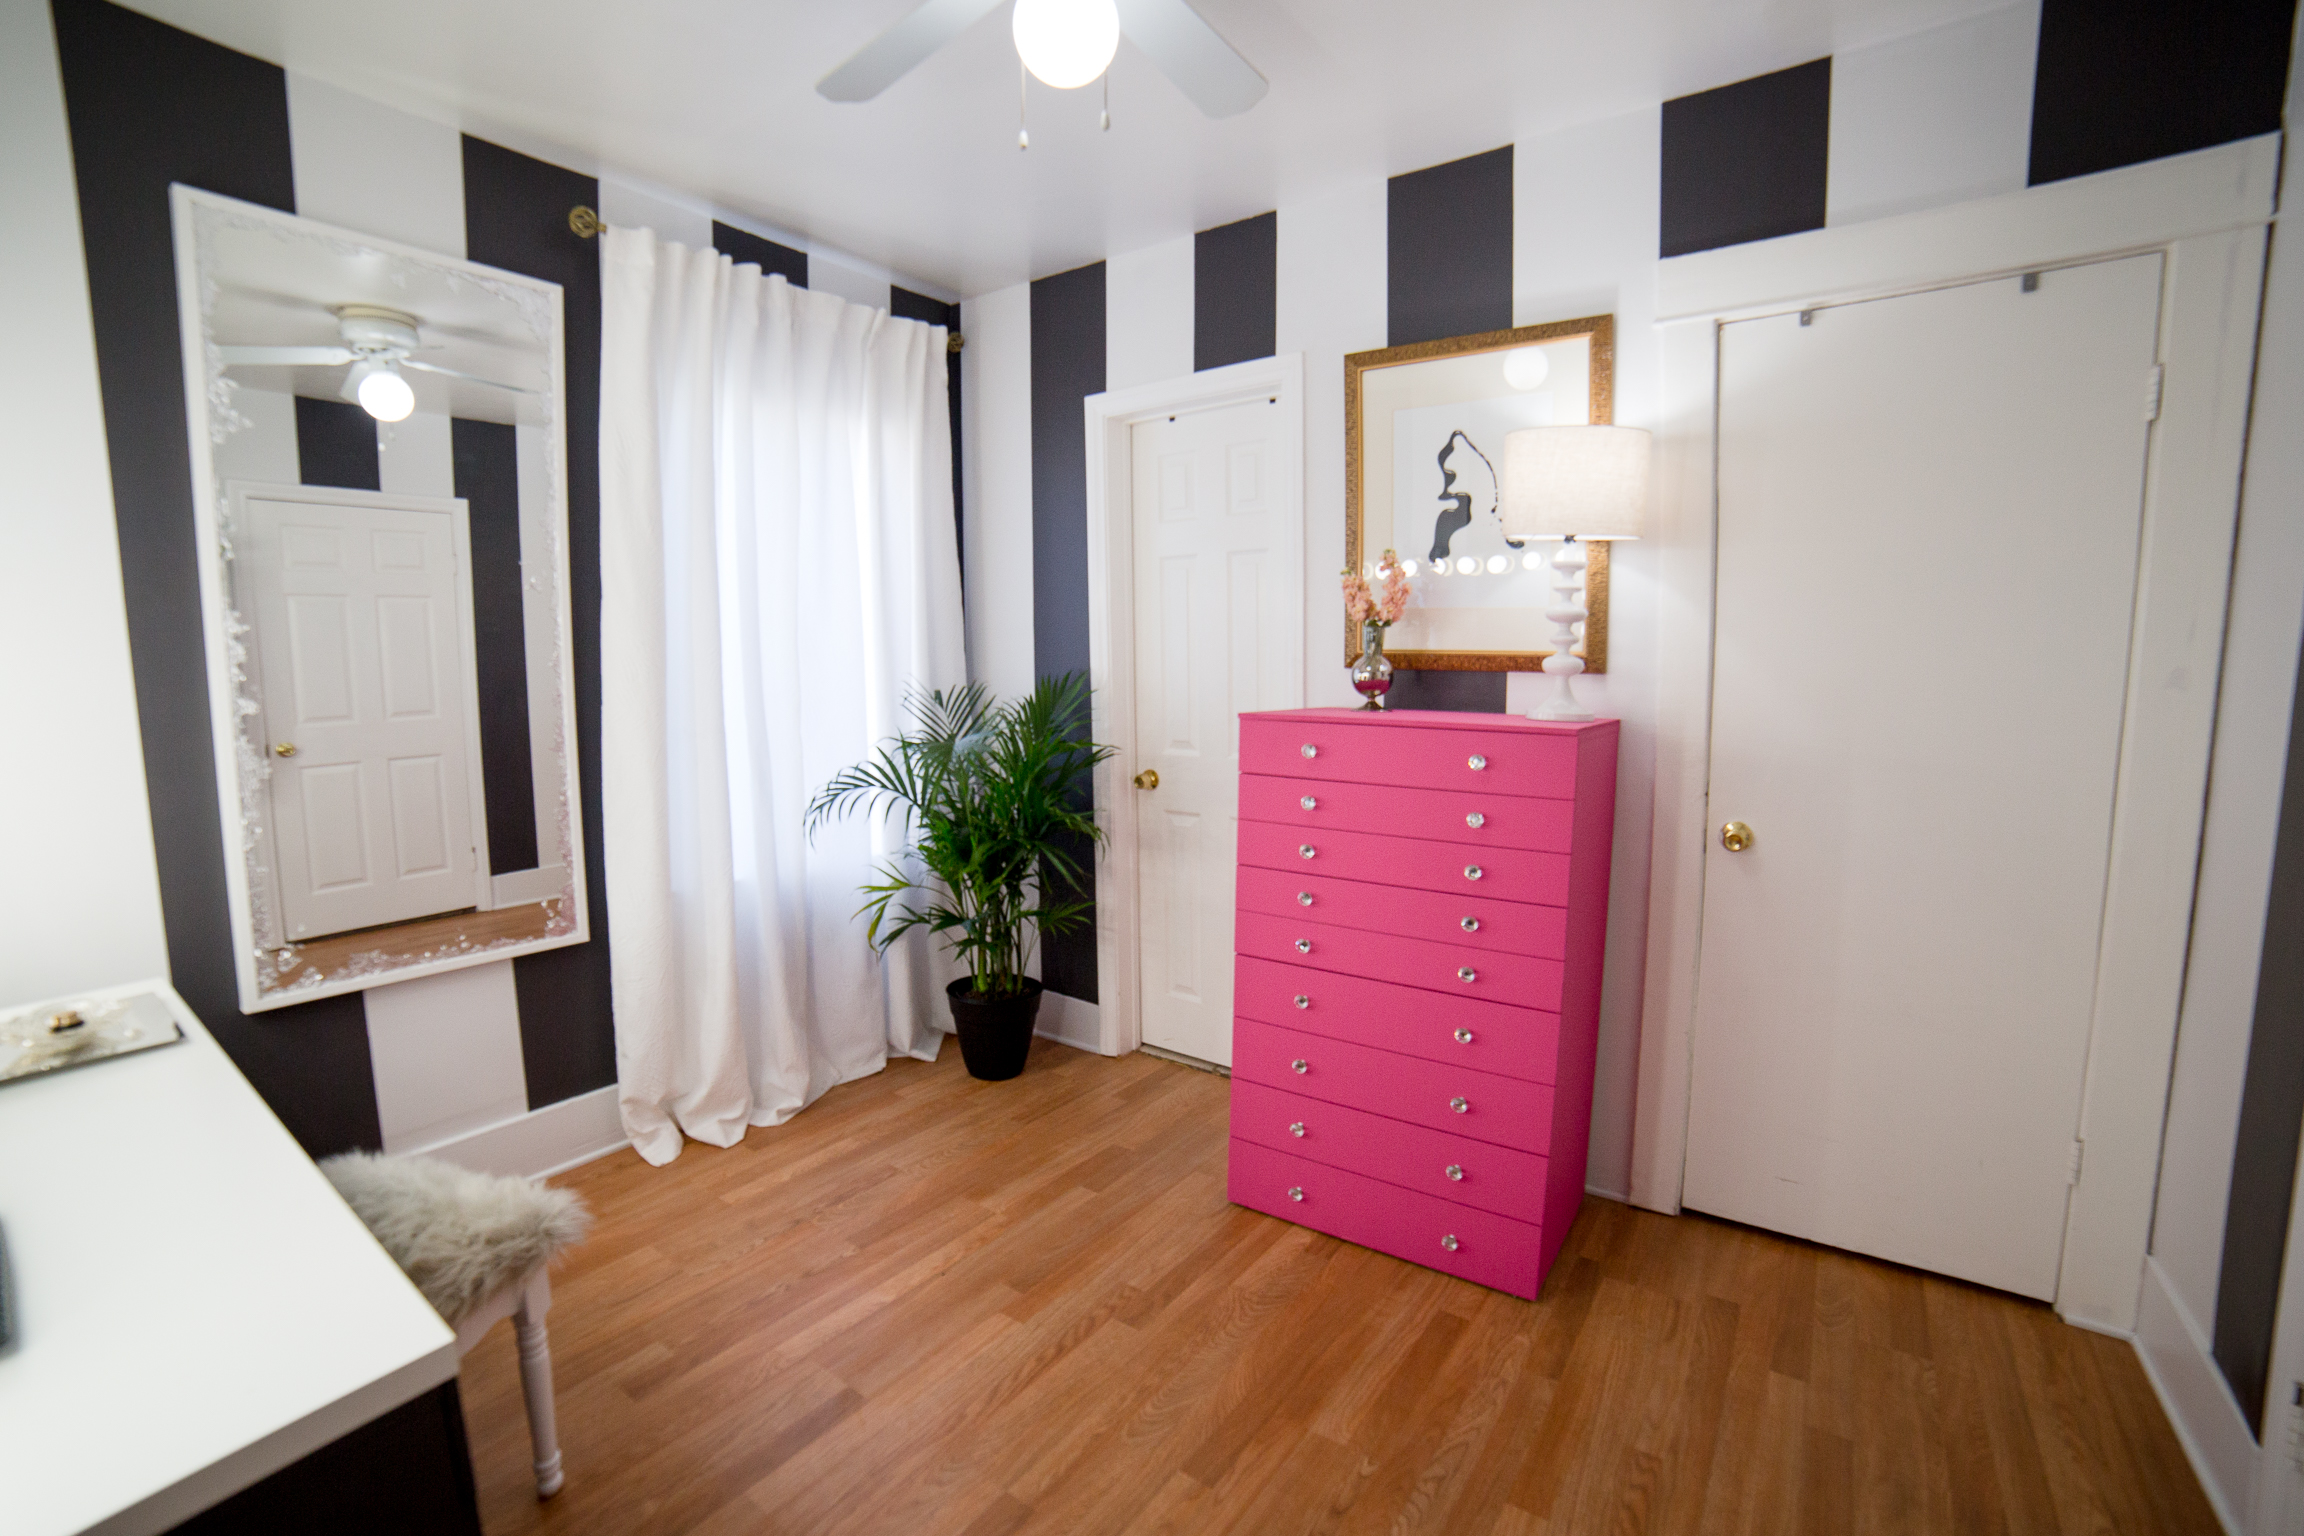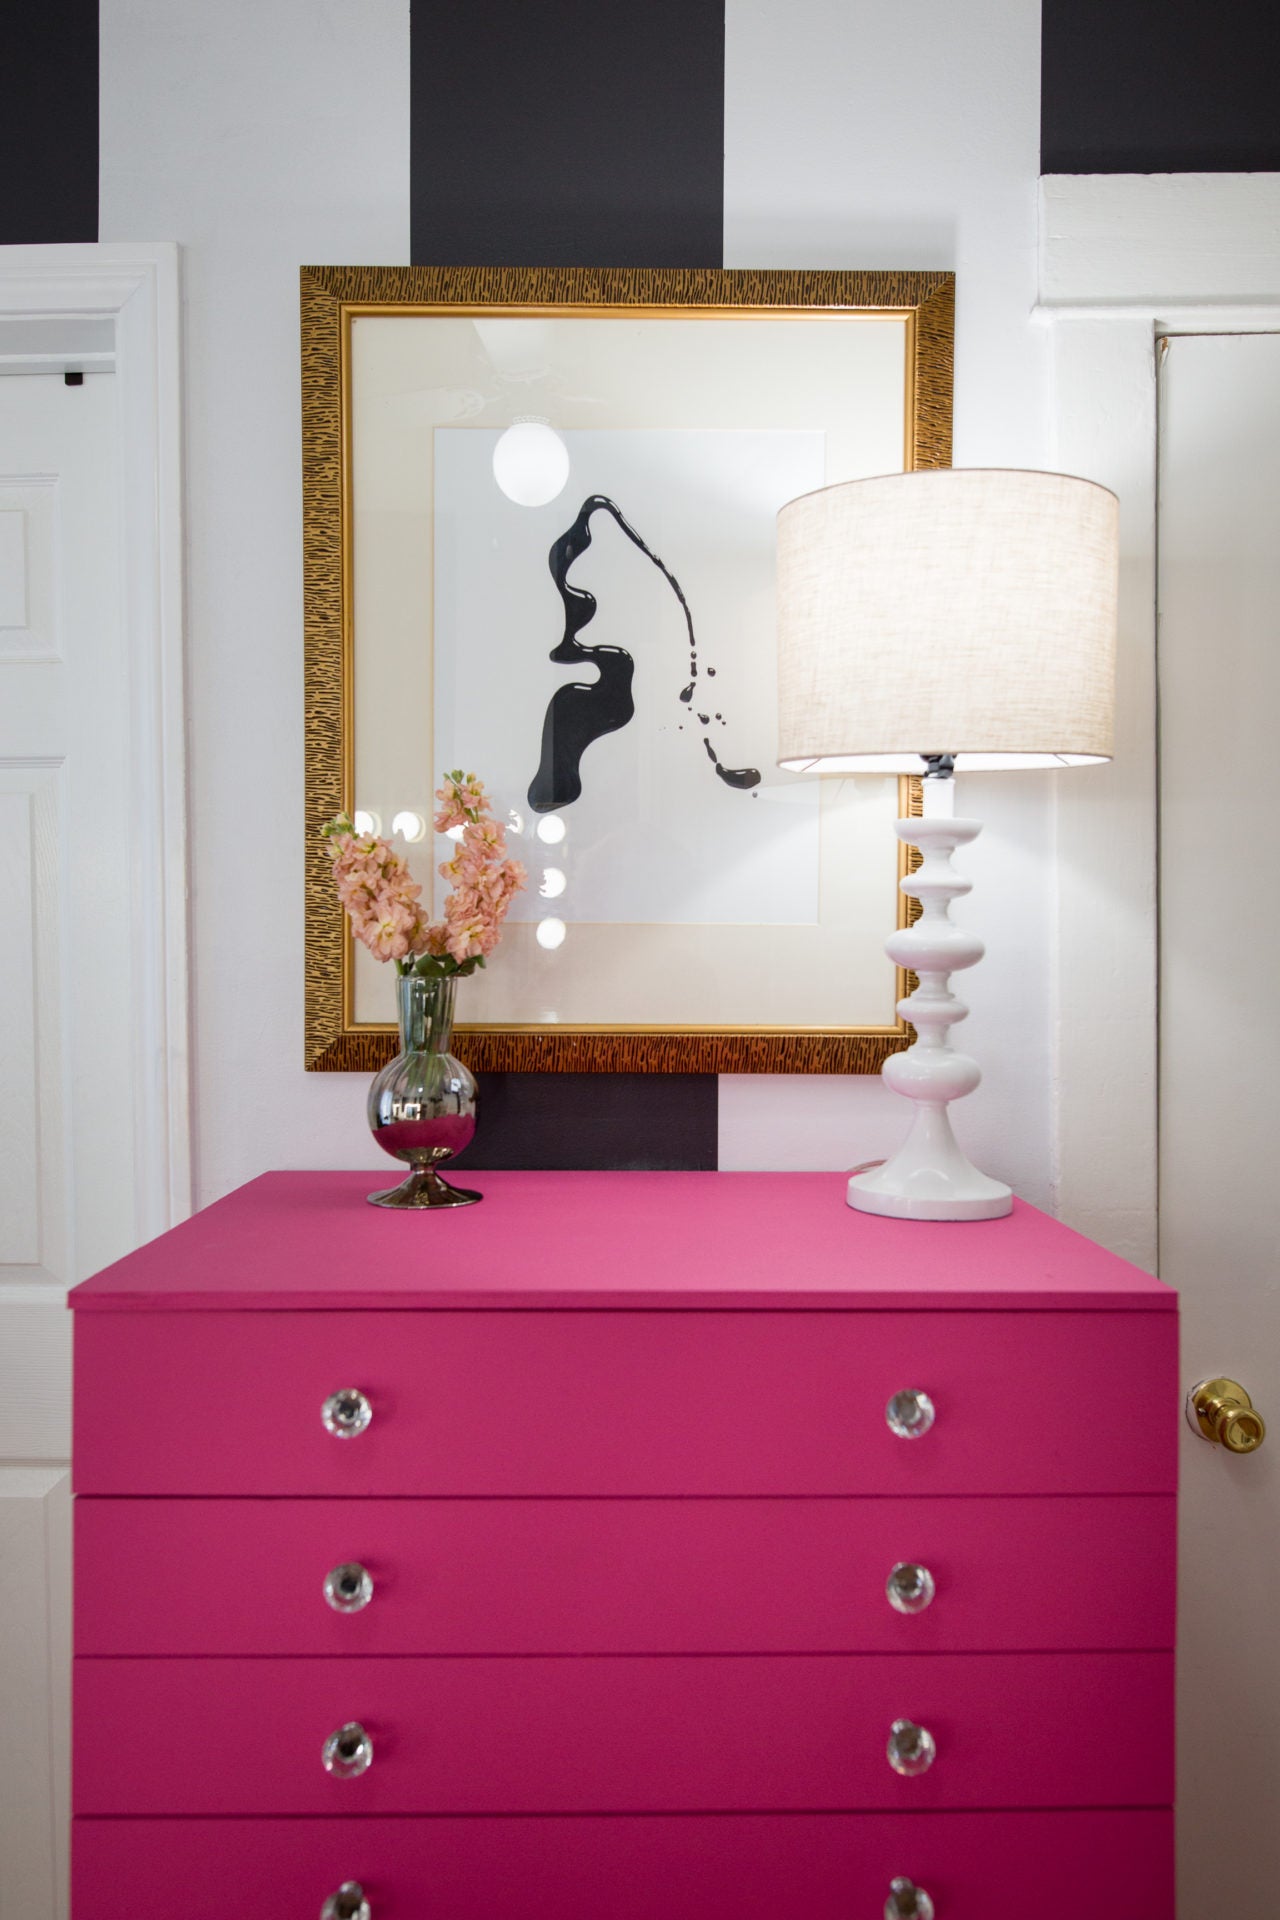
We made this many-drawer highboy or printer's cabinet by disguising two Alex 9 drawer units! Below we turned the generic Alex 5 drawer unit into a more glam design with custom drawer fronts!

The Alex drawer units have become ubiquitous amongst the beauty guru community - you will see them in almost every beauty room from here to the moon! So when we set out to do a Glam Room On A Budget, I knew we had to update the Alex drawers to something new and different with our very own Ikea Hack!
The Alex drawer units (both the 5 drawer unit and 9 drawer unit) are so popular because the slim drawers are perfect for storing all those small makeup items - basically you get more drawers for your money than if you bought just a regular dresser or file cabinet.
So far, we've upcycled Ikea pieces into desks, dressers, and even closets (!) and check out below how we turned Alex into Alexis by giving him a totally new, glam appearance!

Prep It:
IKEA Alex drawer units Paint color of choice - we used pink paint Paint Roller 1/2" plywood Saw 1" Course Thread Screws Power drill Crystal knobs Tools: Table saw, straight edge ruler, pencil, sandpaper


Do It!:
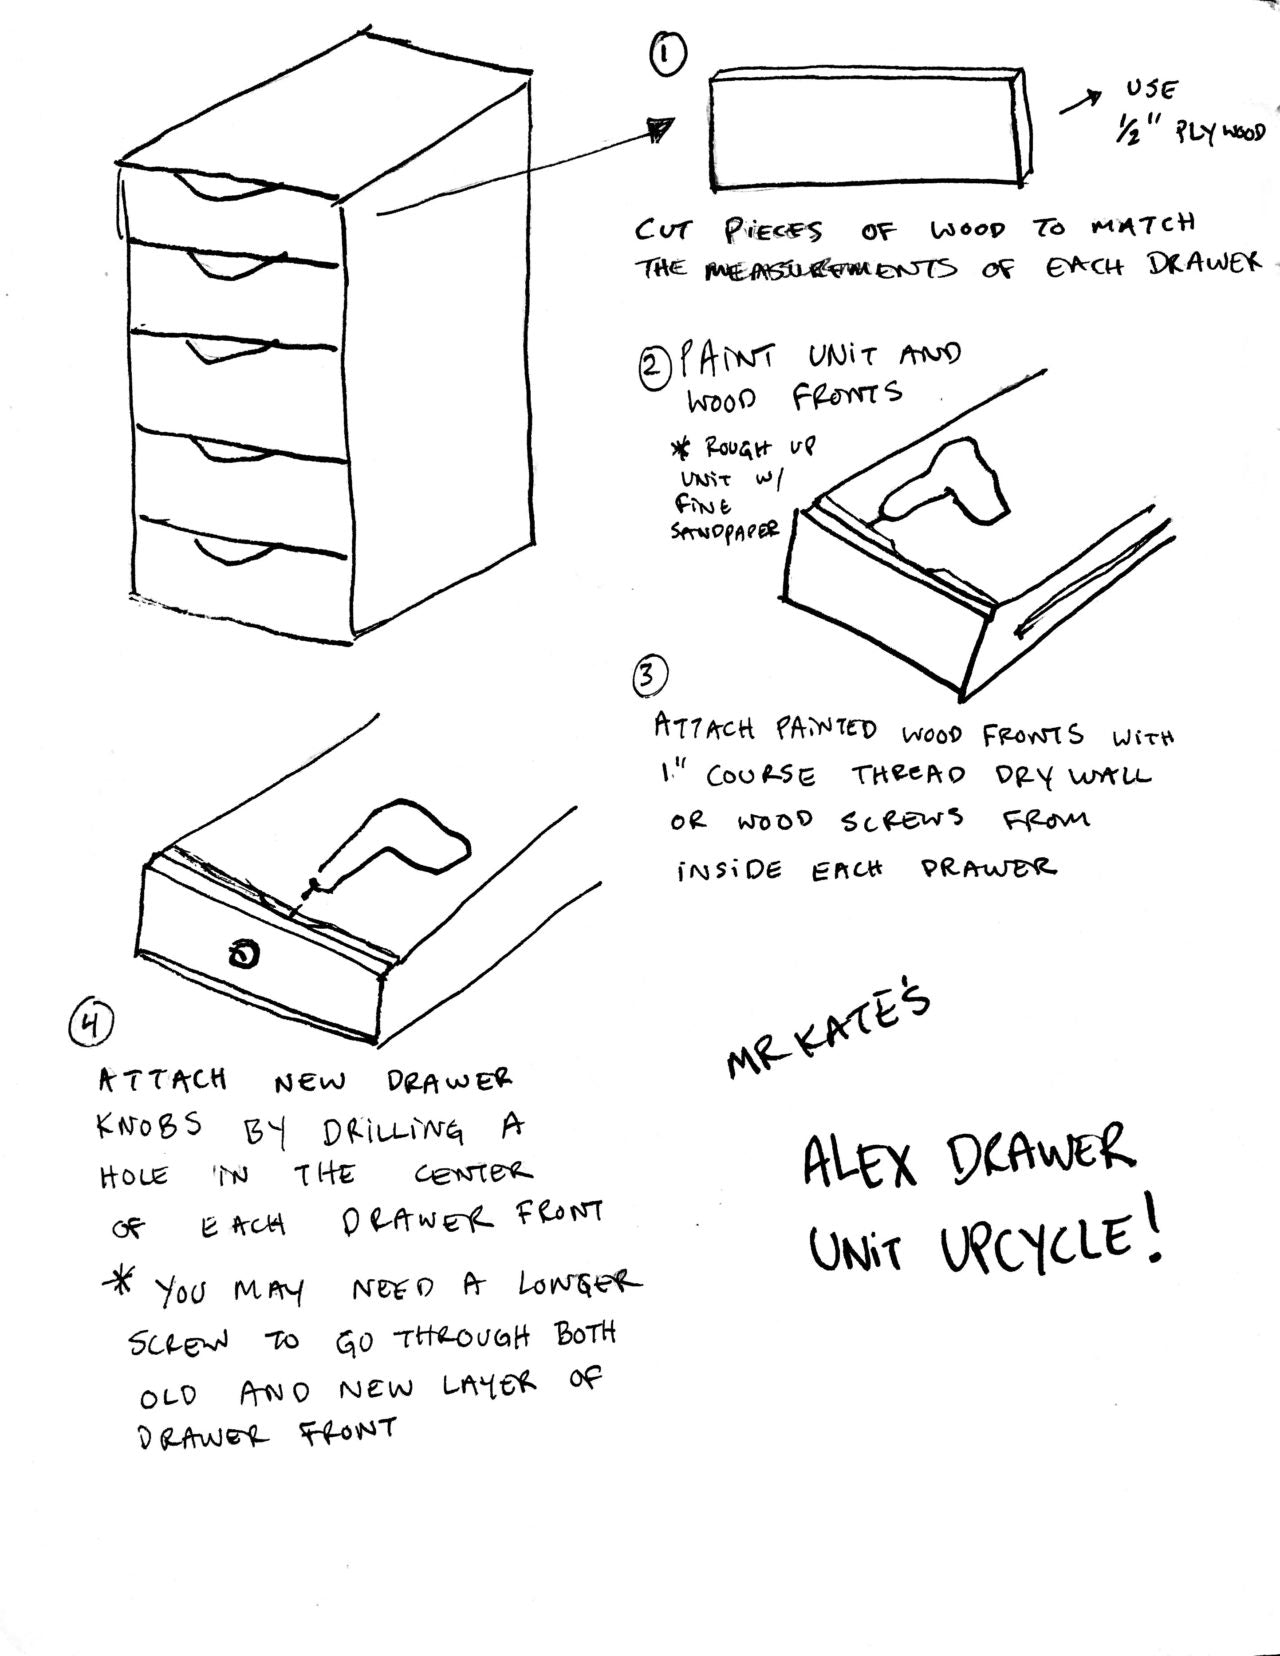
Alex 5 Unit Upcycle:- Cut 5 pieces of plywood to match the measurements of each drawer - you're cutting perfect rectangles so make sure you measure and use a straight edge and a sharp saw to make your cuts.
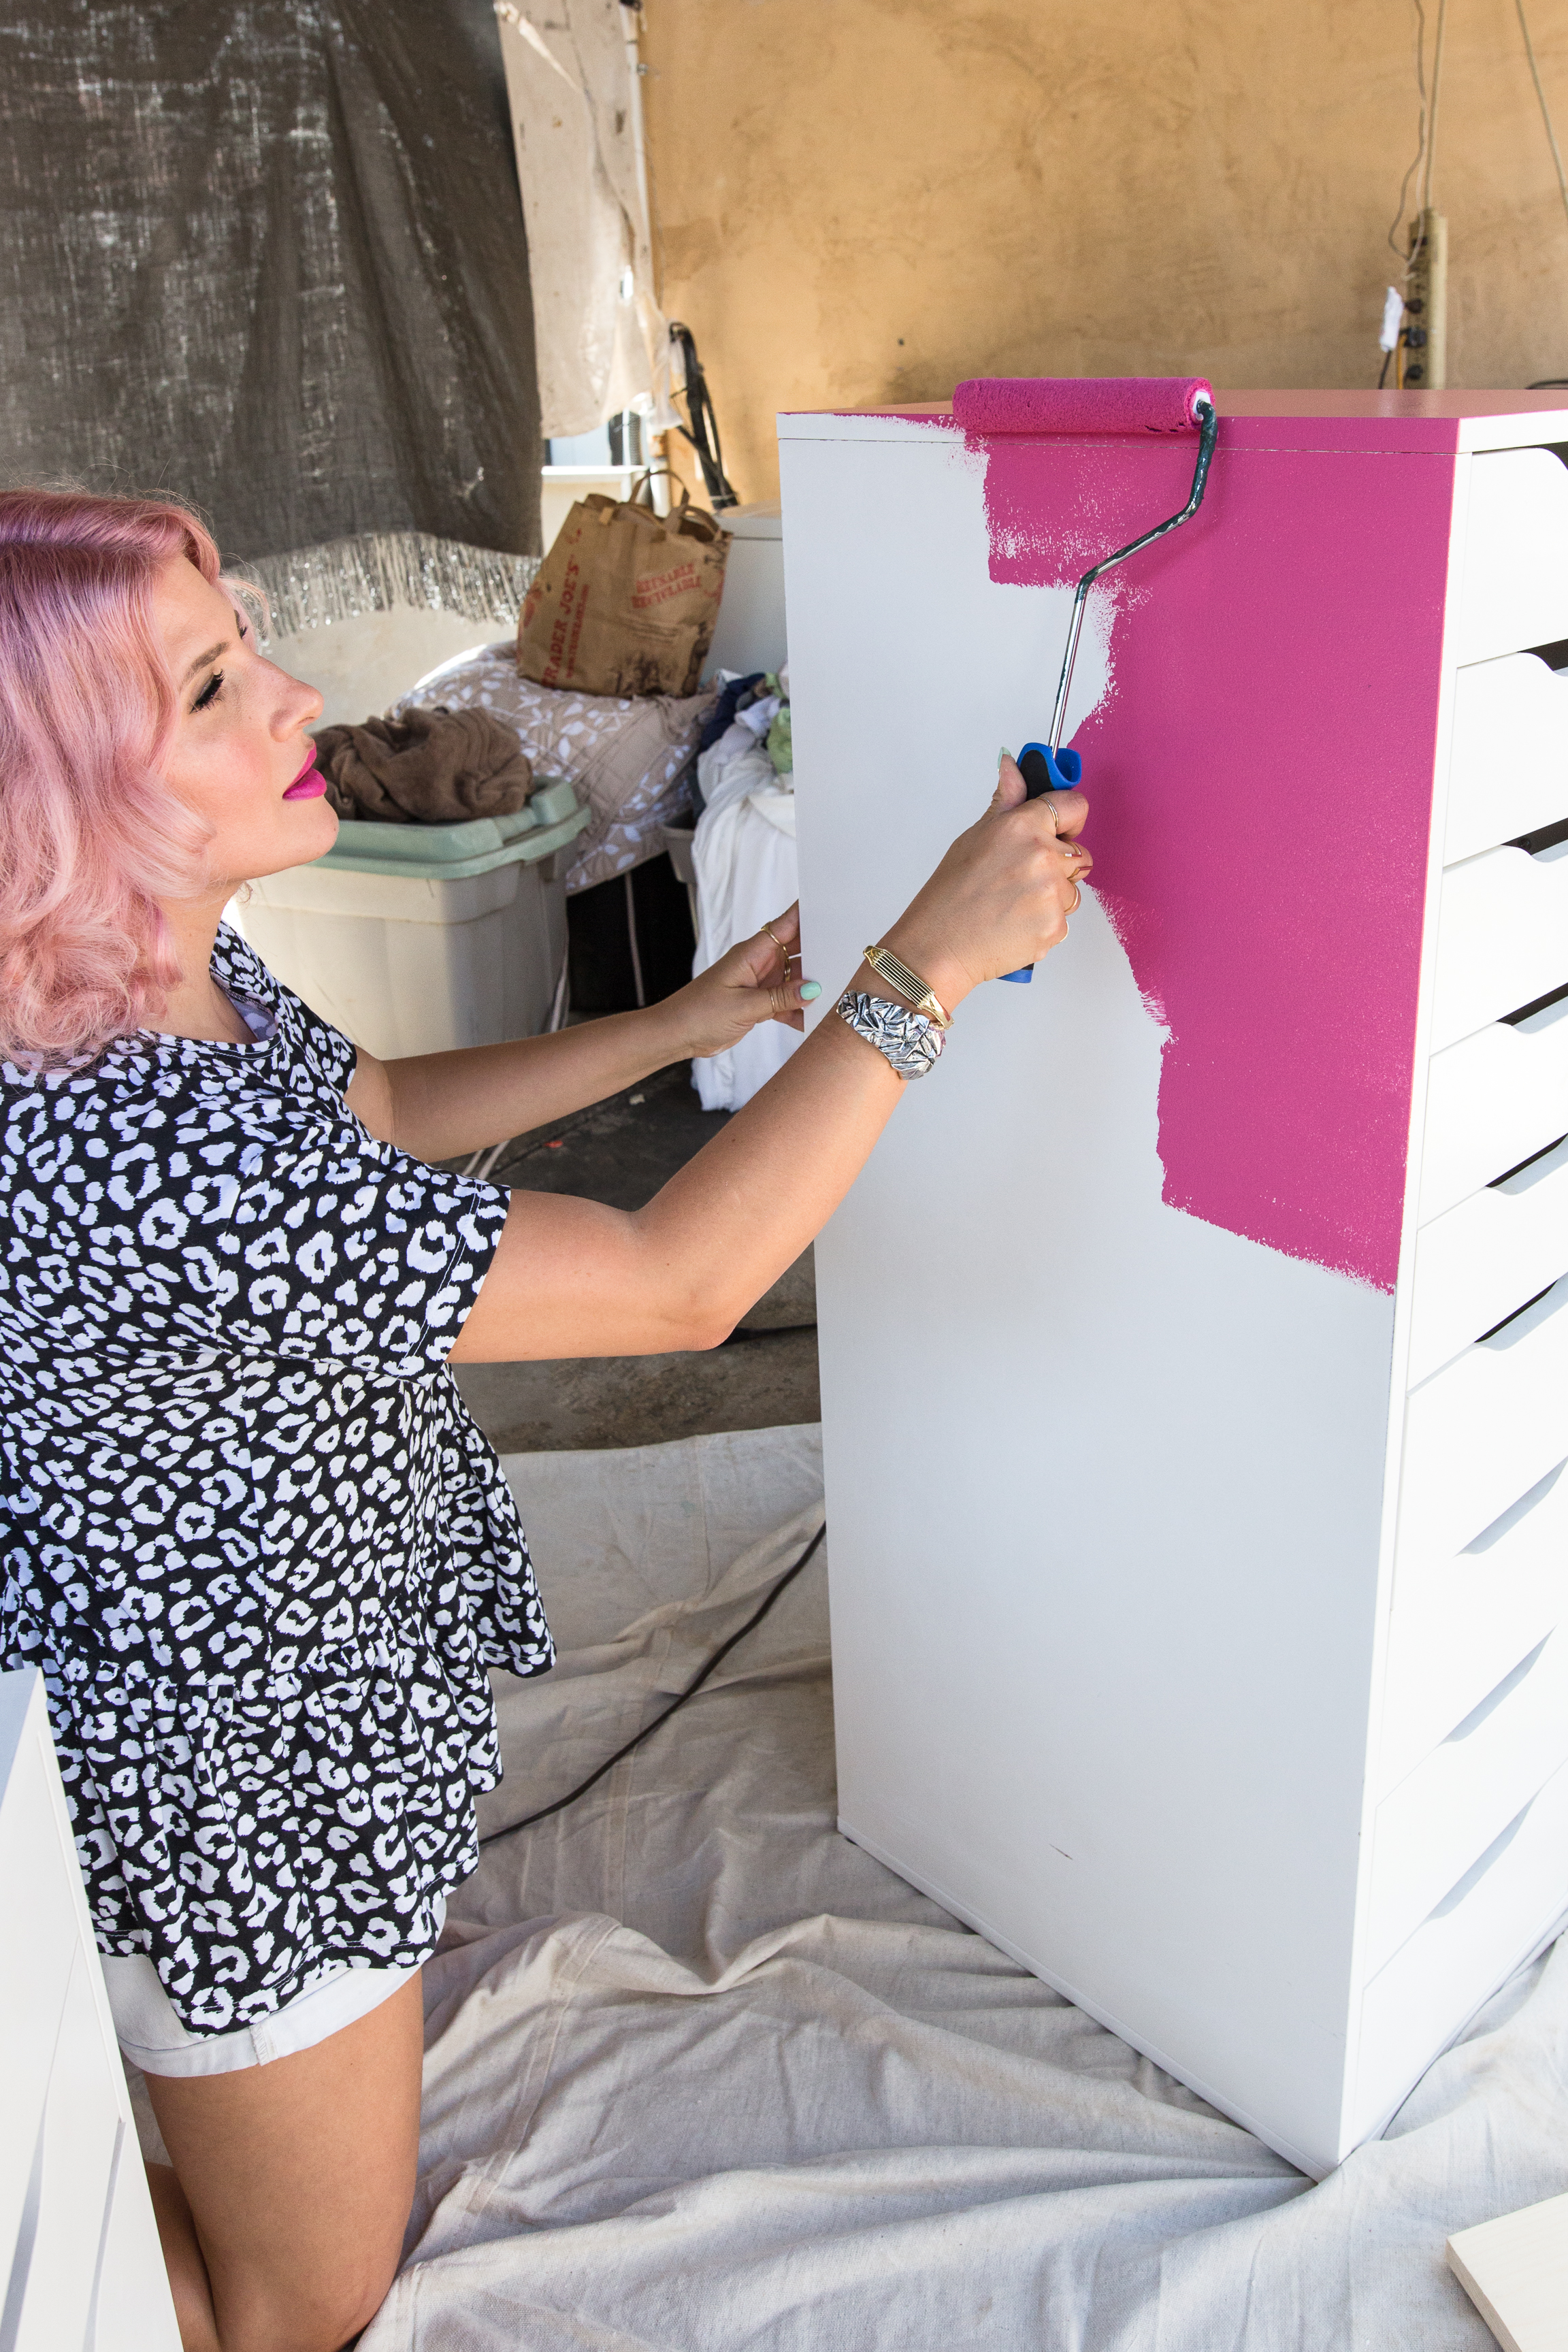
- Sand and paint the drawer fronts and the bodies of the Alex drawer units - it's a good idea to slightly rough up the bodies of the units with a fine-grit sandpaper so the paint sticks better.
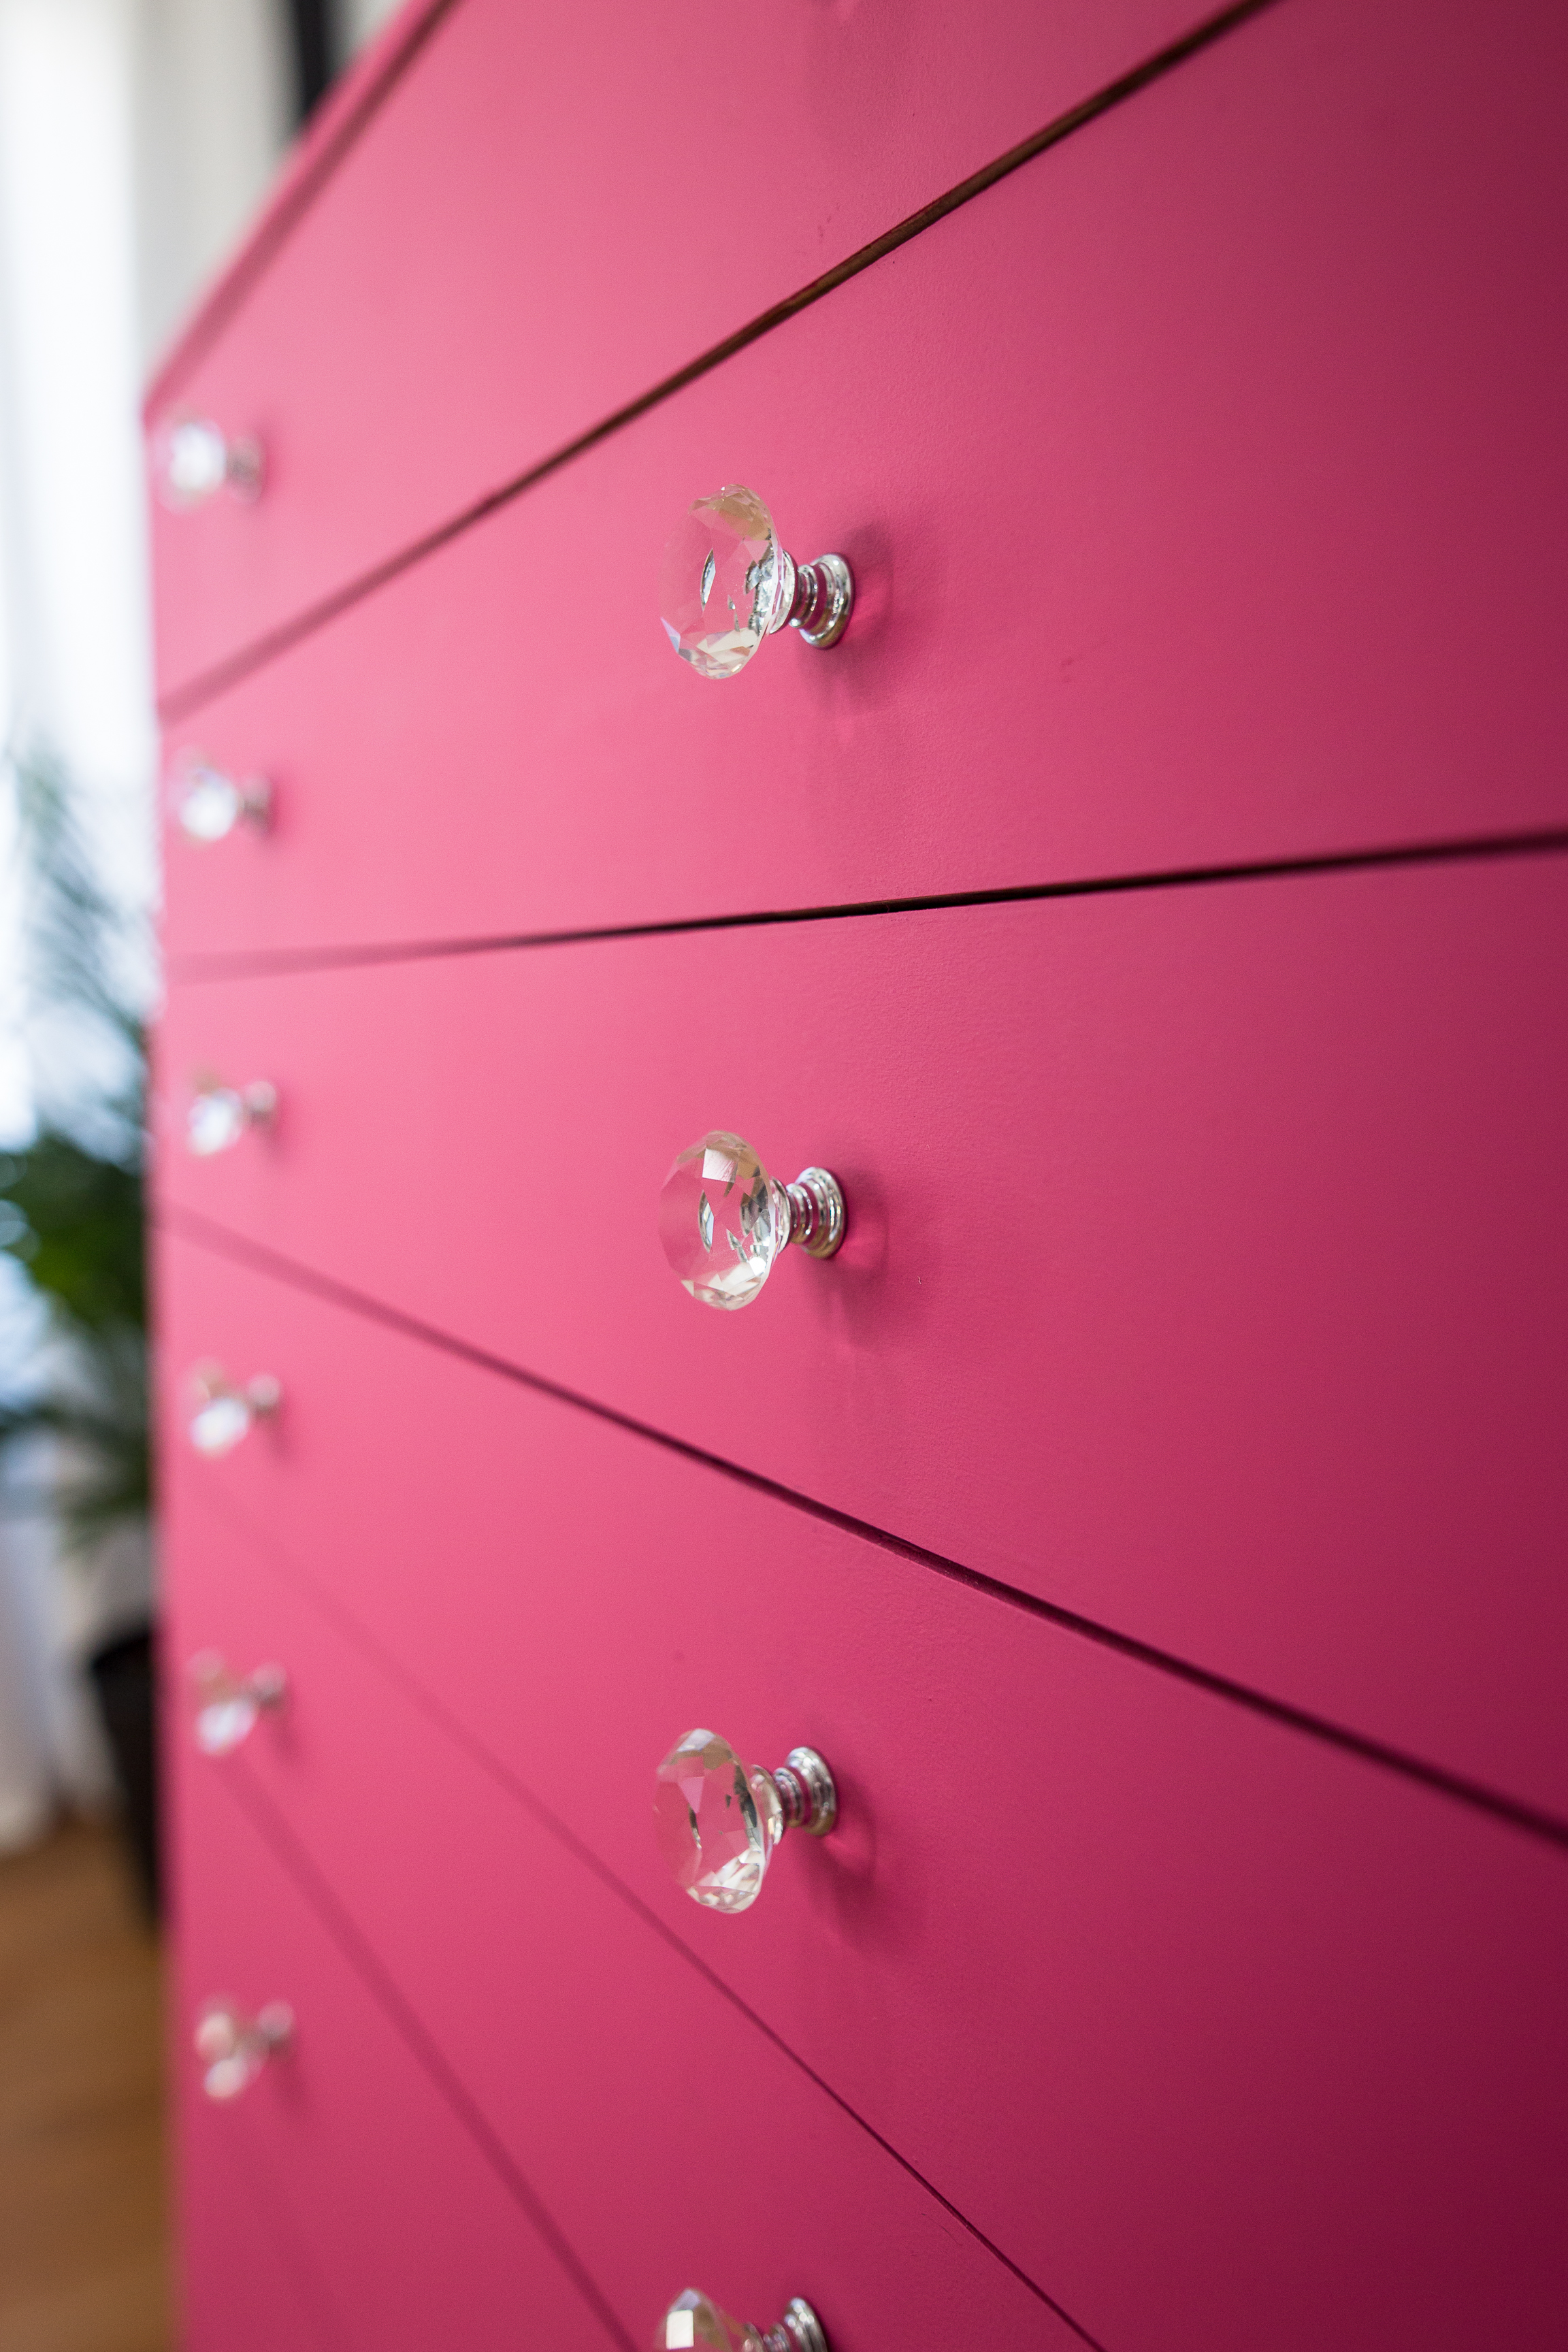
- Attach dried wood fronts with 1" course thread drywall or wood screws by drilling from the inside of each drawer. Use two screws on either end of each drawer.
- Attach new knobs to the center of each drawer by drilling a new hole (make sure you measure so it lines up well) and you may need a longer screw than the one that comes with your knobs to fit through the two layers of drawer fronts.
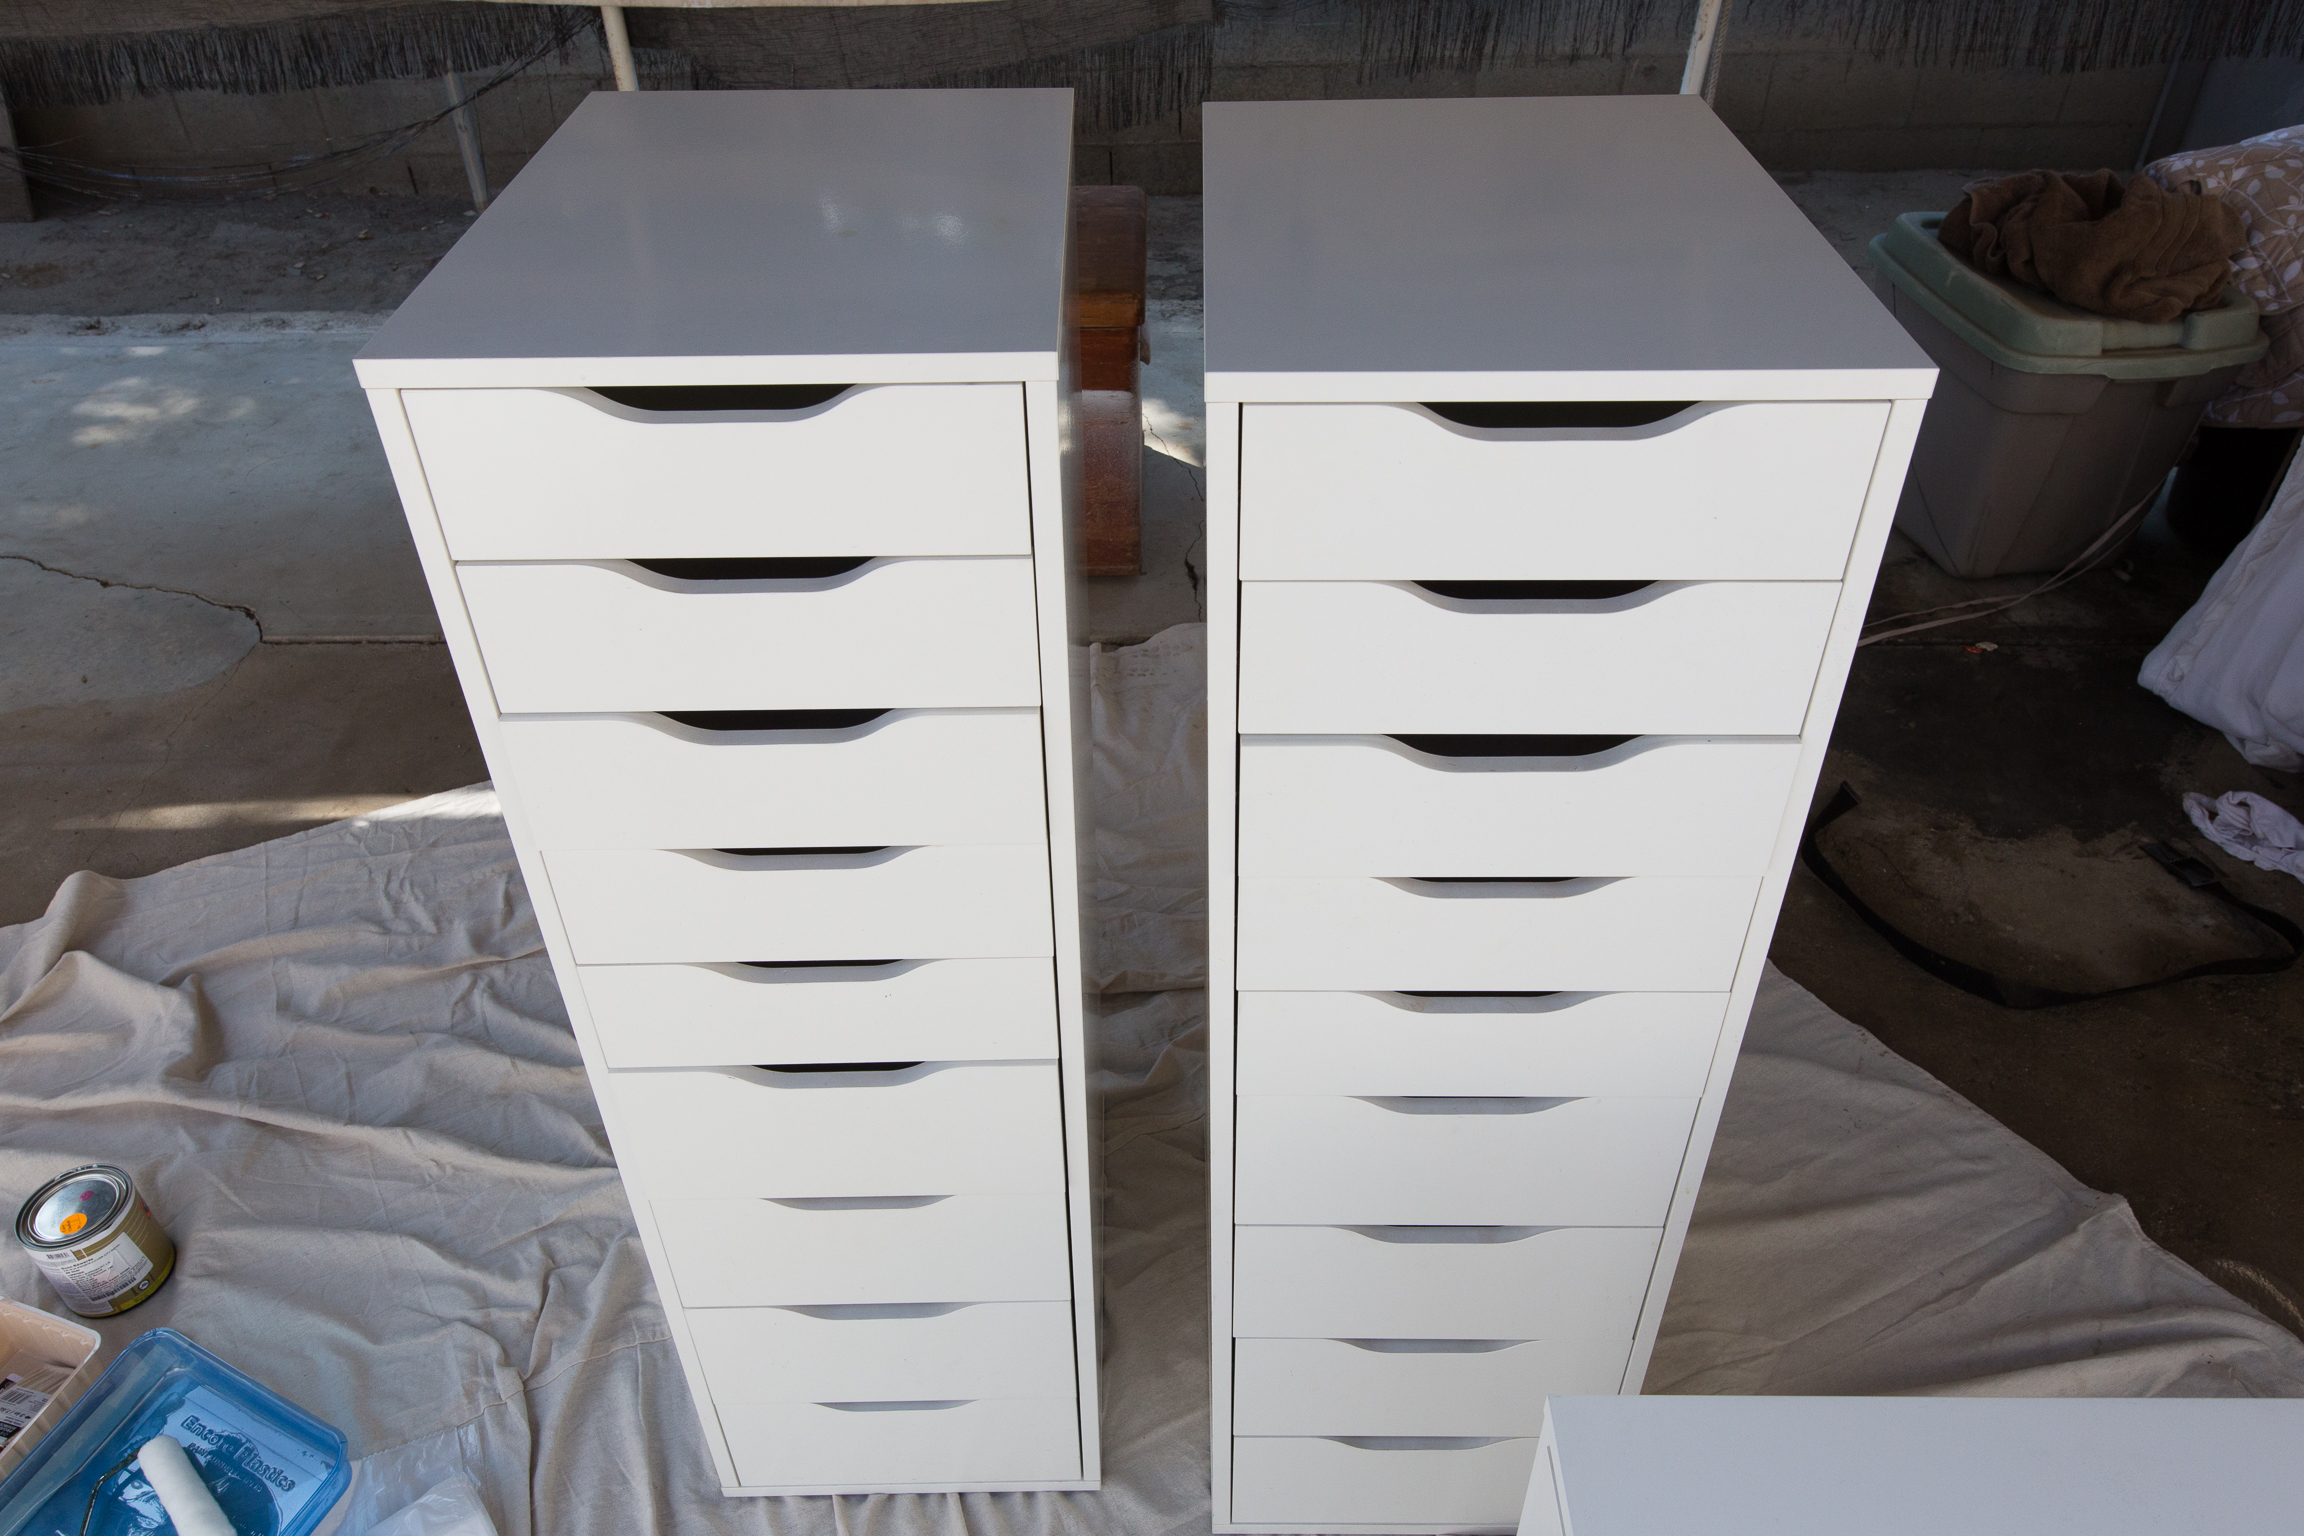
- For this project, we pushed two Alex 9 drawer units together, but you can do it with just one by following the steps for the above 5 drawer project!
- Remove the drawers and screw the two side be side units together so they're securely attached.
- Cut 1 piece of 1/2" plywood to conceal the top seam - sand and paint
- Cut 9 pieces of 1/2" plywood the height of each drawer and the width of both drawers side by side - Remember to measure carefully and use a straight edge and sharp saw to get perfect cuts.
- Sand and paint your drawer fronts
- Rough up sides of unit using a fine grit sandpaper and paint the sides to match.
- Paint the units and the wood pieces, then let dry before proceeding to the next steps.
- Attach the long drawer fronts to each side by side drawer with 1" course thread drywall or wood screws. Use two screws per drawer on either side, screwing from the inside of the drawer so the screws are invisible from the front because the screw will only reach about halfway into the wood piece.
- Drill into the fronts at the center of where each of the old drawers were and attach your new knobs! *You may need a longer screw than the one that comes with your knobs to fit through the two layers of drawer fronts.