
Window, window, on the wall, what's the coolest DIY of them all?
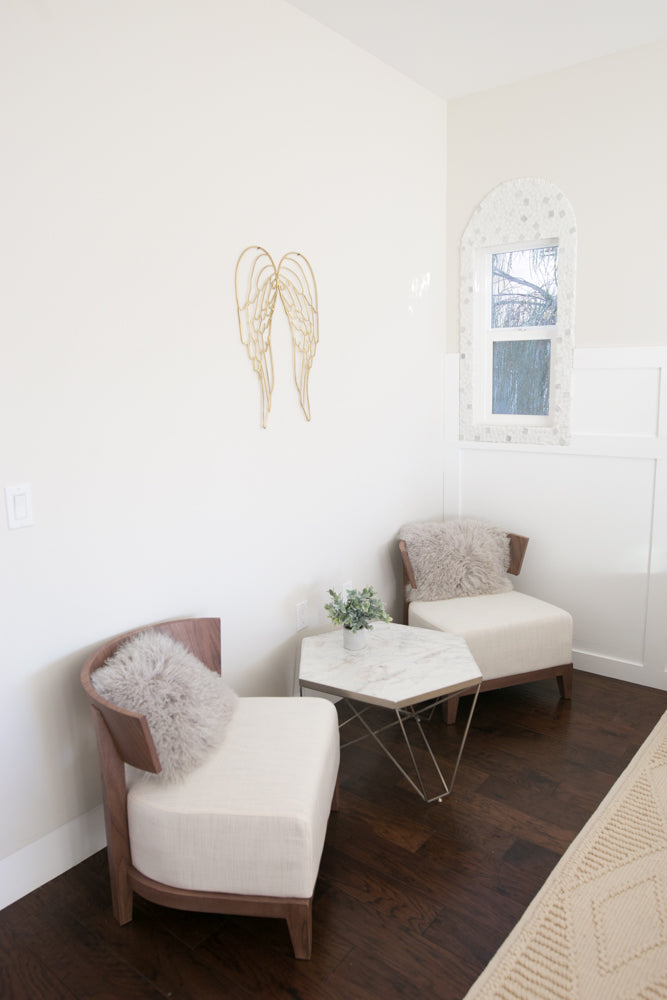
This mosaic arch window frame, obviously! Some things, like windows, you just don't get to choose when you move into a new home. Unless you're building the residence from scratch, you pretty much need to work with what you're given, even if what you're given is sometimes tiny windows in corners with no real purpose and difficult design.
Instead of trying to cover up this little window in Meghan Rienks' newly updated bedroom/ palace, I decided to draw attention to it by making it a fun, exciting element in the design. What's better than mosaics and arched window frames?
Prep It:
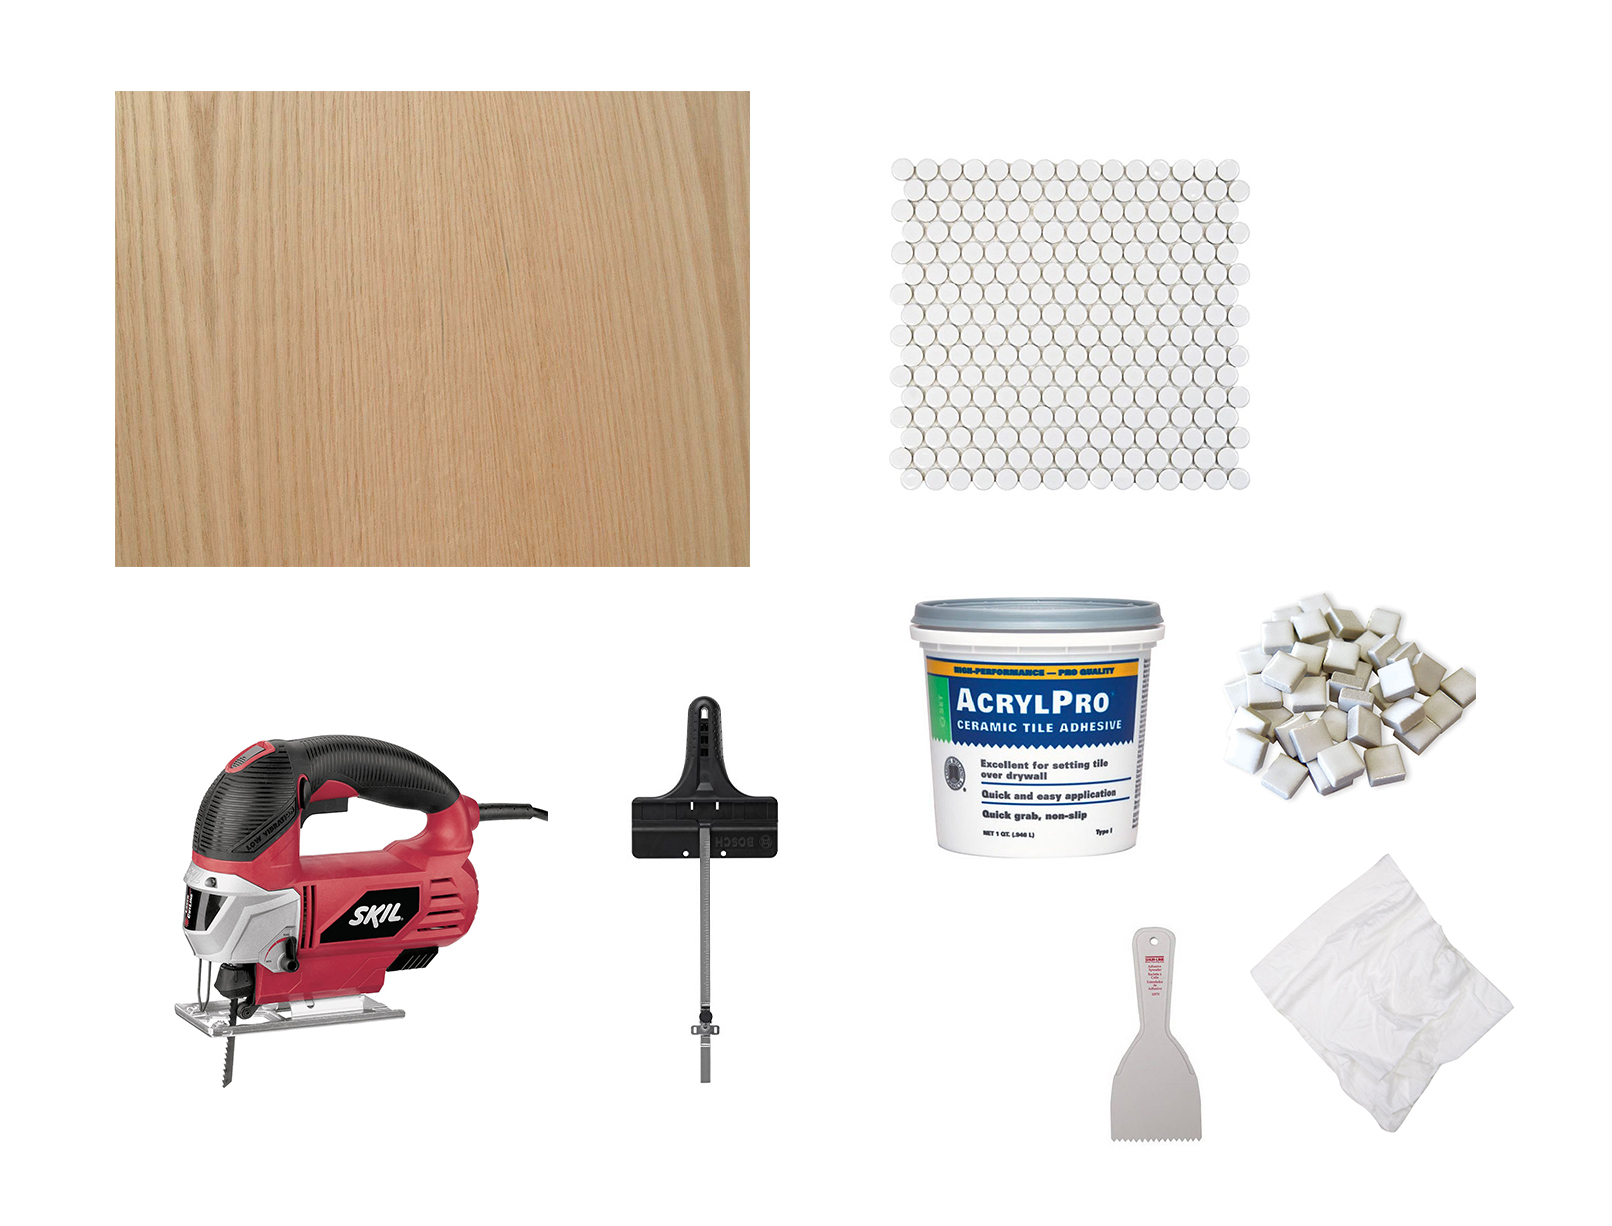
Thin wood board Jigsaw Circle guide for the jigsaw Round mosaic tiles Square mosaic tiles Tile adhesive Grout Tile adhesive spreader Sponge
Do It!:
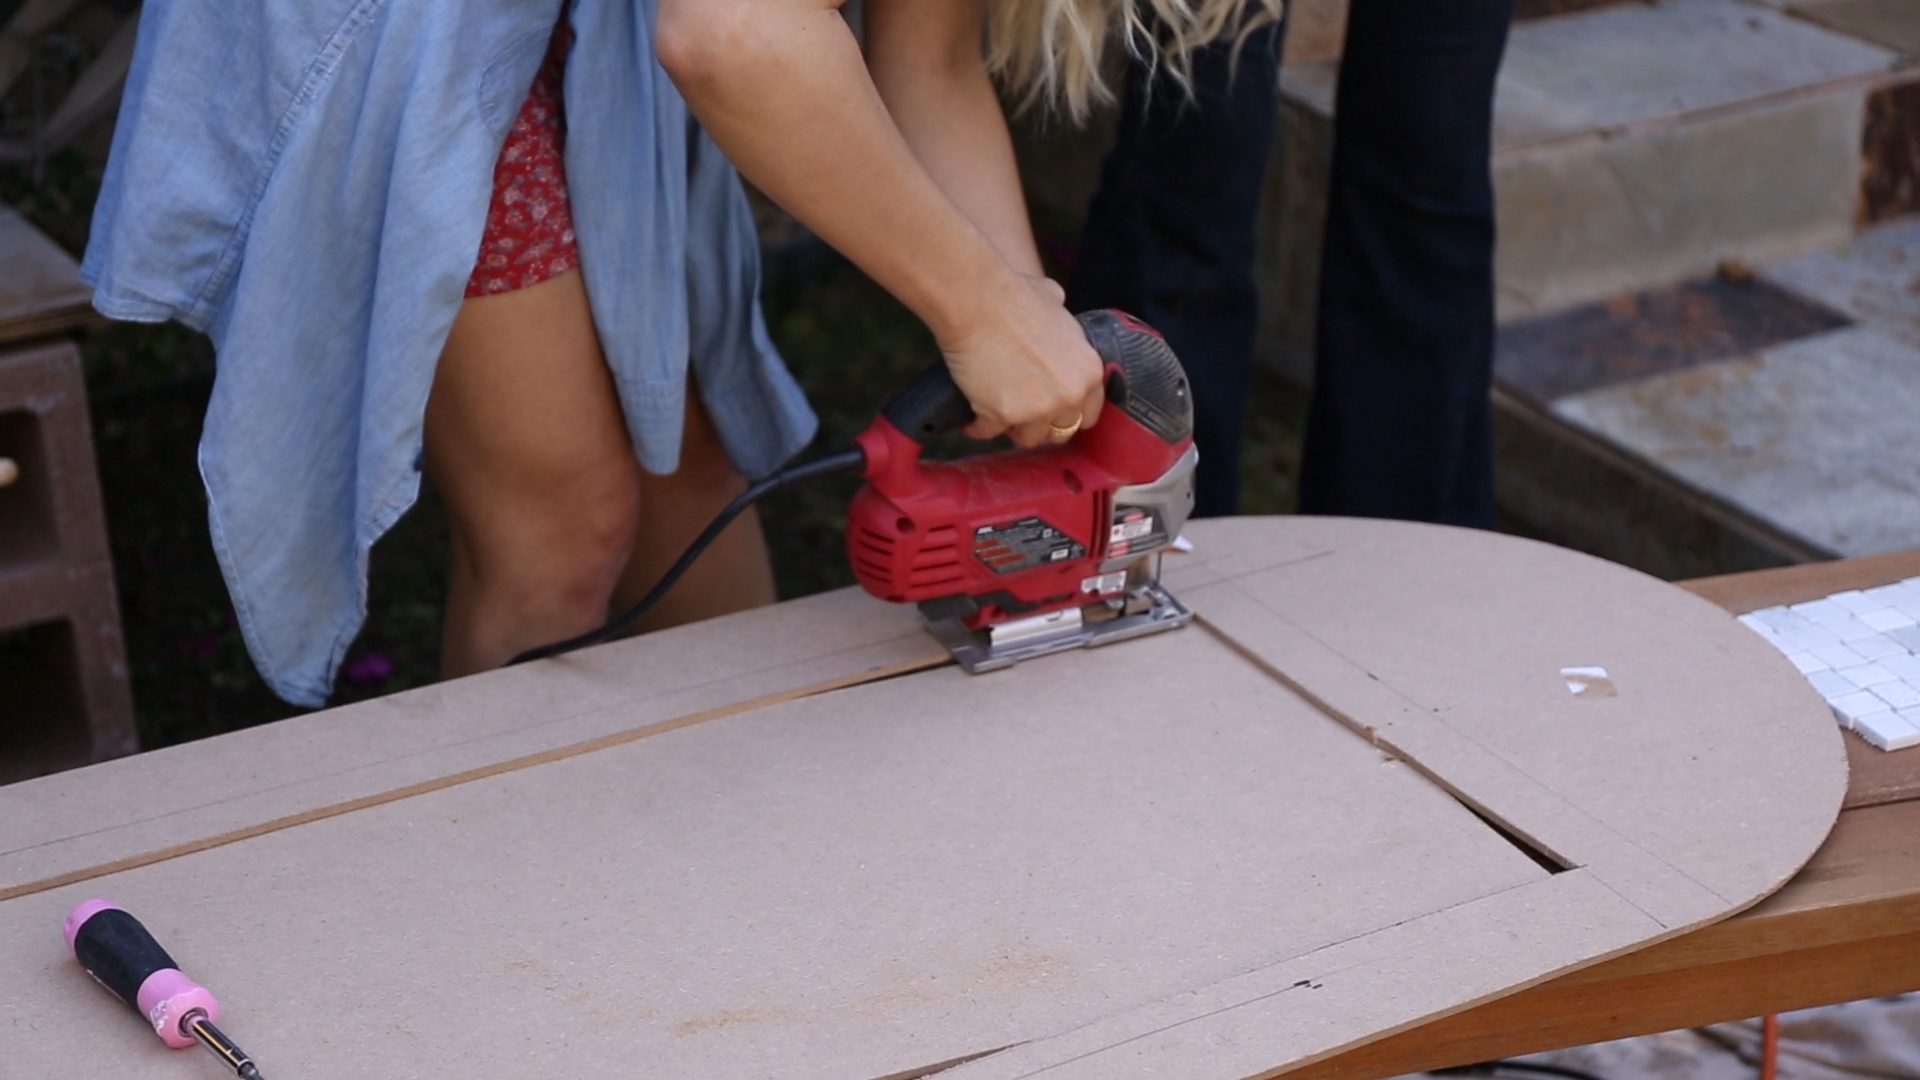
- Measure the size of your window, then draw those measurements onto the center bottom of the board, leaving the same amount of inches on each side and the bottom, and a lot of height on the top for the arch.
- Attach your jigsaw to a circle guide, set the radius of the circle guide to the appropriate size for your board (it should be the distance from the center top of the "window" to the side. Use the guide and cut the top of your board into a half circle. You've made your arch!
- Now use the jigsaw to cut out the window shape from the center of the board.
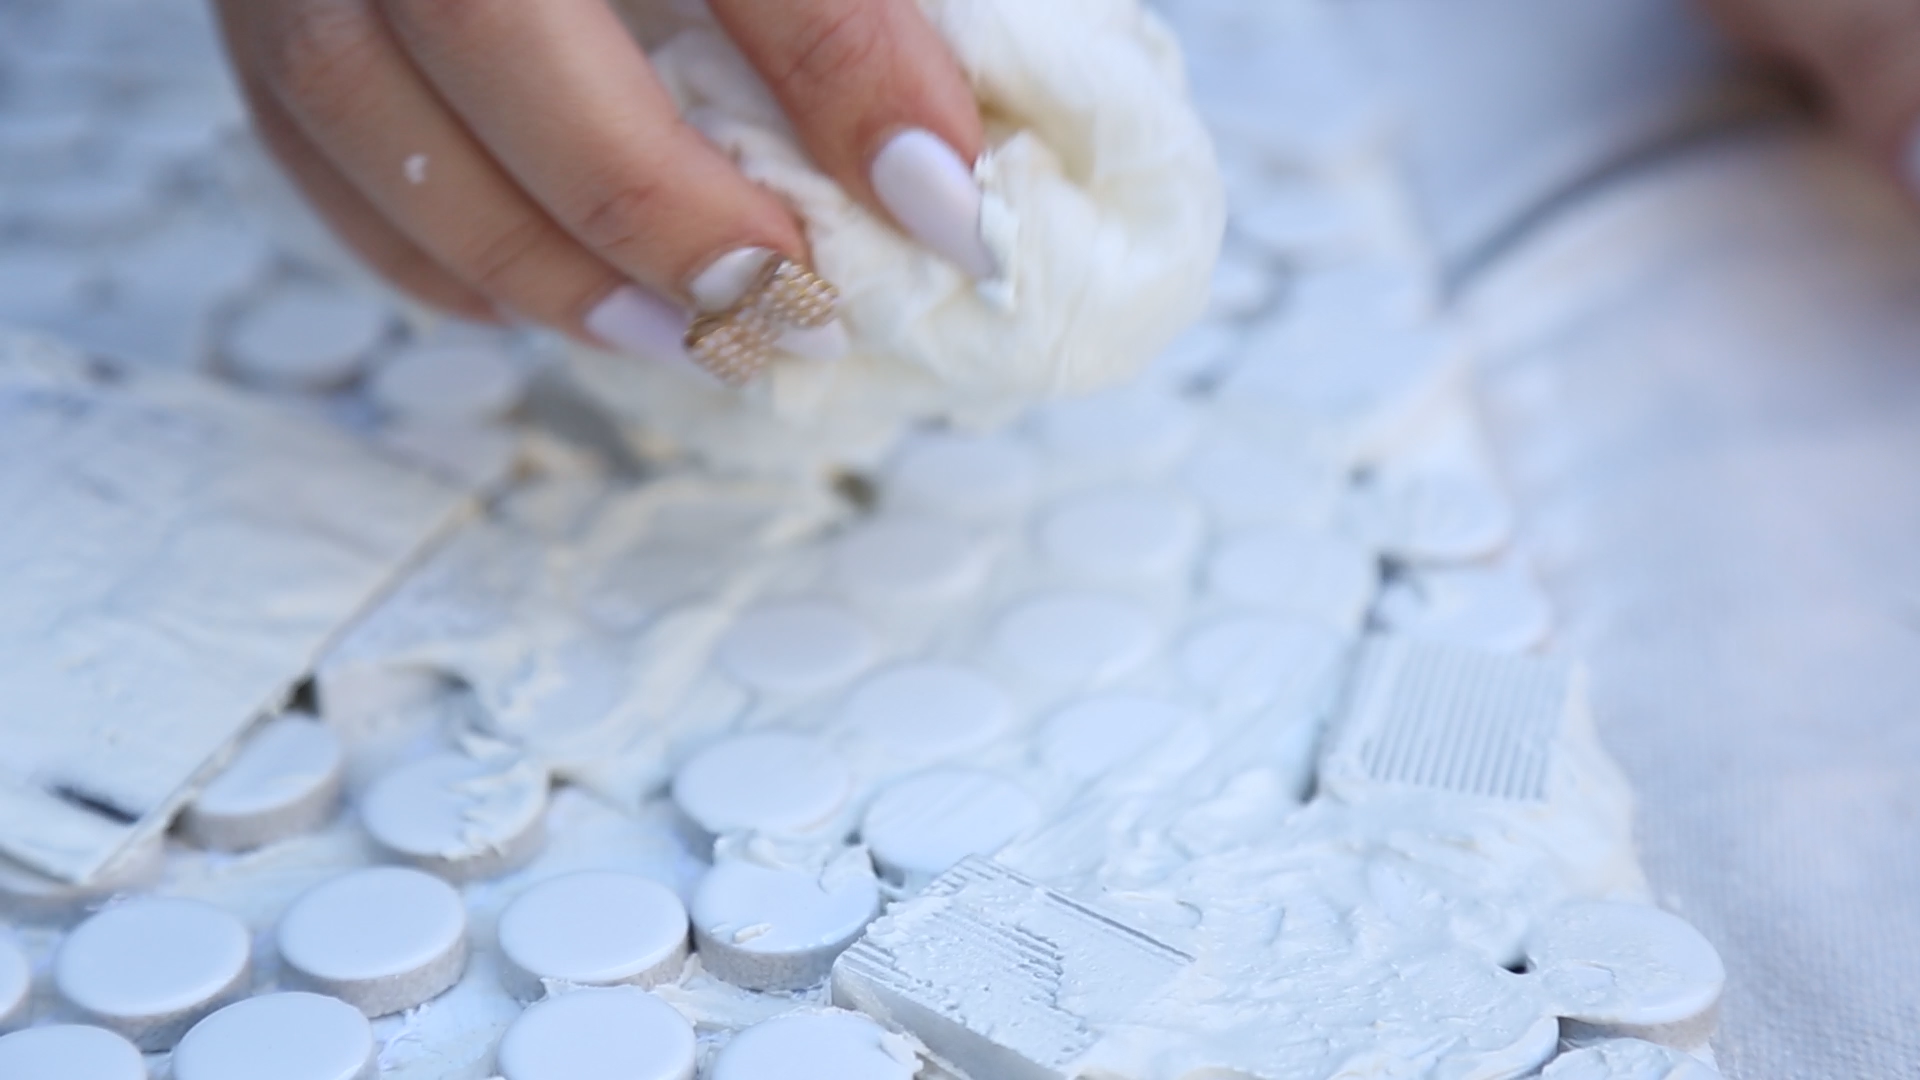
- It's time to tile! Working in sections, spread the tile adhesive across the board and start adding your tiles!
- When you've tiled the entire window frame, add another layer of grout over all the tiles. This step is optional based on your tastes, but it helps the frame look more like a real mosaic.
- Let the grout dry for the amount of time indicated on the packaging (usually about 20 minutes), and wipe the excess off the top of the tiles with a wet rag. The adhesive might need to dry longer, so make sure you take that into consideration, as well!
- When it's time to install your window frame, simply nail it into place (making sure to nail in an only adhesive, no tile space) on the wall, and cover the nail holes with a little extra adhesive!


