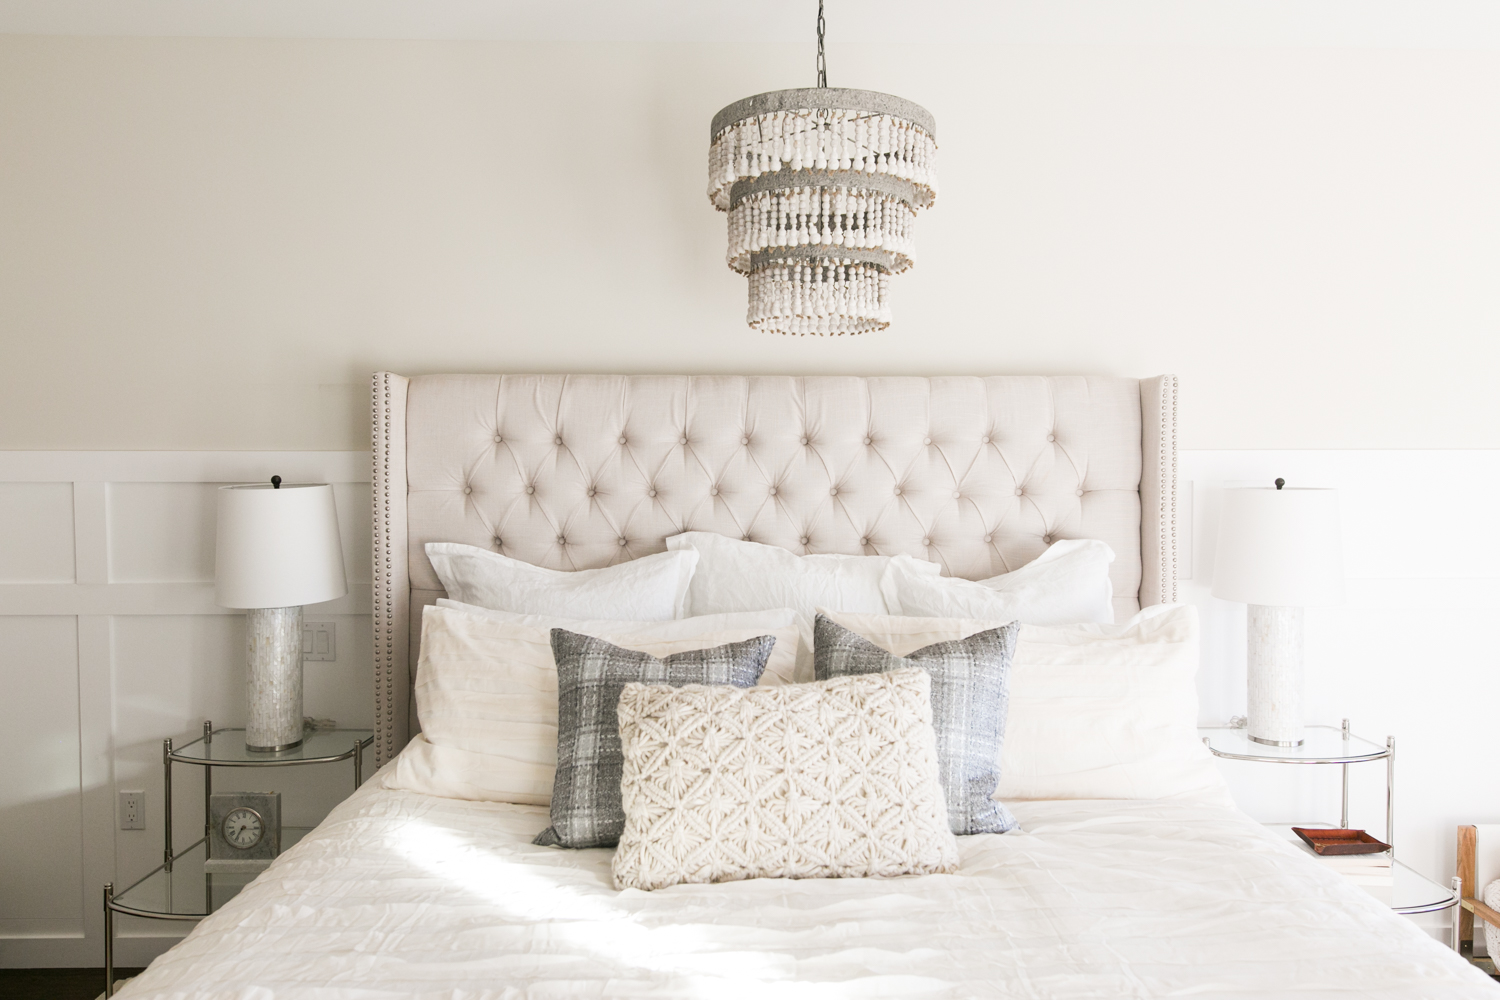
Just to bring a little vocab lesson to this DIY post, let me impress on you the importance of the letter "u" in the term moulding. Without "u," you'd (hehe) say something like "wow my wall has some really cool molding." Except that means decay and grossness and you need to call a specialist. But, if you say "wow my wall has some really cool moulding," you probably mean this awesome DIY wainscoting we did for Meghan Rienks' bedroom!
With just a few wood panels and some paint, we were able to give Meghan's wall a totally new, installed appearance. What's awesome about this project is that it is totally removable, making it perfect for rentals, which most people wouldn't usually think to install major projects like this in. So cool!
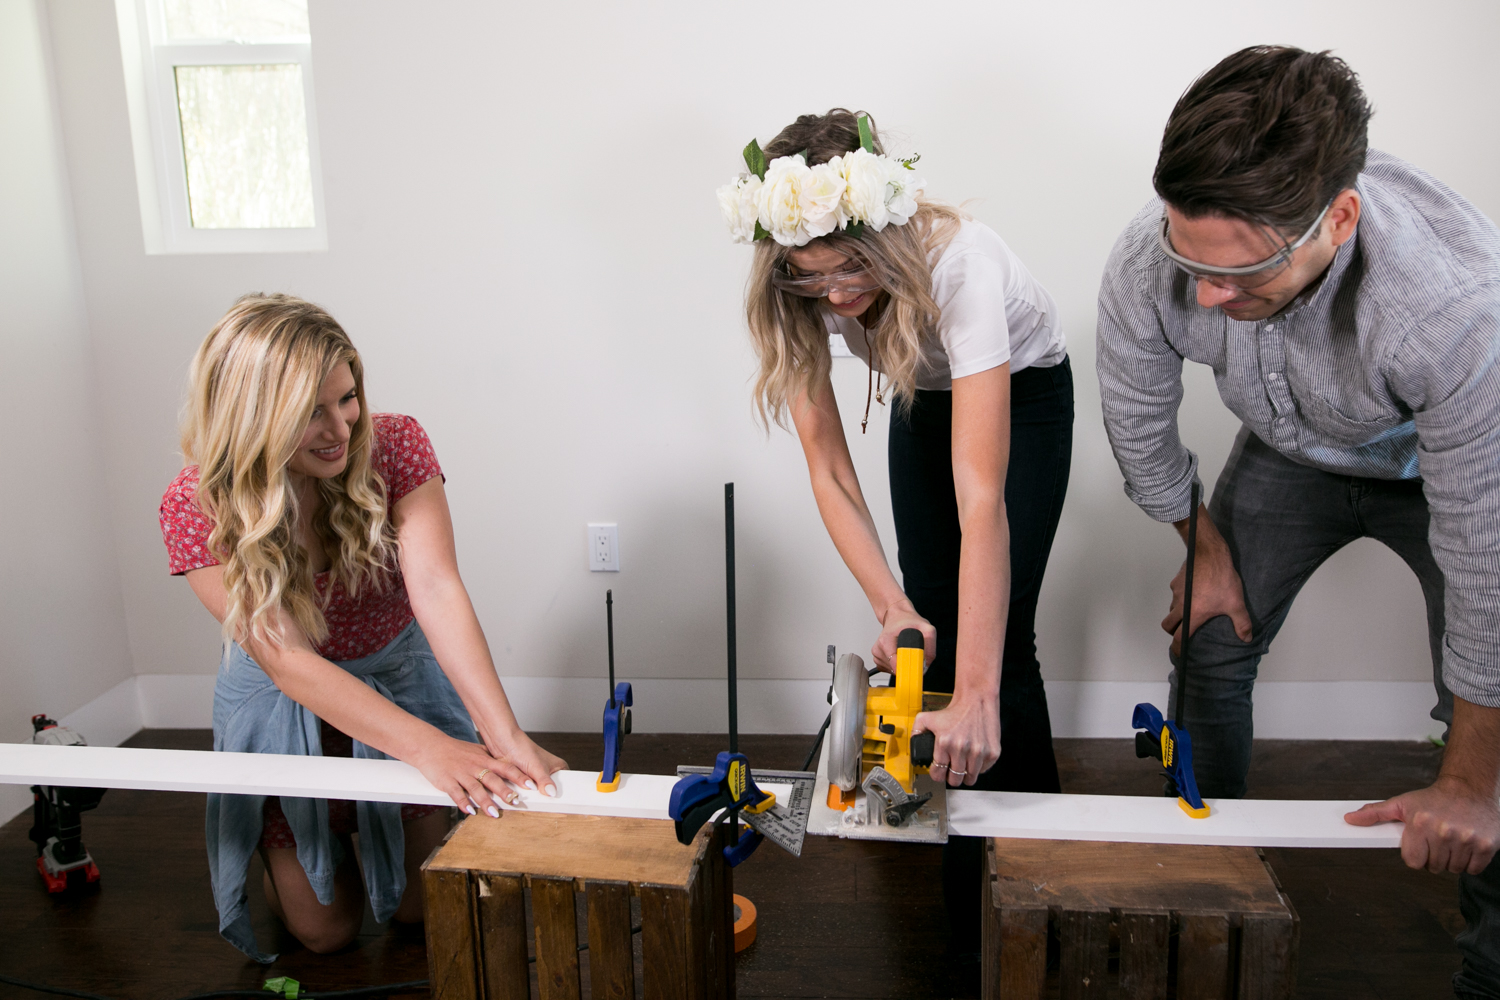
This DIY is probably best done with a friend or two, but I promise the team effort will be worth the classically chic results!
Prep It:
Particle board beams (about 3-4 inches wide) Power saw Nail gun and nails Laser level Eggshell white paint Spackle Spackle knife Paintbrush Paint roller

Do It!:
- The first step in a project like this (before you even pick up your beams!) is to get the measurement of the wall you're working with. Measure the full width of the wall and get 3 beams cut to that length. Note: if there are windows or other features in the wall, account for those like we did for the DIY Arched Window!
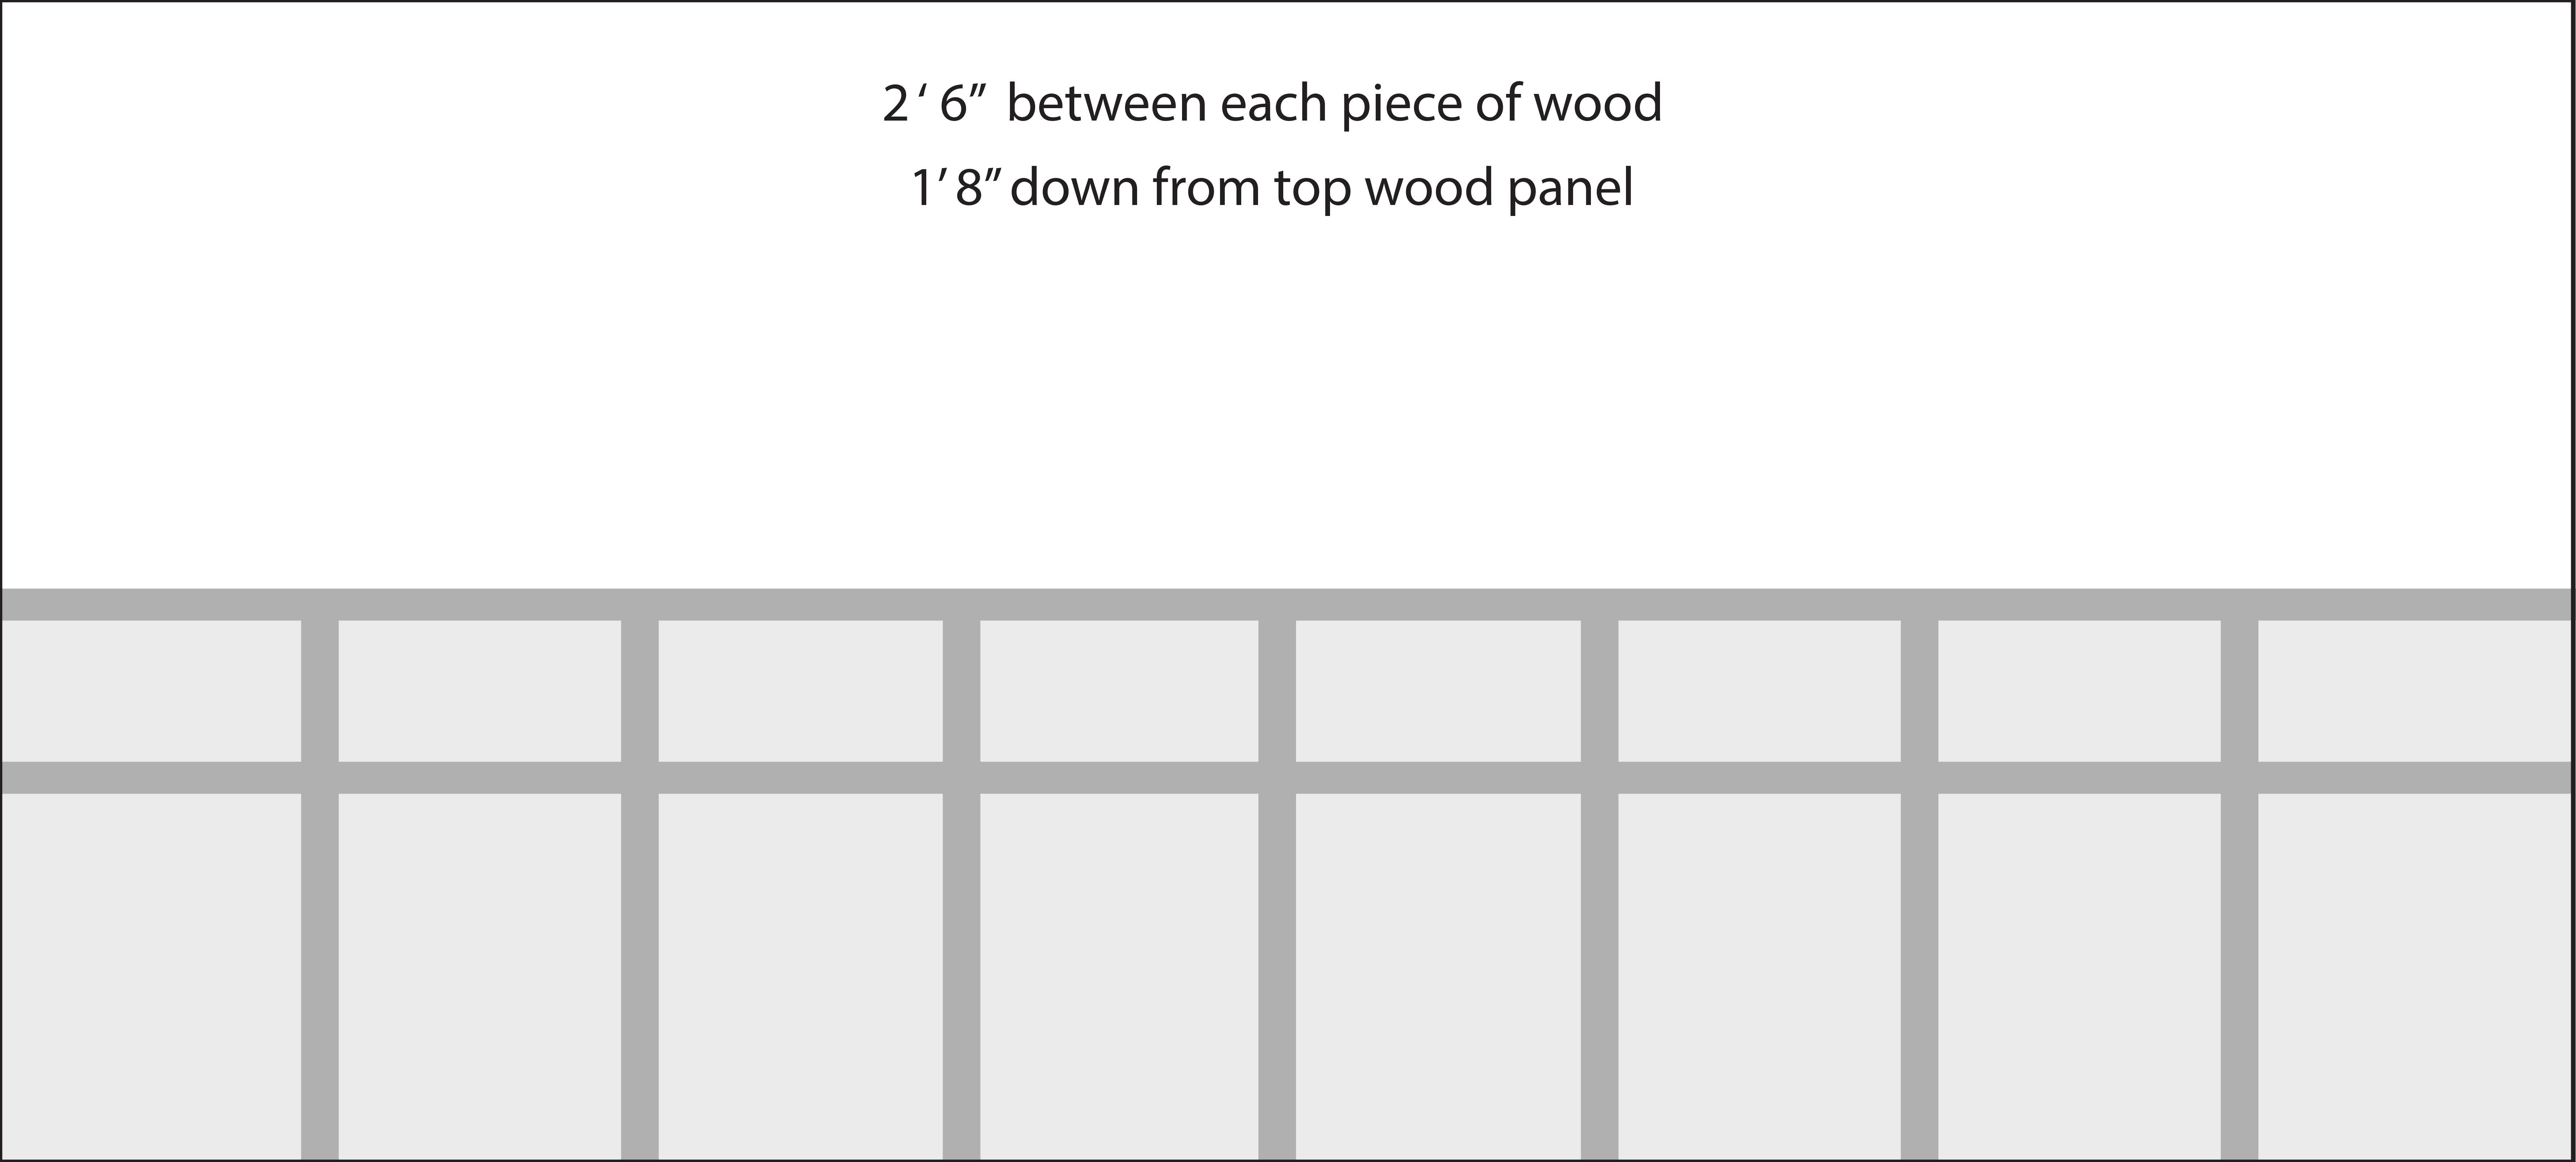
- We made our wainscoting about 5 feet tall, so the measurements in the diagram correspond. If you are doing a different height, adjust the measurements for the length of the pieces that will be going vertically.
- Measure and mark out the lengths of all the smaller pieces you need. For our design it was 7 2'6" pieces and 7 1'8" pieces. Use the saw to cut the pieces.
- A laser level comes in really handy for this next step. Project the a horizontal line 5' up from the floor and use that as your guide as you place the top long beam against the wall and start to nail into place with the nail gun.
- Using our measurements or your own (and also the laser level), nail the other two long beams to the wall.
- Measure how far apart the vertical beams should be, which will depend on the amount of vertical beams you are using and how wide each beam is. Use these measurements to place and nail the vertical beams into place between the long beams to complete the texture of the wainscoting.
- Spackle over the nail holes in the beams to give the entire installation a smooth and uniform appearance.
- Once your spackle is dry, paint it all! We used an eggshell white to slightly differentiate this area from Meghan's cream colored walls. Paint the beams with a paintbrush and the wall with a roller for the best finish.
- Let it dry, and you're done! Look at that beautiful (and removable!) wall installation you just created. Go you!