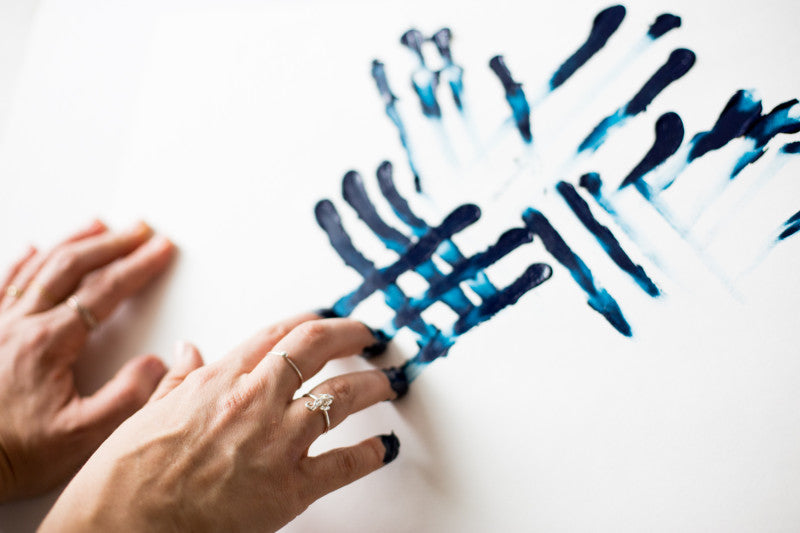
Sometimes the best (and easiest) ideas for projects come right in the middle of doing other projects. Case in point — we were a few hours into filming the Party Animals collection release video and realized that the jungle-esque print we wanted as a backdrop was totally DIY-able! A few minutes, 8 messy fingers, and one impromptu paint later, we not only had exactly the pattern and texture our video needed, but two incredibly modern and stylish pieces of wall art. Needless to say, it was a good day for the Mr. Kate team.

Prep It:
White paper Acrylic paint (we used 2 shades of blue, then added black for dimension) Small plastic spatula Fingers!!


Do It!:
- Mix your paint colors in a shallow container or plate. Make sure you mix enough to dip your fingers in there!
- Now comes the fun part — finger painting! Play it like the Pre-K days and coat your four fingers (thumbs excluded in this one, sorry!) and start creating your painting. We created a messy diamond-like pattern by alternating left and right strokes going diagonally down.
- Work from top to bottom (as to not smudge any perfect finger smears you've already created) and don't hesitate to variate from the pattern, criss-crossing lines sometimes or creating dots or just doing something completely crazy!
- The smaller art piece was created with a small spatula and the remainders of the blue paint, making wiping motions in the similar right/left diagonal downward directions!
- Let your beautiful expressionist art dry, then frame and hang on the wall! Sofia framed her's in an Ikea Ribba frame, which she credits for giving it a luxurious look that is perfect to play off her photography and white walls!


