The best part of my DIY obsession is that I almost never have to throw things out. Okay, maybe that came out wrong. I'm all about getting rid of trash and recyclables and the like (don't call Hoarders on me!), but when it comes to old clothes, home decor, or accessories, there's almost always a new project I can make out of them.
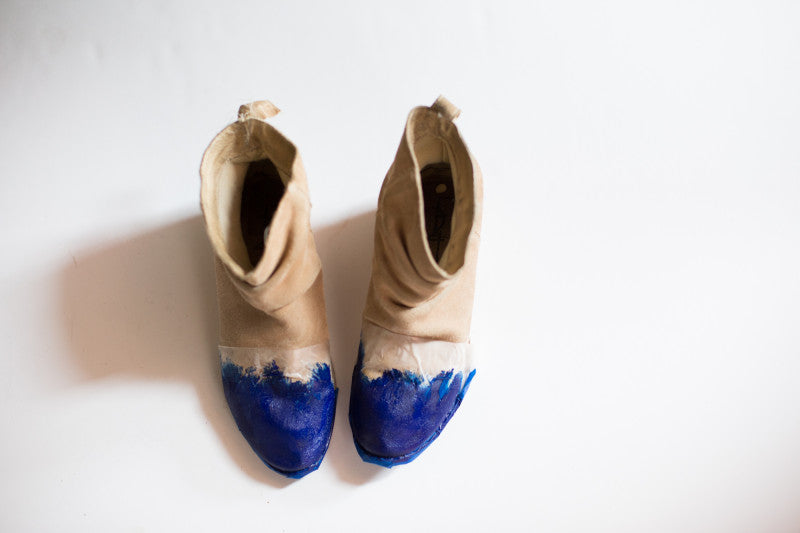
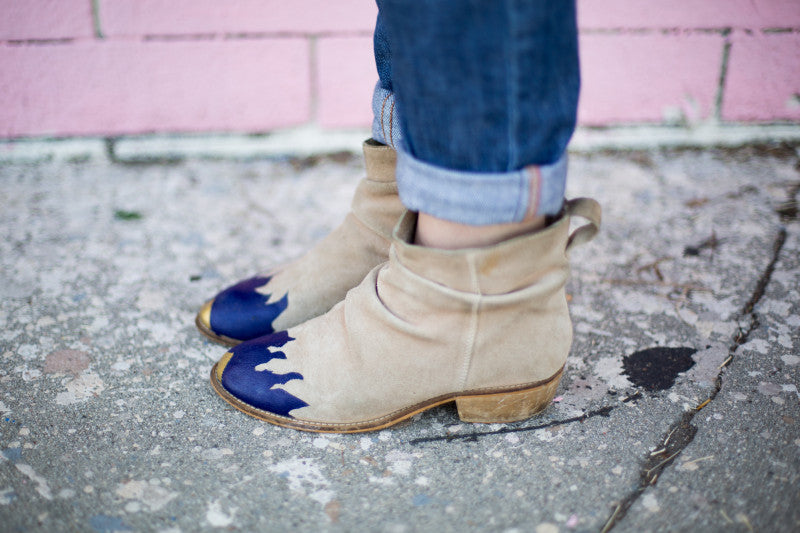
These little tan booties have seen me through some times. They're tried, true, trusty — everything you want in a favorite pair of shoes. But, unfortunately, all that wear and tear also left them a little ... dirty. These little booties either needed a serious DIY upgrade, or they were getting the proverbial boot. Luckily, festival season just happens to be around the corner and there's nothing better to rock out in than some fierce, painted flame-tipped boots. Happy endings all around! My booties got a new, (literally) hot look, and I got my first must-pack item down.

Prep It:
Booties Blue paint Gold paint Wax paper Spray glue Short-bristled paint brush Small paint brush Scissors Marker Painter's Tape


 Do It!:
- Measure a flat edge of wax paper over the tip of your boot where you'd like the flame pattern to be, marking on either edge to get the width of your stencil. Draw a flame pattern in that width — however you'd like it to look! Your flame points can be more symmetrical, tall, jagged, it all looks good!
- Cut out your stencil, then, use spray glue on the back and adhere it to the shoe. Make sure all the points and edges are flat and secure against the curve of the shoe so no paint leaks through! Use painter's tape to cover the sole of the shoe before you start painting.
- Use a short-bristled paint brush to paint the flame area blue. Tip: paint down towards the tip of the shoe, instead of up against the stencil. The paint will be less likely to get under or bleed through this way.
- Let your blue paint dry, and remove the stencil and tape. If any glue residue remains on the shoe, it's easy to scratch off!
- Now, use the painter's tape to mark off a small triangle tip in the front of your shoes. Cover the soles again, and make sure all of the pieces of tape are secure before beginning the next step!
- Use a small paint brush to fill in this triangular area with metallic gold paint. Similarly with the flame stencil, I recommend painting in a downward stroke. Since the base blue is such a rich color, you might need two coats of gold to get that strong, shiny effect!
- Let the gold paint dry, remove the tape, and voila! Depending on what type of paint you used, you might want to seal your designs before wearing this hotties out for a night on the town.