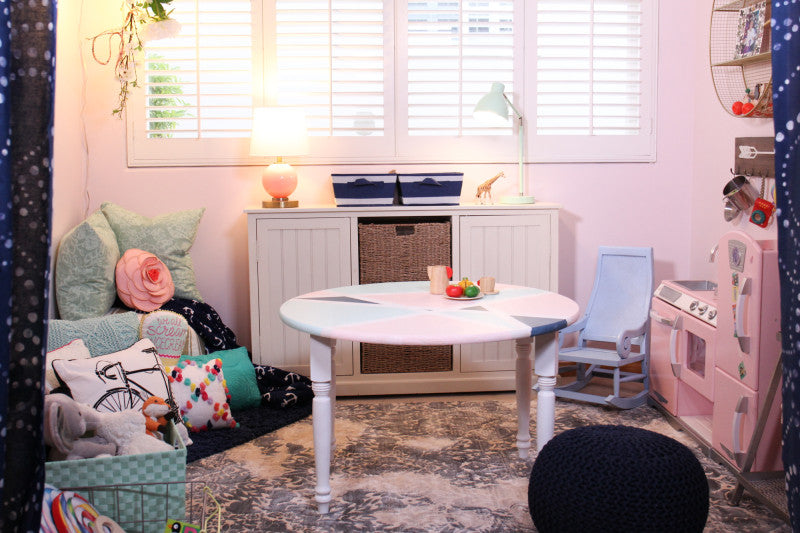
Just like outfits, many well-designed rooms have a statement piece. When I was redecorating my friend Audrey's playroom, I had to decide – what would that piece be? There were so many versatile colors, cute accessories, and just such a sense of creativity, I knew nothing less than an awesome DIY would do to complete the room.
This geometric mosaic painted table was a total show-stopper. Not only did it tie together all the colors featured in the room, but its artistic appeal will hopefully inspire Audrey's daughters to create amazing things on it! The DIY is incredibly easy to switch up for an adult's room – just use less youthful colors. Think neutrals, or even metallics, with a jewel tone accent. Or whatever works for you!

Prep It:
Round wooden table top 4 wooden table legs 4 mounting plates White spray paint with primer 3 paint colors of your choice (tip: I used samples of wall paint, since it has that permanent, semi-gloss finish and the small samples you can get at most stores are plenty for this project!) Painters tape


Do It!
1. Start by spray painting the table top and legs white. Use 2 coats at least to make sure they're fully coated and even!
2. Once the paint has dried, screw the mounts into the table and use them to attach the legs.
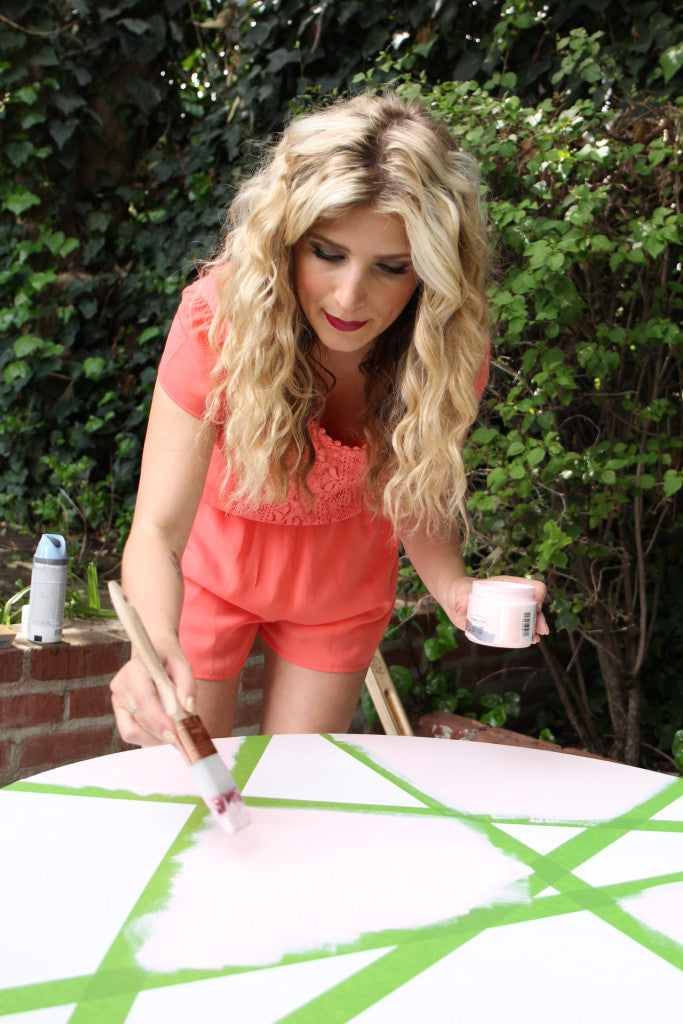
3. Stand your fully functional table upright. Using long (3-4 feet, at least) pieces of painters tape, start creating your mosaic design. Think of it as a puzzle or a web! Once you have your longer pieces down and intersecting, use smaller ones to create cool angles and shapes within the design.
4. When you're finished taping, use gentle pressure and smooth all the tape down - you want to make sure all the edges are down tight so the painting has crisp, clean edges.
5. Now, working one color at a time, start painting in your design! I would, again, suggest using 2 coats to make sure you have a nice, strong hue and even coverage.
6. Let the paint dry, carefully remove the tape and voila! If there are any places where the colors bled into the white, you can use matte white paint and a small paintbrush to correct it!