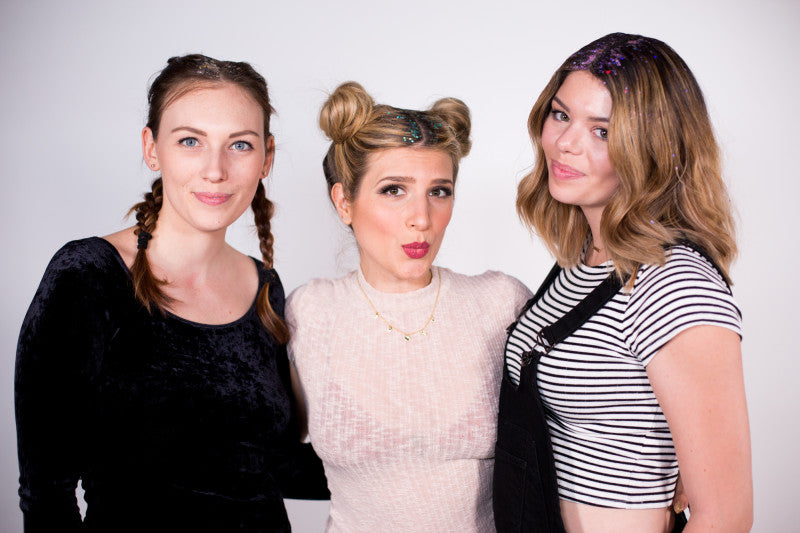
Not to sound like a VH1 special, but when it comes to me and the adorable DIY duo The Sorry Girls (Kelsey and Becky) — we love the 90s! I also love sparkle, fancy hairdos, and always having a pop of something unexpected in my ensembles. Which is why these DIY Glitter Parts were pretty much a life-changing discovery (emphasis on the "disco.")
I LOVE this DIY glitter part to conceal greasy roots or just totally transform a bad hair day into a look that is bound to get smiles. Style it with your hair down, in baby buns or with braids!
Even though we took our looks to a pretty far out place (perfect for festivals), toning down the effect by using less, finer, or closer-to-your-hair-tone glitter makes it 100% acceptable for day-to-day life. Watch the video above and browse through the steps below and in no time you'll be rocking a sparkly mane like the unicorn you always knew your spirit animal was.
Prep It:
Shiner Gold pomade (in Psycho Hold) Hexagonal glitter Fine glitter Star-shaped glitter Hair dye brush Disposable container


Do It!:
- Decide how you're going to rock your do, as this impacts how much of the glitter mixture you'll need to whip up. If you're wearing your hair down, start with a base of a teaspoon of pomade (since only half of your part will be exposed.) If you'll be wearing your hair split down the middle for a pigtail style, start with a base of a tablespoon of pomade (since your full part will be showing.)
- In a disposable container, start mixing the pomade with some fine glitter. We found the pointed end of a hair dying brush to be the perfect instrument to stir this concoction.
- When the fine glitter is fully mixed in, sprinkle in some of the larger glitter. It's important to keep ratios in mind here — there should be 50/50 pomade/glitter in the mixture, but there should be about 75/25 fine glitter to large glitter. Aim for the look of a glittery nail polish top coat.
- When you've got your glitter goop exactly as you'd like it, use the hair dying brush to apply it! Start by scooping a small amount and applying as close to your part as possible, working out/ down with the flow of the hair.
- After the party's over and you're ready to rinse your glitter mane out, simply shower and wash with shampoo! The pomade is water soluble, so the glitter will wash out easily.