
I got to get #WEIRD with the deliciously hilarious ladies of Clevver Style on their show Beauty Break. I showed Joslyn and Lily how to make the DIY (Ping Pong Ball) Marquee Letters straight from A Hot Glue Gun Mess: Funny Stories, Pretty DIY Projects! If you like this project you should definitely get the book because there are over 50 more projects inside!
For another DIY from A Hot Glue Gun Mess, check out 'DIY Watercolor Curtains'!

Yeah, we got a LITTLE weird.
DIY Marquee Letters from A Hot Glue Gun Mess by Mr. Kate

Prep It:
- paper maché letters
- ping pong balls
- twinkle lights
- craft knife
- spray paint (or acrylic paint with paint brush)
- picture ledge (make sure it's long enough for the word you make!)
- drop cloth
- level
- screws and anchors for securely hanging the shelf!
- twine (optional)


 Do It!:
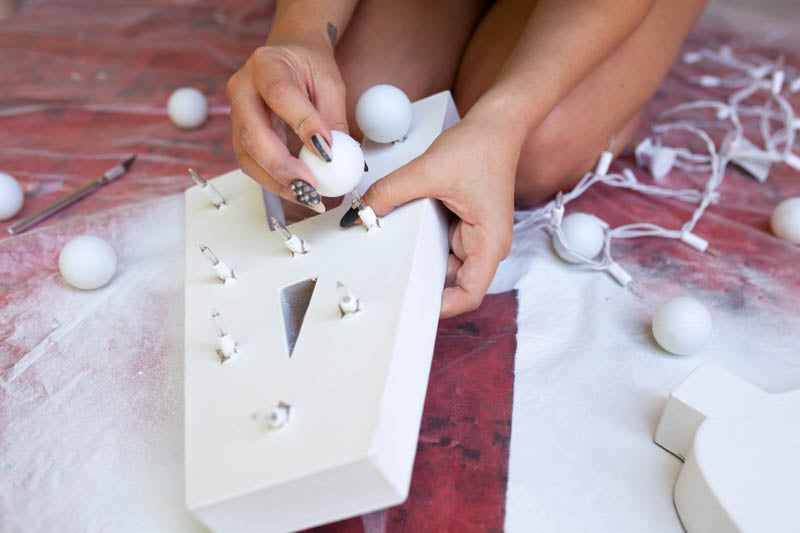
- Use the craft knife to cut out the backs of your letters.
- Set up the drop cloth outside and spray paint the letters the color of your choice. Let dry for about 1 hour. You may want to apply two coats.
- On the front side of each letter, make evenly spaced "X" cuts along the center of the shape of the letter, where you want the lights to show. I left 2.5 to 3 inches between each cut.
- Think about where you plan to display the and make sure the plug end of a string of twinkle lights will be where you need it.
- starting with the first letter in your word, grab a string of twinkle lights and push the lightbulbs through the "x" cuts from the back. Connect another string of lights as needed, going from letter to letter and storing the cord and any extra bulbs in the hollow back of a litter in you need to.
- Make a small "X" cut on one ping pong ball for each lightbulb that's showing. Push a ball onto each lightbulb.
- Wrap any cord that shows with twin for a more finished look. Tip: Tie a knot every 10 to 15 wraps to keep the twine from unraveling.
- Hang the picture ledge using a level and the appropriate nails or screws for your wall.
- Arrange the marquee letters, tucking the connecting cord behind the lip of the picture ledge, and plug in your new light art!

Order your autographed copy of A Hot Glue Gun Mess here!

