A simple chic ornament, to keep your tree classy. I came up with this DIY Cursive String Ornament because I am determined to have a classy christmas this year. I'm kind of over the overly accessorized trees and wanted to go with a chic theme for our holiday home decor and I'm starting with these string ornaments! Added bonus: the Baker's Twine looks like a candy cane!
Tip: This DIY works best for short words so if you don't have a short name try words like 'joy' 'noel' 'cheer' etc.
For another ornament DIY, check out 'DIY Hardware Ornaments'

Prep It:


The 'Kate' took a little more nudging to get right. TIP: If you glue wipes off too much while you're arranging your letters you can paint another layer of glue over the top to make it stiffer. Use a plastic knife to smear the glue and concentrate more on the places where the string intersects.


Do It!:
- Lay out what you want to write with your string so you know how long of a piece you'll need. TIP: shorter words are easier! If you don't have a short name do a short word like 'Joy', 'Noel', 'Love' etc.
- Cut your string.
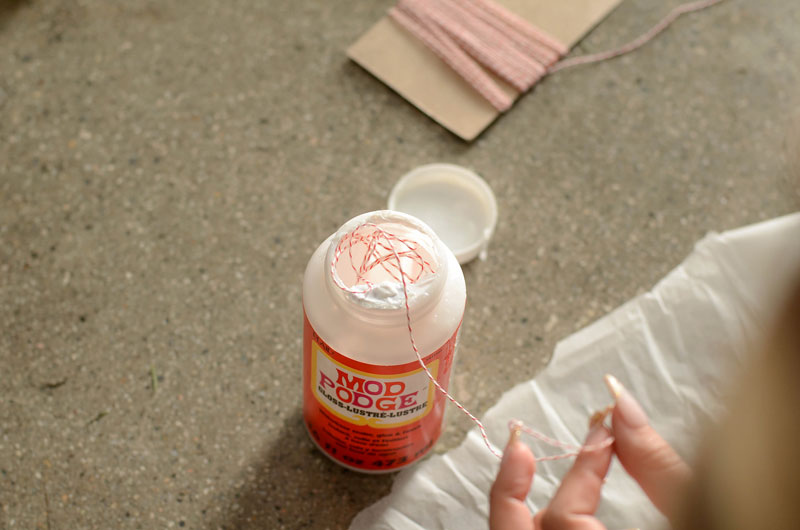
- Dip the string in the Mod Podge so that it's completely saturated. Don't worry, it will dry clear!
- Draw out your word with the saturated string on the parchment paper. Let dry. TIP: If you glue wipes off too much while you're arranging your letters you can paint another layer of glue over the top to make it stiffer. Use a plastic knife to smear the glue and concentrate more on the places where the string intersects.
- Peel off your ornament and gently hang in on your tree!


