

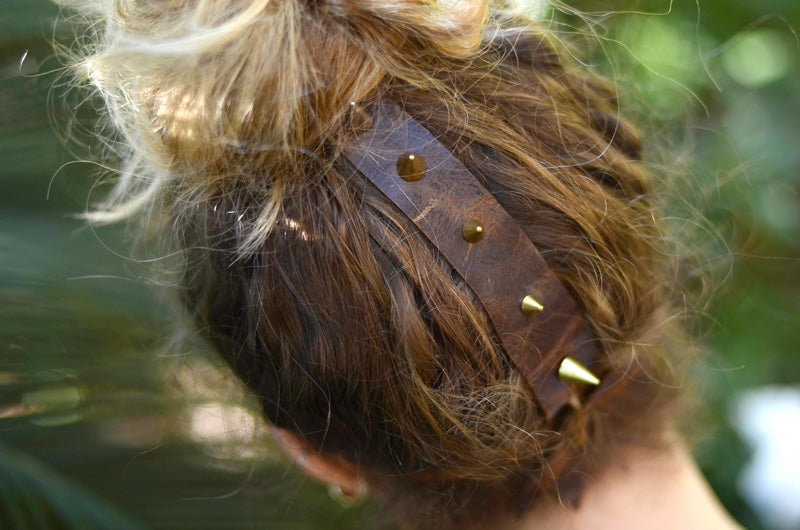
Do I even need to explain why I wanted to create such a marvelous accessory? I think not. I will say with Halloween coming up this would make for a great warrioress or tribal goddess headpiece. I also think this leather mohawk would look bad ass for any night on the town or dancing around any festival. Where are you going to rock yours? I styled mine with a black and white printed top and of course Watercolor BeautyMarks and Mr. Kate earrings because punky jungle nymphs need to be painted accordingly!
Thinking about using this for your costume? Try out these 'DIY: Tribal Print Wrap Bracelets' to accompany it.


Prep It:
- leather cement - or hot glue
- fabric scissors
- leather punch
- scrap leather - I used some from an old leather jacket from the thrift store
- screw back spikes
- screwdriver


 Do It!:
- Cut a thin strip of leather to fit around your head along your hairline with enough excess to tie behind at the nape of your neck. Tip: I like to tape the ends by cutting them into a point.
- Cut a thick strip of leather for your mohawk that fits along the top of your head with about 2" excess.
- Attach your two pieces by gluing one end of the thicker piece of leather in a loop tab around the center of your longer, thinner piece of leather, essentially making a 'T' shape.
- Optional: Make a slit in the center of the thicker tab if you want it to go around a top knot - I did this to mine for extra security when I wear this accessory. You can make this slit wherever you want to wear your bun, braid or ponytail.
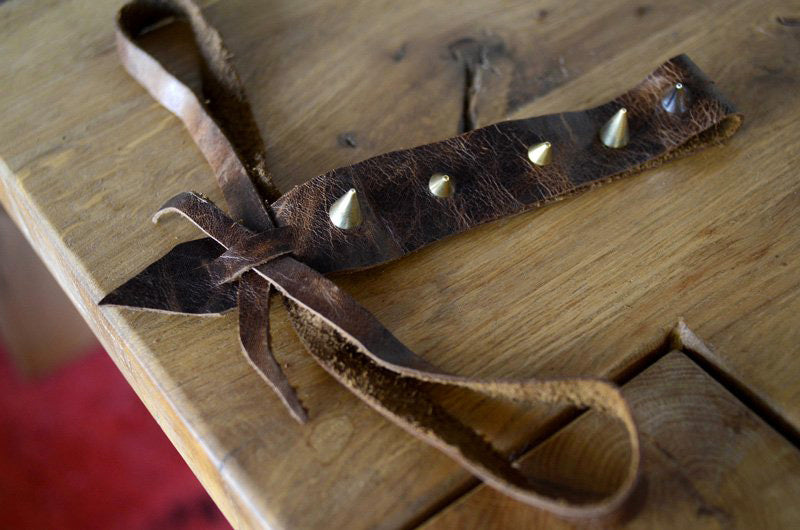
- On the other (non looped) end of the thick piece of leather cut two small slits creating a belt loop center slit (see above photo) so you can feed the two ends of your longer thin piece through the belt loop at the nape of your neck and tie a knot.
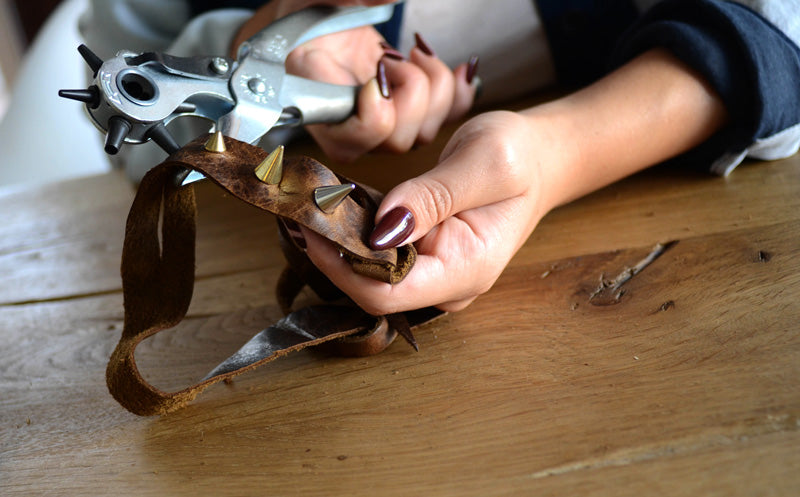
- Spike the center wide stripe of leather using the hole punch to poke a hole for each screw back spike. Poke the screw through and screw the spike on and tighten with a screwdriver. I chose to alternate the size and colors of my spikes.
- Wear your headpiece by laying the spiked piece down the center of your head with the glued loop part at the front of your forehead. Pull your hair through the center, ponytail slit and make a bun, then feed the long ends through the belt loop tab on the other end of the center spiked piece, at the back of your neck and tie a knot. It should feel snug, secure and comfortable.


Outfit Deets:

