
Check out Part 1 of this DIY Vintage Nursery design to see how we painted the walls and installed a chair rail. In Part 2, we complete the room by bringing in all the furniture, including some thrift store and flea market finds and putting up a DIY cloud mobile and baseball bat clothing rack! We also gave big-sister-to-be a special princess corner in the outdoor patio!
Watch the video above to see the transformation and hilarity! Supplies and steps for the DIYs seen in this video are below!
Watch more ‘Breaking Beige: A Delicious Dining Room‘


Shop the room:
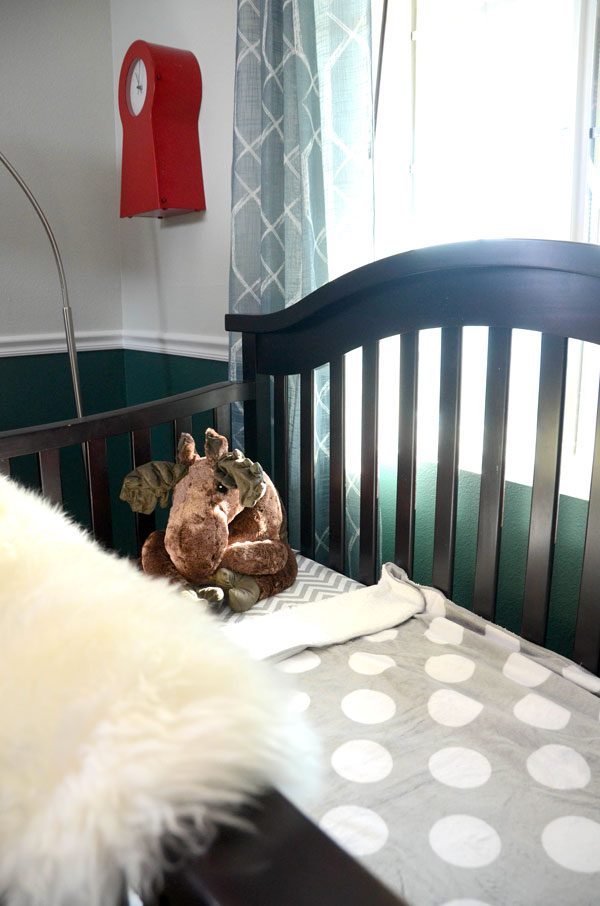
- dark wood crib
- grey chevron bedding
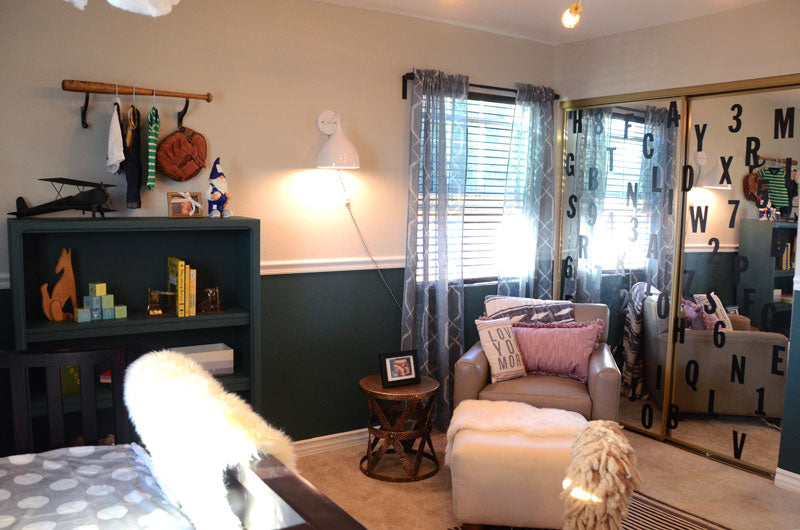
- letter and number decals
- wood rocking horse
- similar wool rug
- similar wood drawer
- baseball bobbleheads
- soft grey basket
- globe
- chevron changing pad
- similar style vintage dresser
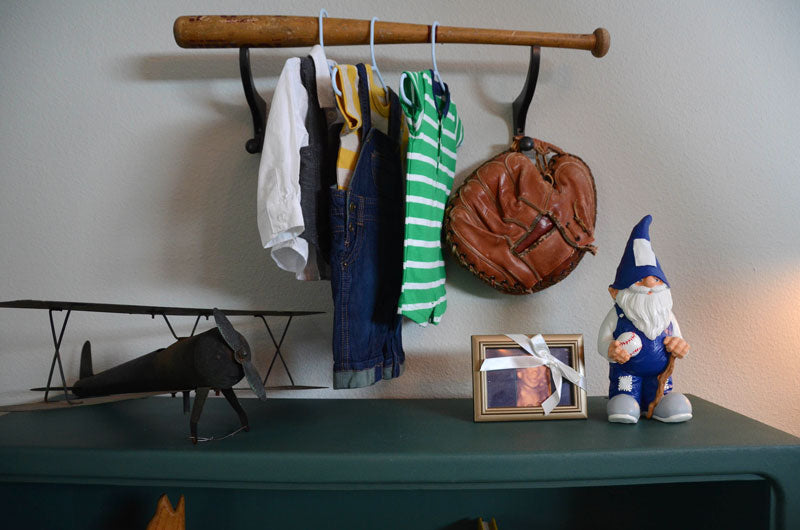
- 2 aluminum bats (these were fastened to the wall with wire, screws, and anchors!)
- vintage airplane decor
- similar style hammered drum table
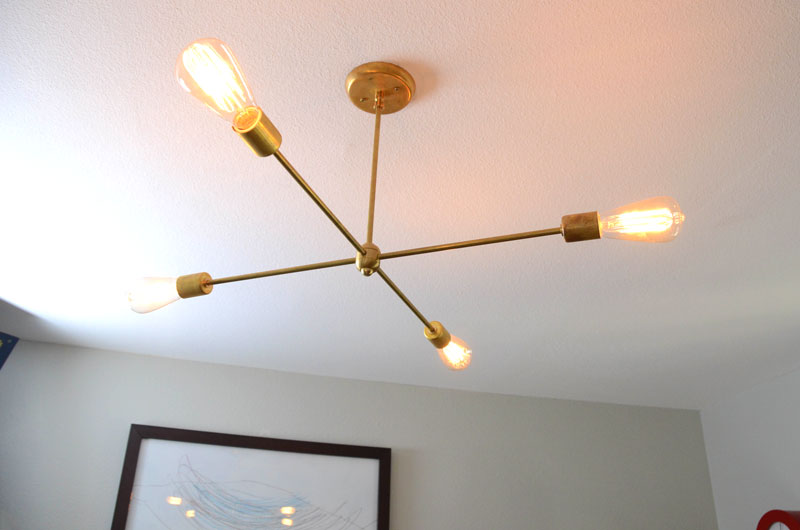
- similar style light fixture
- sheepskin
- soft aztec throw blanket
- wall sconce
- slow sign (this was fastened to the wall with wire, screws, and anchors!)

DIY Cloud Mobile

 Prep It:
- batting or stuffing
- wire
- wire cutters
- fishing line
- scissors
- ceiling hooks


Do It!:
- Tear and fluff the batting into sturdy little cloud shapes. No two clouds are alike!
- Cut about a 4 inch piece of wire and twist it into a corkscrew shape with a look on one end.
- Cork screw the wire end into the cloud.
- Tie a piece of fishing line onto the loup.
- Screw your ceiling hooks securely into the ceiling.
- Tie the other end of the fishing line through the ceiling hooks at your desired height. Sweet dreams!

DIY Vintage Baseball Bat Rack

Prep It:
- 2 coat hooks
- wood baseball bat
- drill and drill bits
- screws and anchors to securely fasten the hooks to your wall!


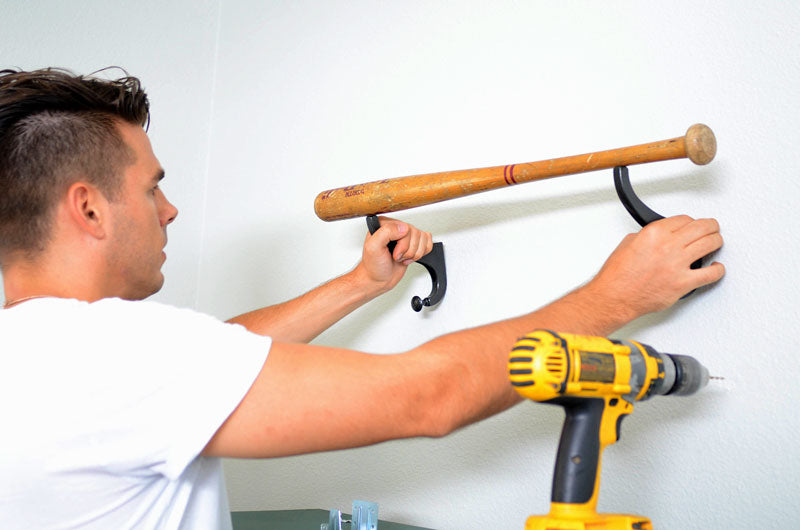
Do It!:
- Using a drill bit a little smaller than the screws on your hooks, drill into the baseball bat where you want to secure the hooks.
- Fasten the hooks into the wall with the screws and anchors!
- Style with tiny coat hangers and some cute baby clothes!


Princess Patio Corner with DIY Hopscotch


Prep It:
- BEHR Premium DeckOver in Wildflower
- All-In-One Wood Cleaner
- sand paper
- electric sander (if needed)
- paint brush
- scrub brush
- washcloth
- water
- painter's tape
- sidewalk chalk (for the hopscotch!)


Do It!:
- Prep your wood or deck by sanding
- Clean wood with water and rag
- Scrub wood with diluted deck cleaner, rinse and let dry.
- For hopscotch: measure and tape off hopscotch outline using painters tape and a measuring tape. I made each square a foot.
- Paint the wood or deck (within the painter's tape lines for hopscotch) with the DeckOver and let dry! Tip: use a thick coat as it helps fill in any indents in the wood.
- For hopscotch: draw in your numbers with the sidewalk chalk or you could paint them for a permanent result.


What do you think? We'd love to hear from you in the comments below!

