
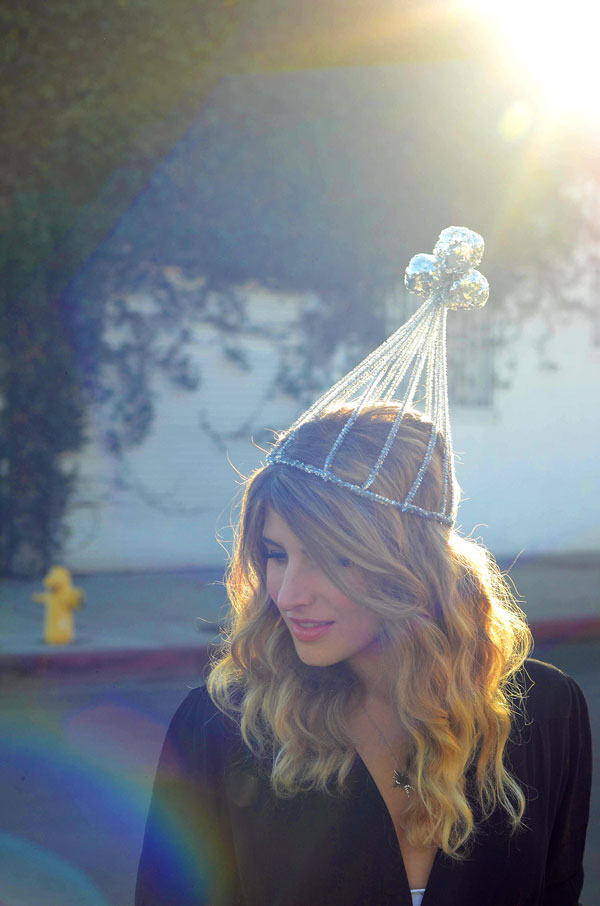
Merry xmas eve! 2014 is almost over and I'm celebrating the passage of another year with a DIY Party Hat Crown which I was originally making for a blog post but decided to also film as part of this week's Kate's Take episode. This past week I also shot a totally wild video with P'trique of Sh*t Fashion Girls Say fame, I got to dress in 80's workout clothes AND a giant showgirl feather headdress - watch the video here.
Thank you so much for all your support this last year. Mr. Kate as a business has grown leaps and bounds because of all of you who enjoy our content and buy our jewelry and BeautyMarks. I feel so lucky and filled with appreciation for each and every one of you. Thank YOU for making 2014 a great one!
I hope you all get to make this crown or check out 'DIY Lace Crown' for another fun and easy party crown project.


Prep It:


DO IT!:
- Twist two or three pipe cleaners together to form a circle that fits around your head. Use a few more pipe cleaners wrapped around to reinforce the strength of your base circle.
- Dump and dollop of Mod Podge or white craft glue and a pile of glitter onto the wax paper.
- Roll the cotton balls around in the Mod Podge until they are fully covered and then roll them around in the glitter to fully disco-ball-ify them. Let dry for about an hour or so until the glitter feels hard and secure.
- Connect more pipe cleaners perpendicularly to the circle you've already created by twisting them into place. Then connect the other ends all together to form a pointed top over the round base. Use a spare pipe cleaner to secure all the loose ends together at the point of the hat/crown.
- Hot glue the glitter cotton balls to the top of your hat, you could use 1 or 3 like I did and now you're ready to party and get that New Year's kiss! Muah!


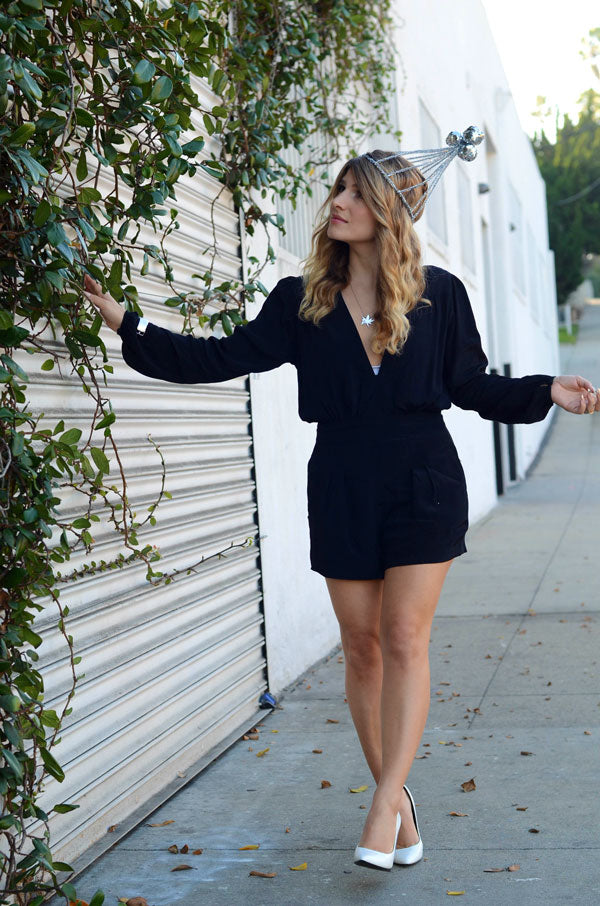


Outfit Deets:
- Romper: Motel Rocks
- White pumps: Zara - similar here
- Necklace: Mr. Kate Starburst Necklace in silver
- Cuff: Mr. Kate Timeless Watch Cuff in white gold

