
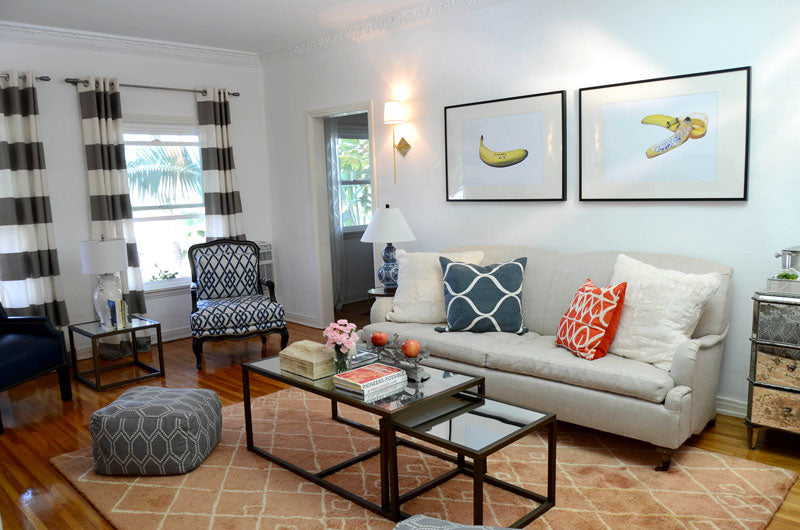
Of all the Mister Sister episodes this one is the most bitter-sweet! Sweet, because Tess's living room is exactly what she wanted it to be, a classy, elegant space where she can entertain but also get cozy and watch TV. Bitter, because it's our final Mister Sister episode...her apartment is officially complete! With the bold patterns, blue and white china, white color palette with a splash of grey, coral and blue, and glorious DIY projects all over, I have to say this has been a fun transformation. I can't wait to come over to my little sister's comfy pad and have her mix me up something delicious. Here's hoping she keeps it clean, that little bugger!
What are your favorite parts of the living room? I love how the banana photos turned out. Did you spot all of our thrift store finds from Mister Sister Episode 4: Thrift Store Haul?
We hope you enjoyed watching Mister Sister and stay tuned for more Mr. Kate projects, we have some exciting ones coming your way.
If you missed Mister Sister Episode 5: Cozy Kitchen Cuties, watch it here!

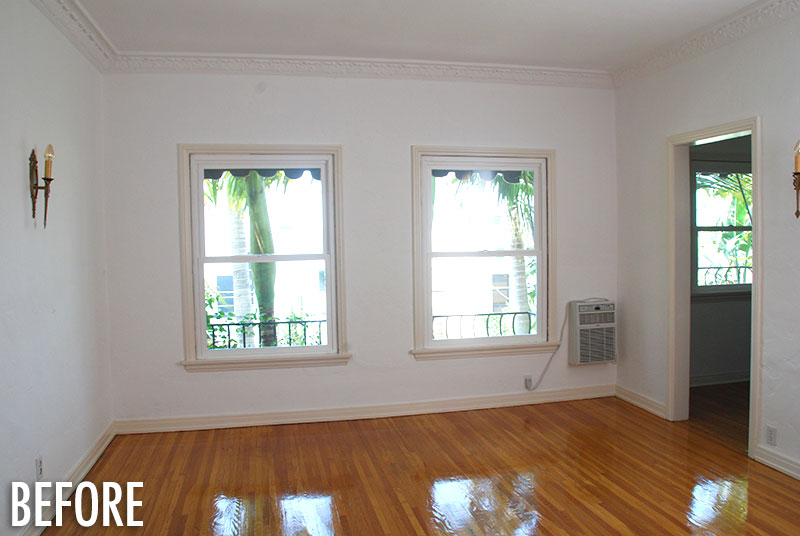
Remember the moodboard we created in Episode 1?... Full of mixed patterns, white, blue, coral, grey and black...


- couch
- poufs
- throw pillows: white faux fur, coral leaf, and blue
- mirrored nesting coffee & side tables
- credenza
- mirrored dresser for bar (similar style here)
- bar tray
- frames with mattes
- bar ice bucket
- copper mugs
- rug
- curtains
- tv
- curtain rods & finials
- sconces
- blue leather chair
- orange coral throw blanket
- blue patterned chair
- white lamp
- spode lamp
- coffee table box (similar style here)
- oversized candle
- spode vintage vases (similar styles here, here, and here)
- metal decorative ball
- animal head hooks
- entryway mirror
- entryway chandelier
- entryway rug
- Joey used a 1 1/4" drill bit to drill a hole and run the cable box cords through and then placed a tiny remote repeater eye on the top of the hutch with transmits the remote signals to the box hidden behind the cabinet doors... so much cleaner looking!


DIY Banana Photos
Prep It:
- Bananas
- Permenant marker
- Spray adhesive
- Rhinstones
- Glitter
- White or colored poster board for photo backdrop
- Camera
- Computer and photo editing program like iPhoto or Photoshop
- Store-bought frames with mattes - I got the large ones for Tess' living room at Ikea
- Decorate your bananas with the permenant marker ( I wrote Chanel No. B) or glitter and rhinestones (use the spray adhesive to make them stick)
- Take photos against the paper backdrop and upload them to your computer
- Edit the photos to your liking and order prints in a size that will fit your frames - I like to use GrannyStone
- Frame your prints and hang them on the wall!


- The drink we made is called The Sneaky Granny, a mix of rye whiskey, Disaronno, etc. - get the recipe on my Thanksgiving Cocktail Pinterest Board here!

Cheers to finishing, Tess loving the design and all of you watching and supporting! Thank you!!! xo

