Thrilled to debut our new DIY home decor video series, Mr. Kate's Breaking Beige where Joey and I go into people's homes and break them of their beige! It's a reeeaaally fun show and I'm so proud of all the Before and Afters so make sure you tune in for every episode coming out every week on our YouTube channel. Check out our first room transformation in the video above and the photos below!
First up, we go to Whitney's house to help her with her blah dining room. Whitney is a professional nutritionist and food/fitness blogger and newlywed (her husband is a lawyer who works long hours) and she really needs a pretty place to throw some healthy eating soirees. Check out her blog: To Live & Diet in LA
The Design Dilemma: Whitney's dining room is small with no color or personality. They have a lot of dark brown furniture and the table is rectangle which doesn't promote a good flow in the small room. The large closet is just a clutter collector and there is no hint of Whitney's happy personality in the space as is.
The 7 Step Breaking Beige Design Solution:
- Paint the walls (except the back accent wall) and inside the closet with Behr's Summer House.
- Paint the accent wall a base color of Behr's Milk Paint and do a hand-painted, large scale floral mural using the Behr colors: Green Parakeet, Lotus Petal, Ballerina Tutu, Midnight Blue, Storm Lighting, Blackout, Dew Pointe, & Race Car Stripe.
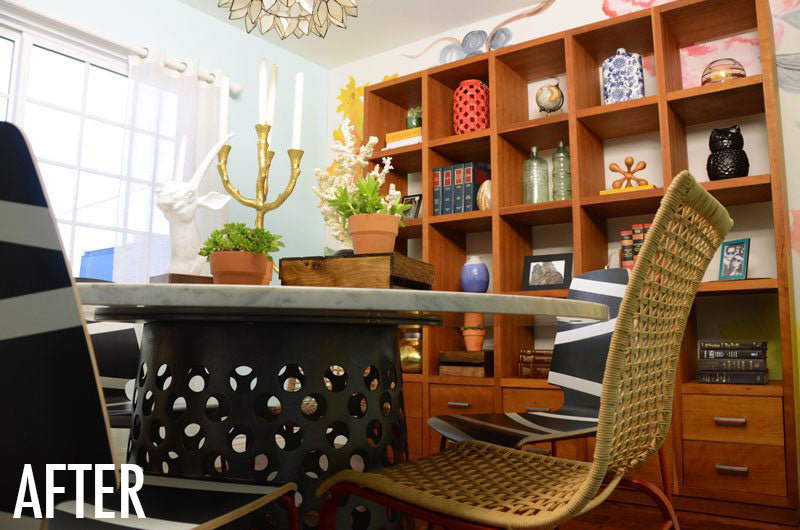
- Create a flow with a round marble table.
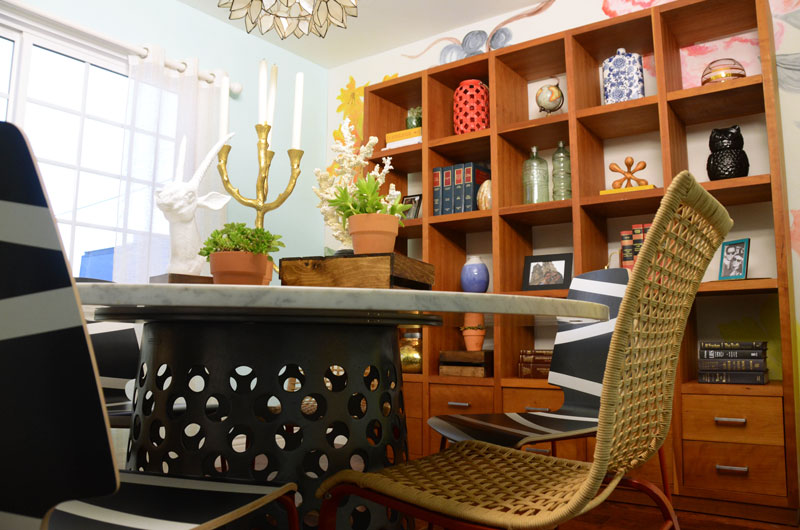
- Make a bold statement with two different kinds of dining chairs alternating around the table.
- Bring in a large shelving unit (Whitney had in another room and wanted to get rid of) to house decor items, photos and collectables from Whitney and her husband's world travels.
- Build a modular bar inside the closet with stained wood crates and floating shelves - see DIY Crate Shelves for more inspiration.
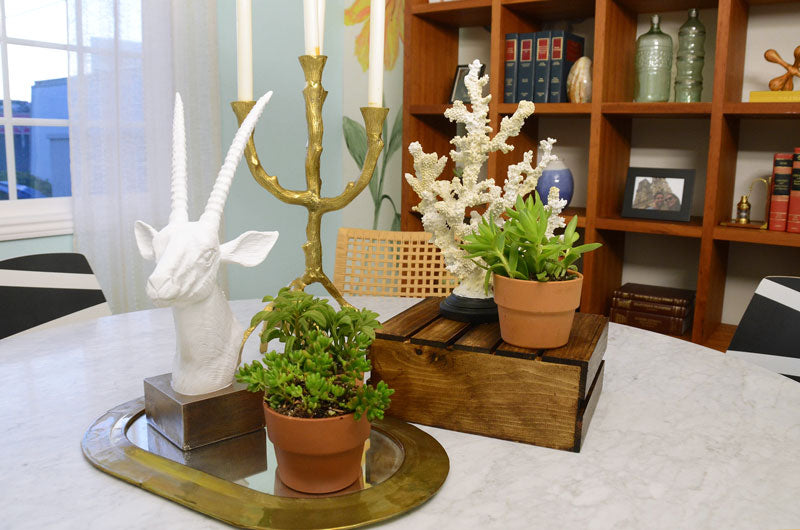
- Tie in the color palette and bring an eclectic look to the space by styling the shelves, table top and bar with bohemian and colorful decor items.
For more Mr. Kate interior design series check out: 'OMG We Bought A House!' or 'A Hollywood Home' or 'Mister Sister' or 'Two Couples In A Condo'




Shop The Room:
- BEHR’s Marquee line for the base wall colors (color: Summer House and for the mural base: Milk Paint)
- Premium Ultra Plus line mixed with a BEHR glaze for the mural colors (colors: Green Parakeet, Lotus Petal, Ballerina Tutu, Midnight Blue, Storm Lighting, Blackout, Dew Pointe, & Race Car Stripe)
- Wood crates for the crate bar
- Wood stain for the crates
- Lotus Pendant Light (above table)
- Round marble table
- Ikea chairs
- Floating shelves
- Bar sign
- Modular shelves (similar here)
- Natural flax curtains
- Curtain rod
- Large rectangle mirror
- Organic brass candelabra (similar here)
- Sculptural ceramic animal head (similar here)
- Gold mirror trays (similar here)
- Ceramic coral (similar here)
- Vintage brass antelope
- Pretty bar glassware
DIY Floral Wall Mural


Prep It:
- Paper
- Pencil
- Artist brushes in different sizes
- Wall paint in the colors of your choice
- Behr's Faux Glaze
- Plastic cups
DO IT:
- I first sketched the flower layout that I wanted for the wall on a piece of paper - I did a variety of flowers with leaves and then one bunch of grapes with twisted vines. I knew I was going to put the shelf in front of it so I painted all on the permimeter of the wall.
- I then sketched the flowers directly onto the wall using a pencil in case I messed up
- I created a color guide for myself on the piece of paper to map out where I would paint what color
- I thinned the paint colors to make them look more like watercolor by using 1 part Behr's Faux Glaze to 1 part whatever color I was using in plastic cups and stirred it using the handle of a paintbrush
- I painted over and within the pencil lines using large brush strokes to look very organic and imperfect. I layered the colors to add complexity.
- Let dry!

Colorful Chair Legs Ikea Hack!

For Whitney's dining chairs I used a mix of two different styles of Ikea chairs and spray painted the legs to unify them around the base of the table.
Prep It:- Two different styles of Ikea chairs - I used the VILMAR and the woven ones have been discontinued, similar wicker ones here.
- spray paint - I chose a terracotta orange
 DO IT!:
- Before you put the chair together spray paint the legs and connection bars. If the legs can't be removed tape off the chair and use a garbage bag to cover any large areas.
- Let dry and style!






To learn how to stain crates and make your own reclaimed crate wall, check out 'DIY Crate Shelves' and 'DIY Reclaimed (Looking) Wood'


Sooo, what do you all think!? We love reading your comments! xoxo

