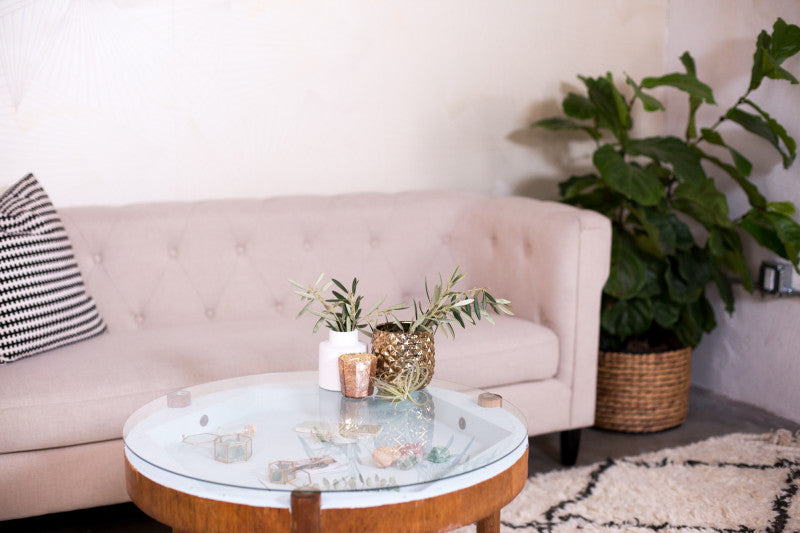
When I encountered this charming midcentury coffee table, I was smitten with its simple design and serious potential for an Upcycl'd upgrade. It had all the makings of being an incredibly cute, customizable shadowbox coffee table, now all I had to do was ... make it!
The trick to this DIY is finding a table with a hollow bottom and legs that can be easily detached and reattached. This may sound specific, but once you hit those flea markets and thrift stores, I promise you'll be up to your sternum in choices! Check out the video above, and more images of the final table (along with the 411 on the how 2) below!


Prep It:
Coffee table or side table with an inset bottom Sandpaper block Washcloth Wrench *New* paintbrush (this is recommended to get a smooth paint finish with no dried paint flecks!) Paint color of your choice Painter's tape Scissors Custom glass top (instructions on getting this below!) Silicone dots Assorted items for inside and on top of the table


Do It!:
- First things first: take off your top! No, not your shirt, silly — the table top! You'll likely need to unscrew the legs for this step, so use a wrench, screwdriver, or whatever tool your particular table needs.
- Sand the underside of the table, including the hollowed out area, then wipe down with a damp cloth to get a nice, smooth surface for painting.
- Wrap the side edge of the table in painter's tape, so that when you paint, all the color stays on the top and the sides can remain the same color! You can paint the whole table if you like, but I thought the pale mint green paint looked best just on top, so the natural wood of the sides and legs could shine, too!
- If there are any holes on the underside of your table, you can fill them with wood putty, or just leave them be! I elected to leave mine, as I thought they looked nice with the round shape of the table. If you use putty, make sure to sand it down before painting!
- Using a new paintbrush (so any lingering dried flecks of past projects don't obstruct your pristine paint job), paint the top and hollowed out section of the table. Use at least 2 coats, so the pigment is nice and strong and opaque.
- Let the paint dry, remove the tape, and reattach the top of the table to the legs.
- Place your shadowbox items inside the hollowed out area, making it into a proper shadowbox! You can choose photos, crystals, toys, flowers, whatever you find beautiful and meaningful. The great part about this design is that the glass is easily removed any time you want, so you can switch out the display as you choose!
- Now, about that custom glass top. Before starting your project, take the measurements of your table to a hardware store and have them cut you a custom piece of glass. It's as easy as that!
- Stick silicone dots on the table (or leg) tops, place the glass, and you're done! Have your morning coffee (or a Moscow mule) looking down on memory lane! Which reminds me ... I never got that drink!


