
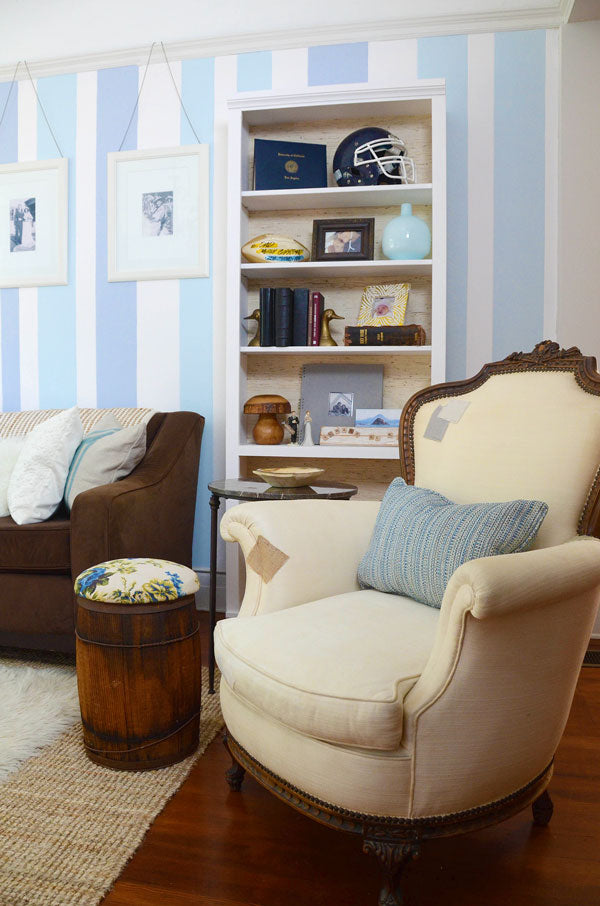
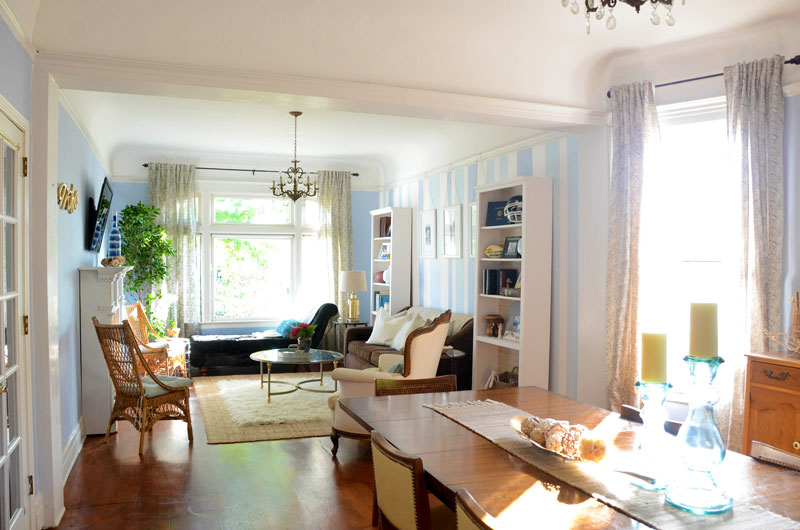
Love how this cozy beachy design turned out for the adorable and wonderful Scribner family! Hope you love it too! This is our season finale episode of Breaking Beige! Hope to bring you more soon!
If you missed the first part of the Scribner's family room, check it out here.
Want more Breaking Beige? Check out: A Delicious Dining Room, The Perfect DIY Vintage Nursery (PART 1), The Perfect DIY Vintage Nursery (PART 2), Swanky Bedroom Design (PART 1), & Swanky Bedroom Design (PART 2).


Shop the room:
- similar style curtains
- gold lamp
- chaise lounge
- similar style accent table
- shag rug
- table runner
- jute rope ball
- decorative branch
- mint vase
- galvanized metal tray
DIY Painted Upholstery


Prep It:
- Behr Premium Plus Ultra in Powdered Gold
- fabric medium
- mini paint roller
- painter's tape
- screw driver (if necessary to disassemble your furniture) and helps to scrape off paint from nail heads
- small artist brush
- stir stick


Do It!:
- Tape off around the upholstry and remove cushions (if possible with a screwdriver) to prep for paint.
- Read the instructions on your fabric medium to get the proper proportions to mix your paint color with the medium. I used 1 part paint to 2 parts fabric medium. Mix the paint with a stir stick.
- Roll the paint onto the fabric until fully covered. Let dry. - If your upholstry has nailheads like the ones we painted, you'll want to get as close as possible to those with the paint so using a smaller artist brush helps to be more accurate. If you do get any paint on the metal nailheads wait until it's dry and scrape off with a flat head screwdriver.
- If the fabric needs a second coat, paint a second coat and let dry.
- Re-attach the cushions. Enjoy!

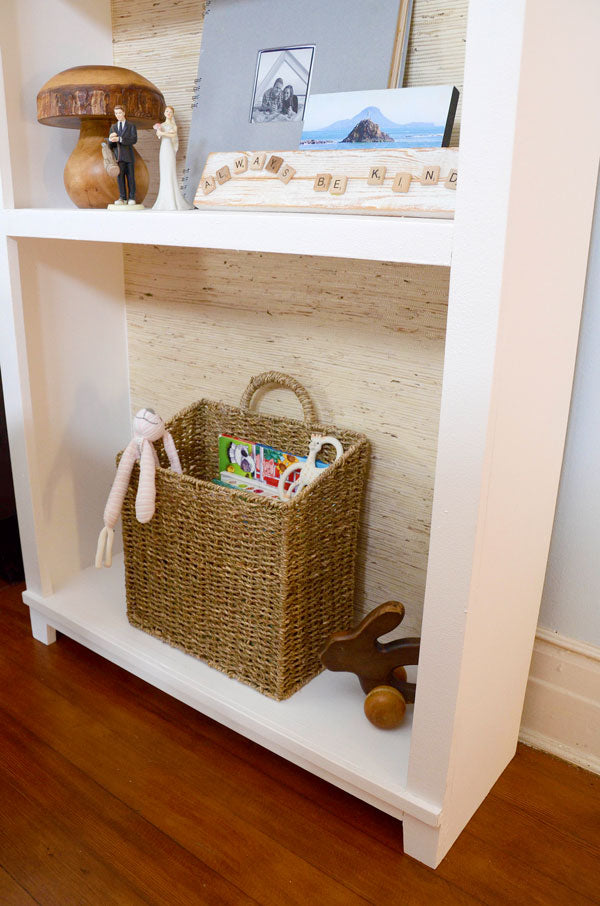
DIY Grasscloth Bookshelf Lining


Prep It:
- bookshelf with removable shelves that is as wide or narrower than the width of your grasscloth
- roll or more of grass cloth (depending on how big/how many bookshelves you need to cover)
- carpet tape
- craft knife
- measuring tape

Do It!:
- Place the grass cloth in the area you want to line and use the craft knife to carefully cut it to size. If this is too difficult you can measure the area with a measuring tape and then mark off on the back of your grasscloth with a pencil where to cut.
- Use the double sided carpet tape to adhere the grasscloth to the back of the bookshelf. Place the tape on the bookshelf first and then start at one end removing the backing of the tape as you press down the grasscloth to make sure it's laying straight and flat. Use more tape around the perimeter and a couple pieces making an X in the center to make sure the grasscloth is secured everywhere.
- Insert your shelves and style in your room!

DIY Upholstery Patches
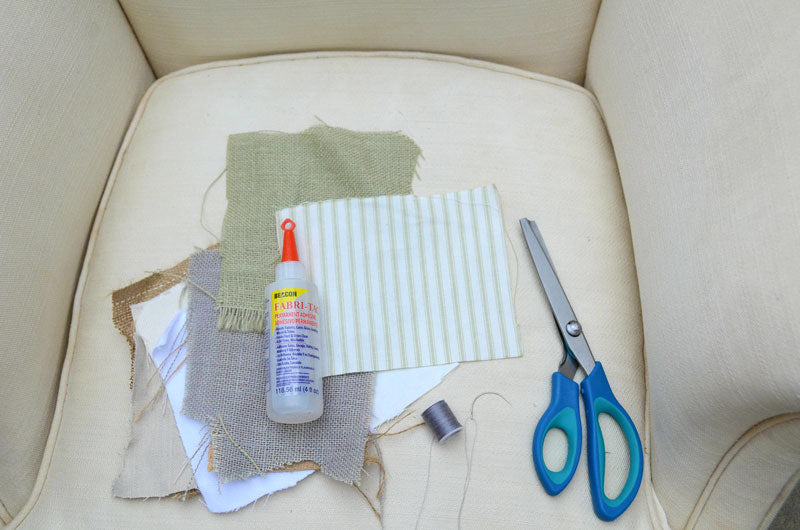
Prep It:
- fabric swatches
- pinking sheers
- fabric glue
- needle and thread


Do It!:
- Cut the edges of the fabric with the pinking sheers into your desired patch shape.
- To further prevent fraying, use a little fabric glue over the cut edges.
- Glue the patch over the area you want patched (small stains or tears). Let dry.
- Sew the patch down to further adhere the patch to the furniture. TIP: A curved needle is easier to sew into a piece of furniture.

DIY Decorative Wood Slice Faux Fireplace

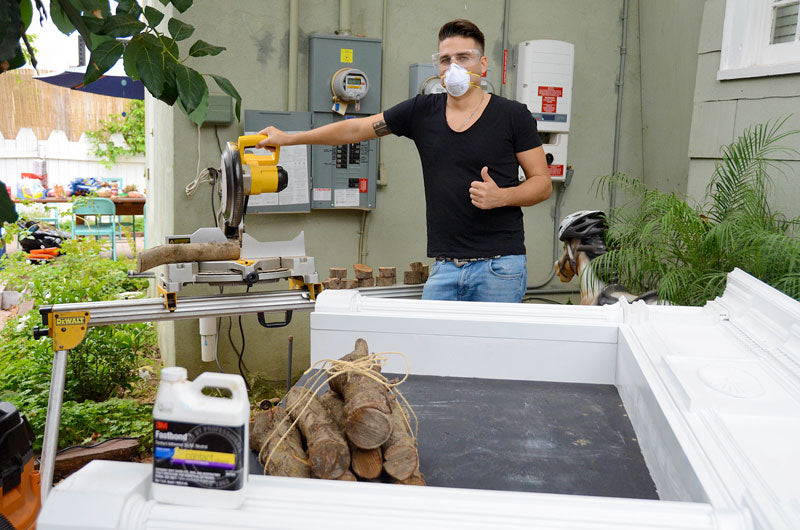
Prep It:
- fireplace mantel
- piece of plywood cut to fit inside the fireplace opening (painted black or color of your choosing)
- round logs
- circular table saw (you can rent them from the home improvement store for the day)
- safety goggles
- safety mask
- contact cement
- paint brush


Do It!:
- Carefully cut thin slices of the wood with the saw, arranging them on the wood backing as you go so you know when you have enough wood sliced to cover. TIP: Be safe, wear a mask and goggles!
- Following the instructions on your contact cement, paint the wood slices and the corresponding space on the fireplace. Let it sit for a while until it's clear then stick them together - Tip: it's important to read the instructions to know when exactly to bond the two painted surfaces for the strongest hold.
- Install the fireplace on your wall using strong screws and anchors and enjoy!


What do you think!?

