
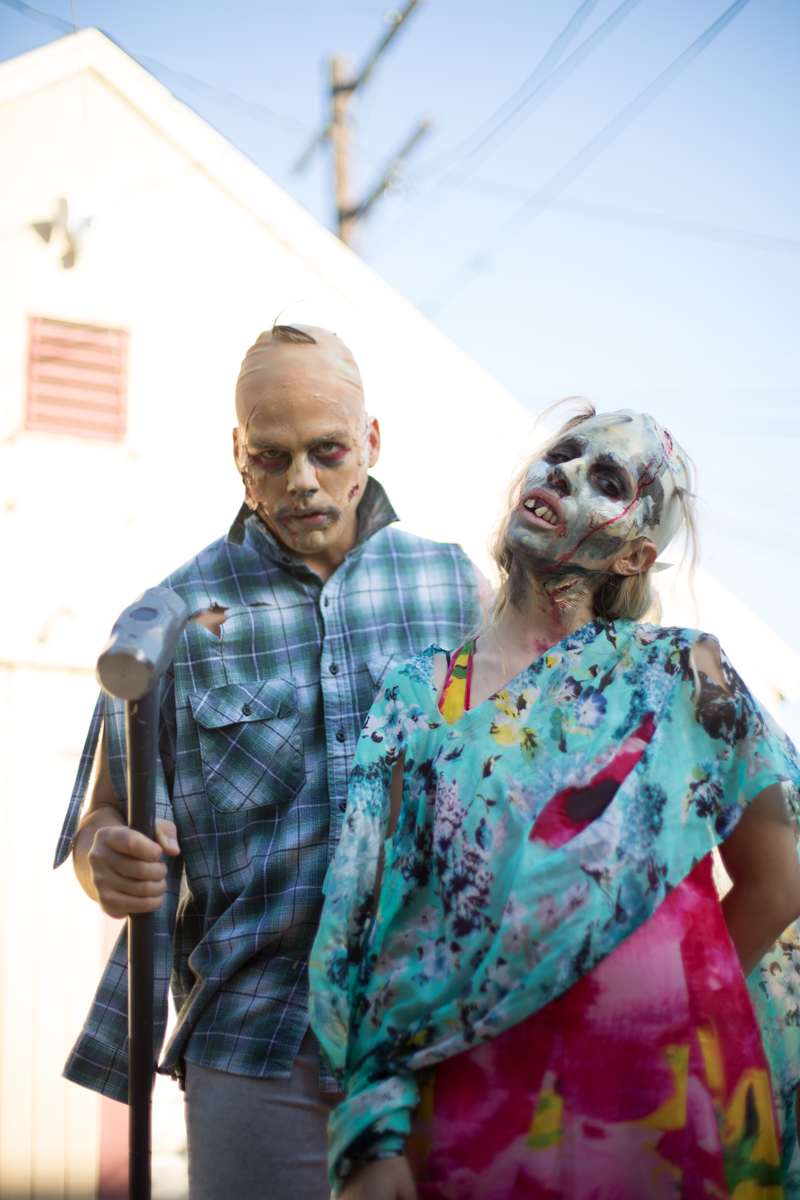
DIY Zombie Makeup
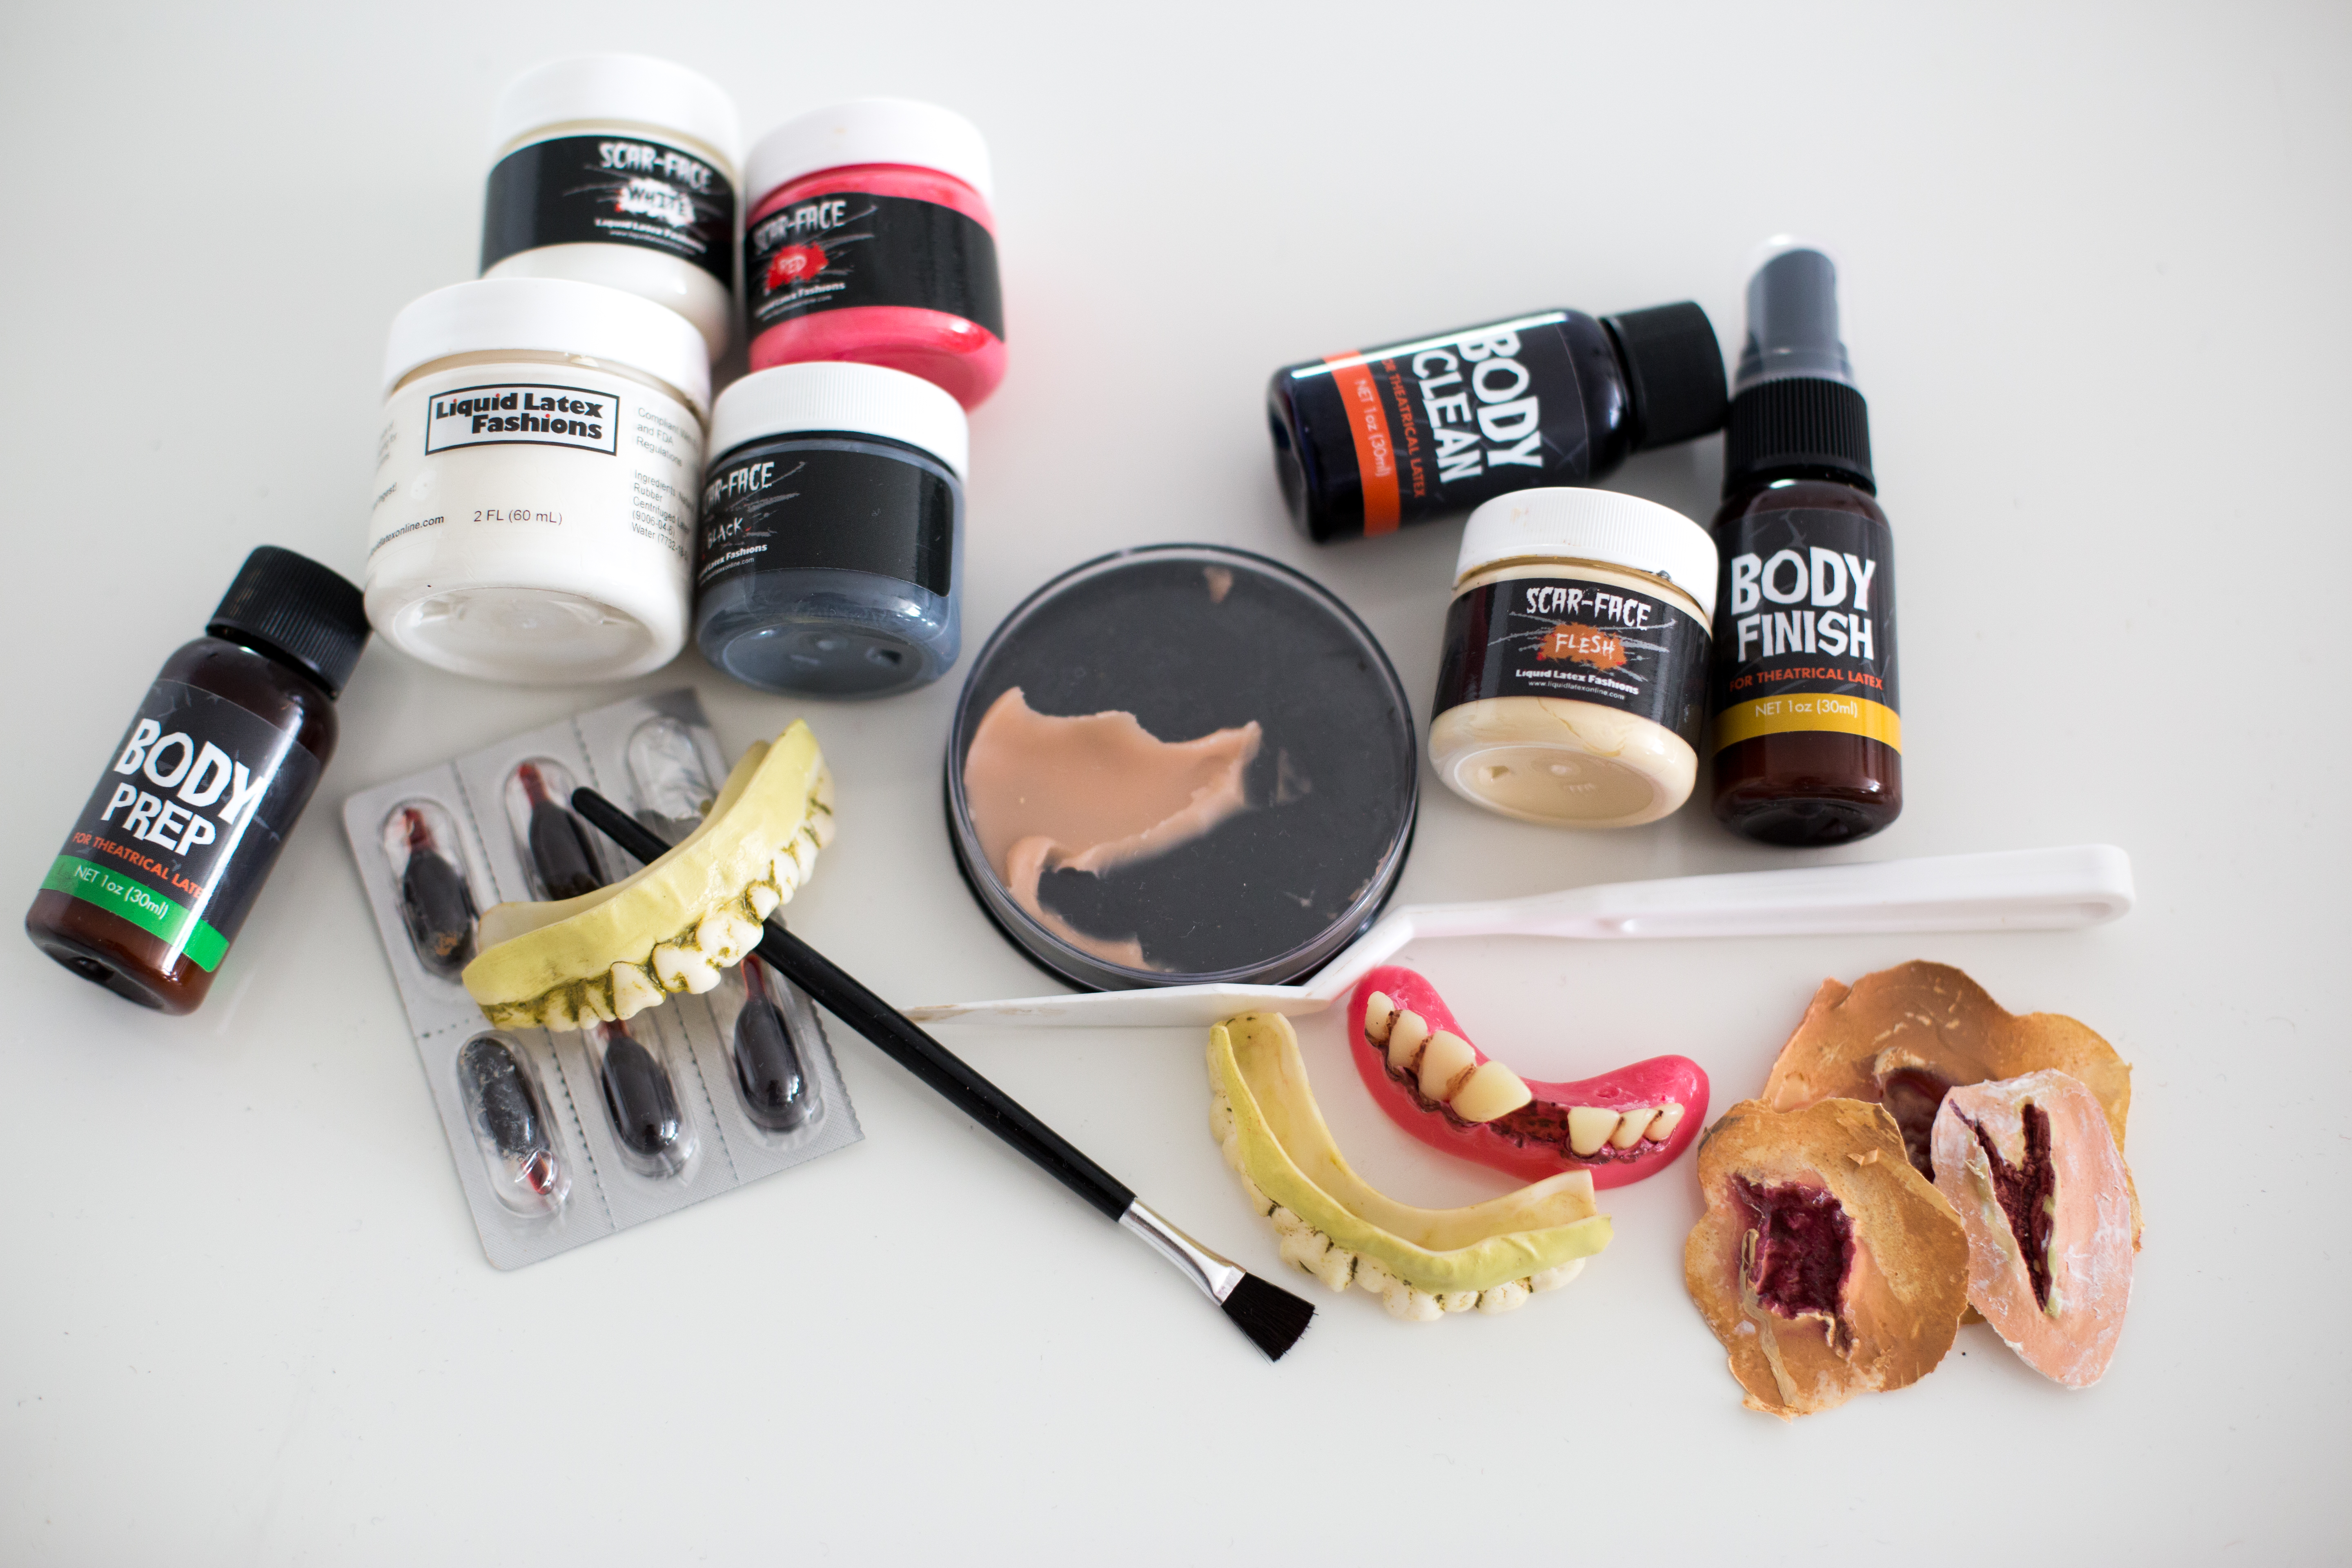
Prep It: (all makeup supplies were bought at the Halloween store unless otherwise noted)- Bald caps
- Liquid latex in flesh color
- Liquid latex in a Zombie kit that has black and white latex colors
- Fake blood
- Fake teeth
- Fake scar patches
- Scar putty – usually comes with a small spatula applicator
- Adhesive (I didn’t have any so I used eyelash glue but adhesive from the costume shop is stronger and better)
- Makeup sponges (from drugstore)
- Red lipstick
- Various dark eyeshadow colors
- Pencil
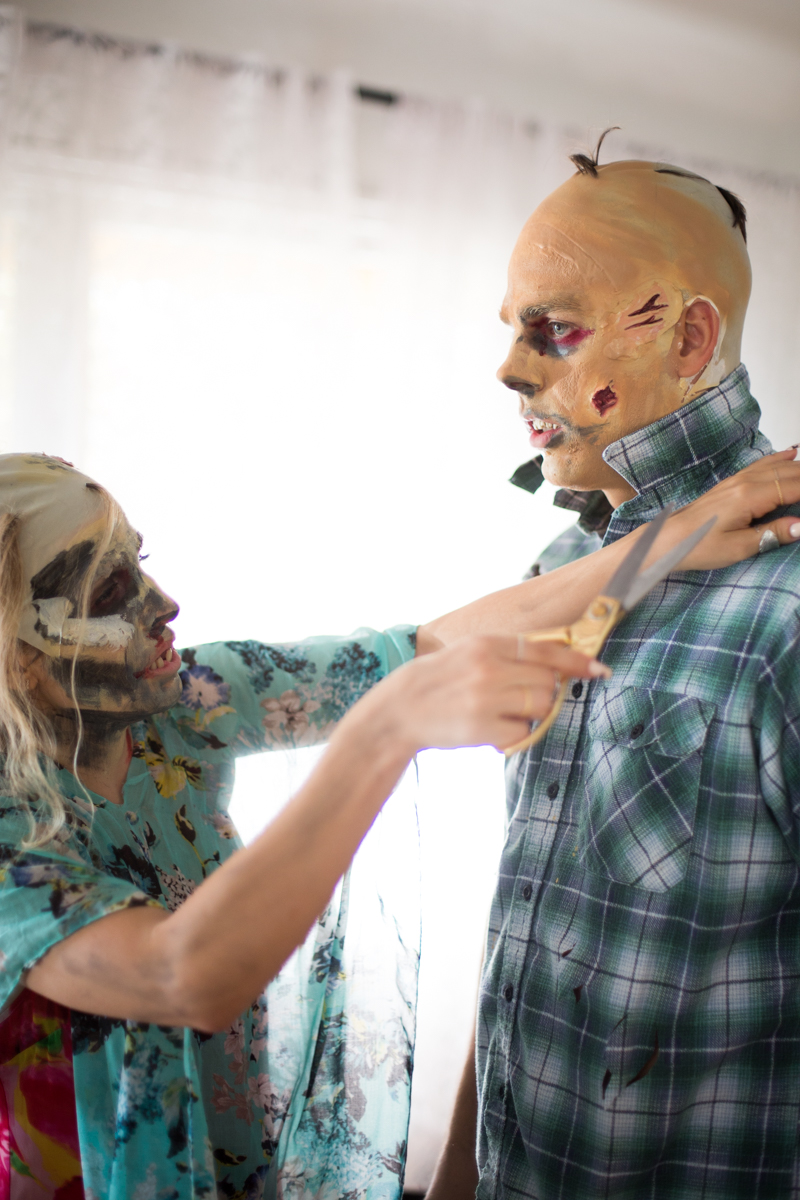
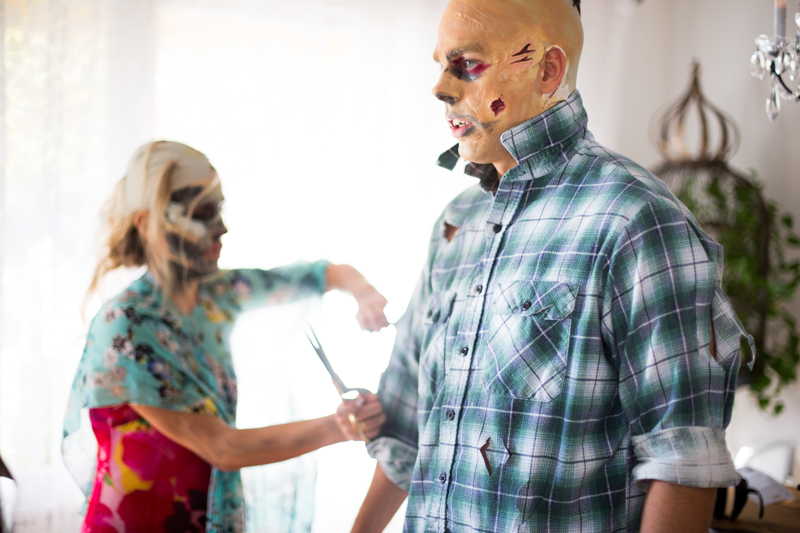
- Scissors
- Latex skin prep and remover kit (really helps to get this stuff off later!)
- Costumes: old clothes you can tear and get dirty!
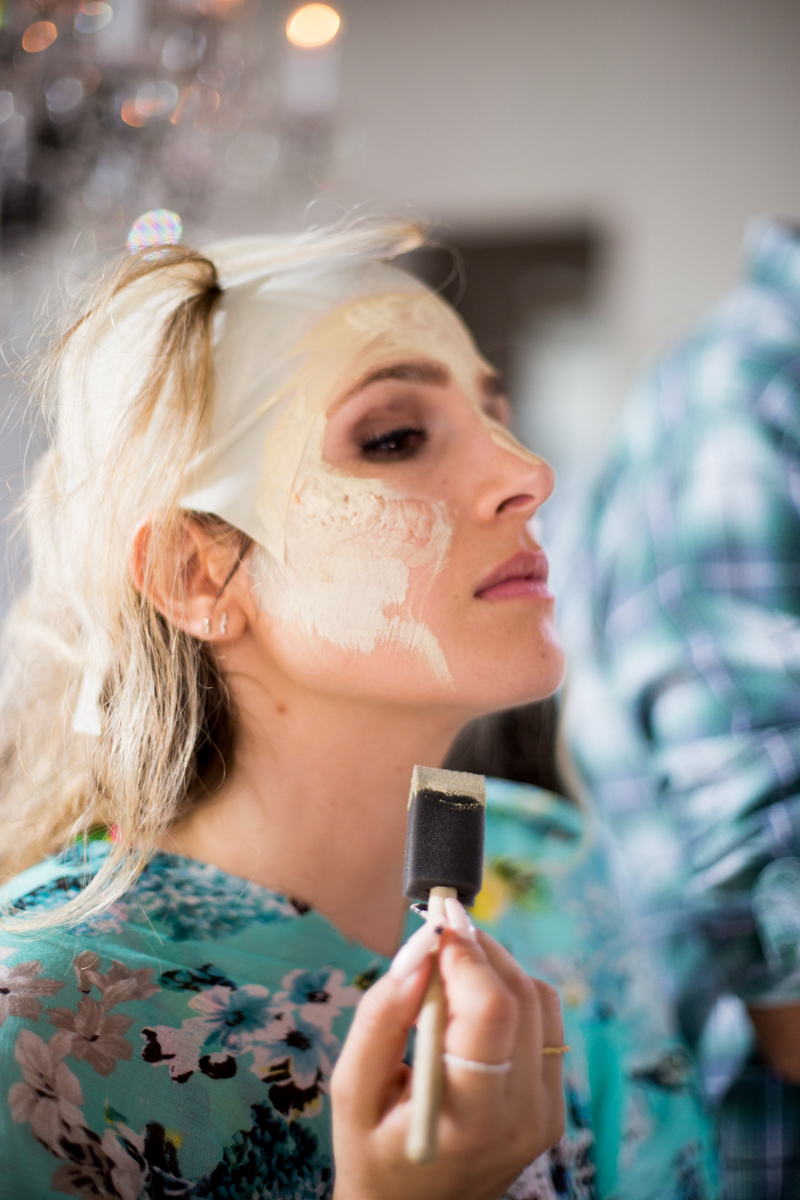
- Use the latex prep lotion on your face and neck – this helps protect your skin and hair when you’re removing the latex later.
- Put on the bald cap and use the pencil to trace around your ears. Remove the cap and cut out the ear shape. Optional: cut little slices in the cap in random spots to pull through locks of hair to look extra dead.
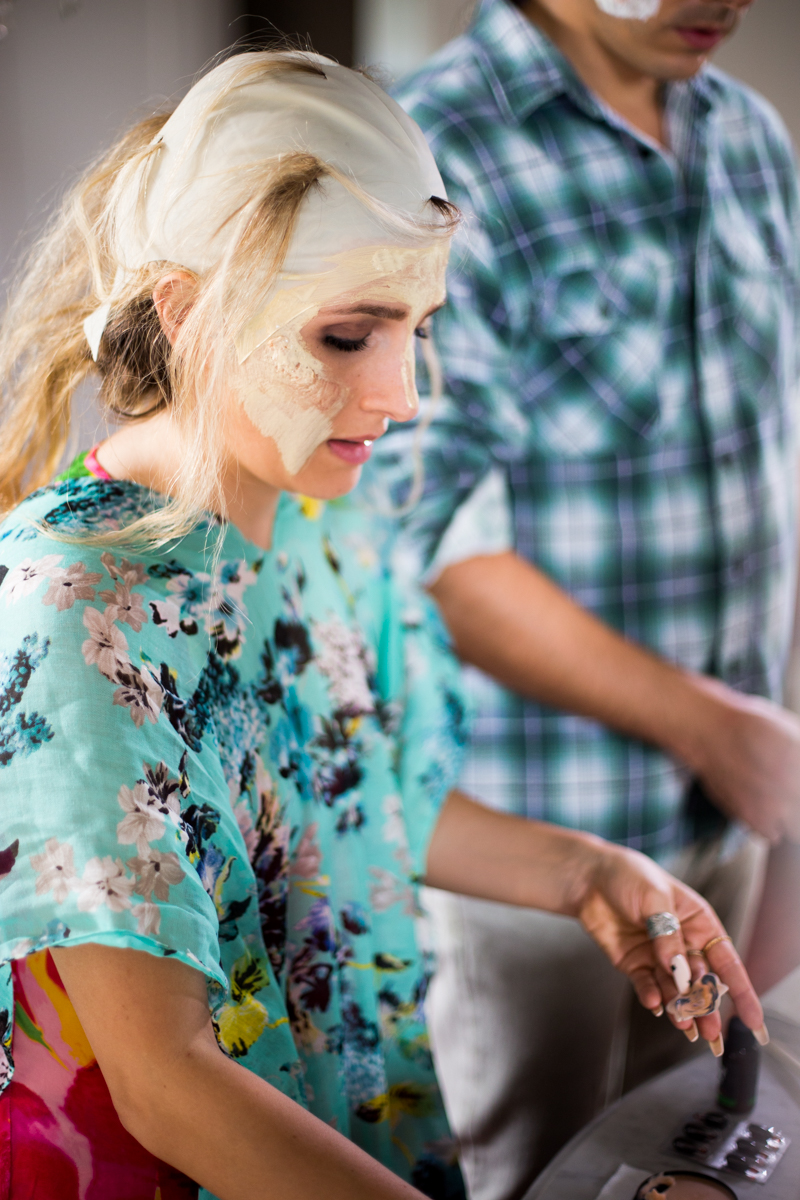
- Put on the bald cap and use adhesive to secure it down around your forehead and temples – we didn’t have the adhesive so I just used a ton of latex painted on with the foam brushes that come in the kit. I have a lot of hair which I balled up and stuffed in the back of the cap. It definitely does not look perfect but hey, I’m a zombie! Use the pencil to pull out locks of hair through the slices in the bald cap.
- This is the part where you get to get creative with your zombie – You can add scars using the scar putty, paint more latex all over using the darker shades to create sunken cheeks and eye sockets and use the scar patches attached with adhesive (conceal the edges of the scar patches using more liquid latex so it looks seamless).
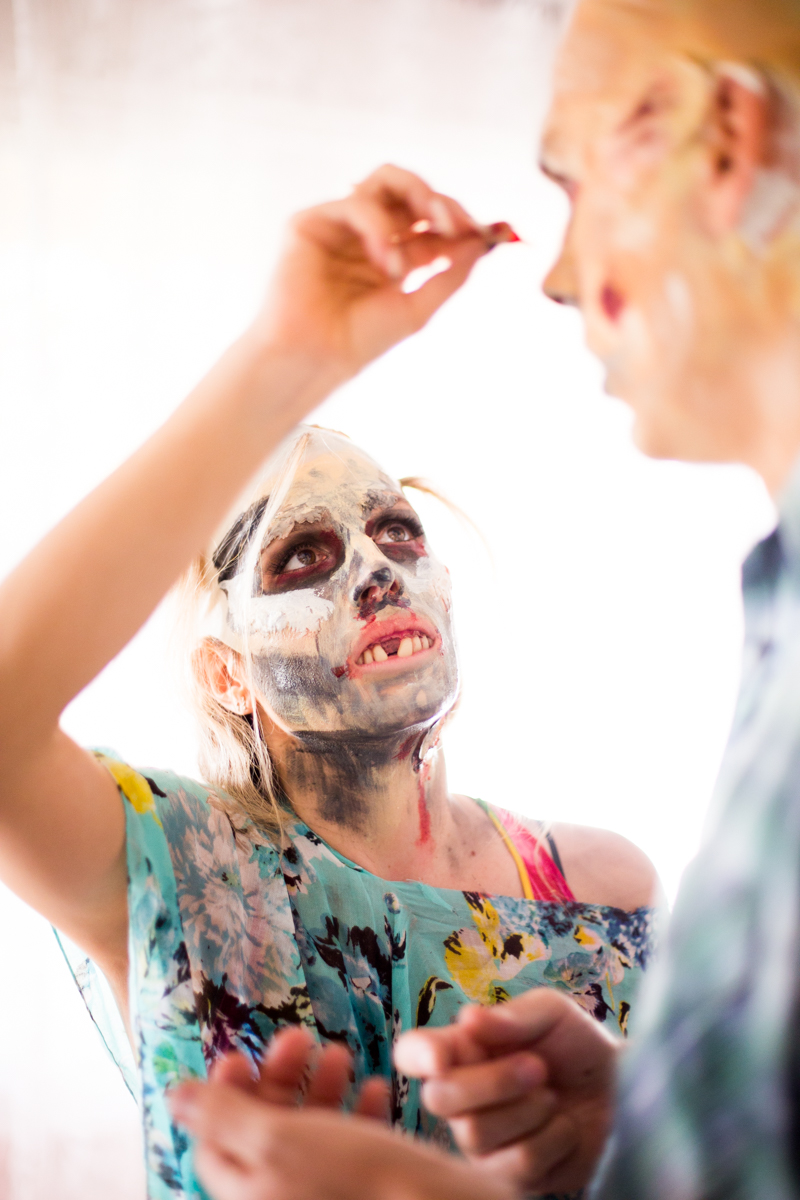
- Use dark shadow around your eyes and red lipstick to make them look red rimmed.
- Use some fake blood pods to drip under your nostrils, at the corners of your mouth and dripping from your tear ducts.
- Insert the fake teeth – which usually come with wax to help them stay secure.
- Slice up your clothes and rub some dirt on them and you’re ready to go!


