
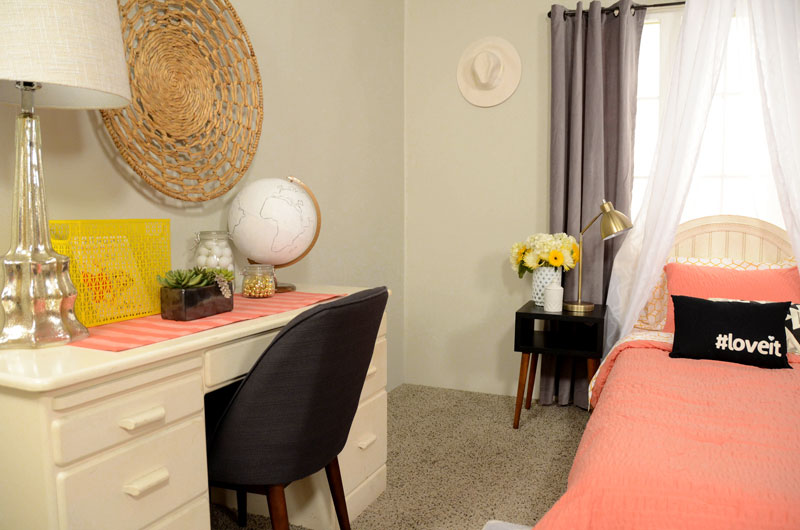
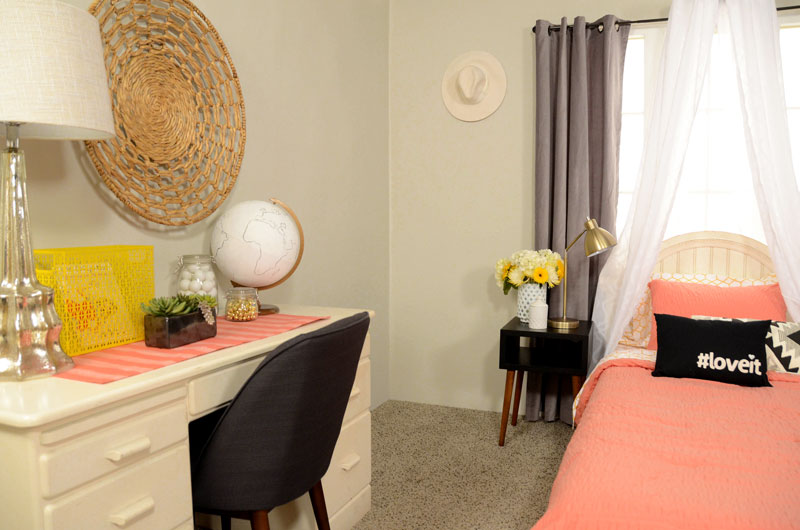
Very excited to be working with Target Style to create some Home content! First up, my challenge was to decorate a bedroom on a budget so I picked a verrrry bland bedroom in a studio space to infuse with some quick and wallet friendly decor fixes. I didn't paint the walls or change the carpet, I only used decor items and a fun DIY canopy made from a hula hoop to add some glamour to the twin bed.
What do you think of the transformation? I'd love to hear from you in the comments and check out some more photos of the room below!
For more Mr. Kate + Target, check out 'Denim for EVERY Body'

Shop the Room:
- sheets: Threshold 300 Thread Count Organic Sheet Set
- throw blanket: Threshold Lattice Throw
- yellow throw pillows: Room Essentials 2-Piece Printed Suede Triangle Pillows
- pink comforter set: Room Essentials Textured comforter set
- #loveit throw pillow: Room Essentials #loveit Lumbar Pillow
- southwest throw pillow: Room Essentials Southwest Lumbar Pillow
- curtain rod
- velvet curtains: Threshold Velvet Curtain Panel
- white side table: Threshold Hourglass Accent Table
- black side table: similar here
- silver lamp: Room Essentials Articulated Task Lamp
- black lamp: similar here
- desk chair: Threshold Modern Anywhere Chair
- accent jar: Privilege Small Ceramic Jar with Lid
- white vase: Threshold Large White Patterned Glass Hurricane Candle Holder
- canopy curtains: Threshold Clipped Sheer Curtain Panel
- desk runner: Threshold 4 Pk Woven Stripe Placemats
- faux succulents: Threshold Faux Succulents in Black Ceramic Planter
- yellow magazine holder: Room Essentials Desktop Storage Unit
- woven art: Woven Water Hyacinth Basket Wall Decor
- cork letters: 3D Cork Letters
- jewelry display: Chainlink Wall Storage- Aged Brass
- rug: Circo Chevron Rug


DIY Hula Hoop Canopy


Prep It:
- hula hoop
- rod pocket curtain panels
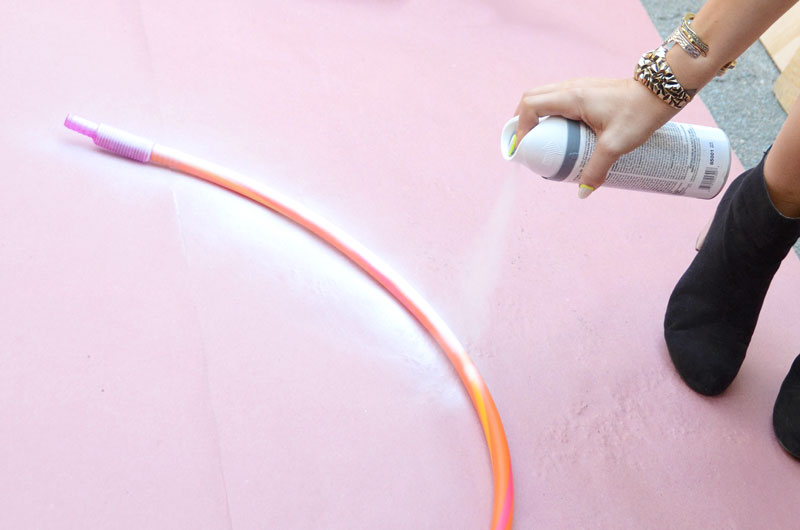
- white spray paint
- twine
- bolt cutters (if your hula hoop doesn't come apart like mine did)
- strong tape like duct tape (if your hula hoop doesn't come apart)
- screw hook and anchor to mount canopy to ceiling


Do It!:
- If your hula hoop doesn't come apart like mind does at the light attachments, cut the hula hoop to open it up so you may slide on the rod pocket curtain panels later. Tip: If you have a queen or king sized bed you may want to leave the hula hoop the original size but if you have a full or twin bed it will look better if you cut down your hula hoop to be a smaller ring (like I did).
- Spray paint the hula hoop. Let dry.
- Feed the curtain panels through the hoop and re-attach the opening using strong tape.
- Tie the twine around the hoop in between the panels to affix the hoop up to the ceiling, or make holes in the curtain panels to feed the twine through to affix the canopy to the ceiling. If you have 3 pieces of twine in a teepee shape going up to the hook on the ceiling it will be more stable.
- Let the curtain panels hang down on the sides or behind your bed and voila!


What do you think? Would love to read your comments below and let me know if you have any questions! xo

