If you're renovating a kitchen, chances are a big part of that makeover will involve the cabinets. While essential for storage, these features tend to be very emblematic of the design era they were originated in. Complete cabinet replacement can run into the thousands for cost, leaving a mid-renovating homeowner with a might big question mark and a potentially unfinished kitchen! Yikes!
Fear not, however, my mid-makeover friends, for I have the perfect solution that saves a lot of $$$ and looks absolutely amazing. Instead of replacing your entire cabinet system — just replace the doors! Switching the facing of these features (and throwing on some new hardware for a shiny, final touch) is the perfect tune-up to get your kitchen back on track!
Check out this hack in hack-tion on OMG We Bought a House!

Prep It:
Custom cabinet doors White paint Paintbrush Drawer pulls Slow close hinges


Do It!:
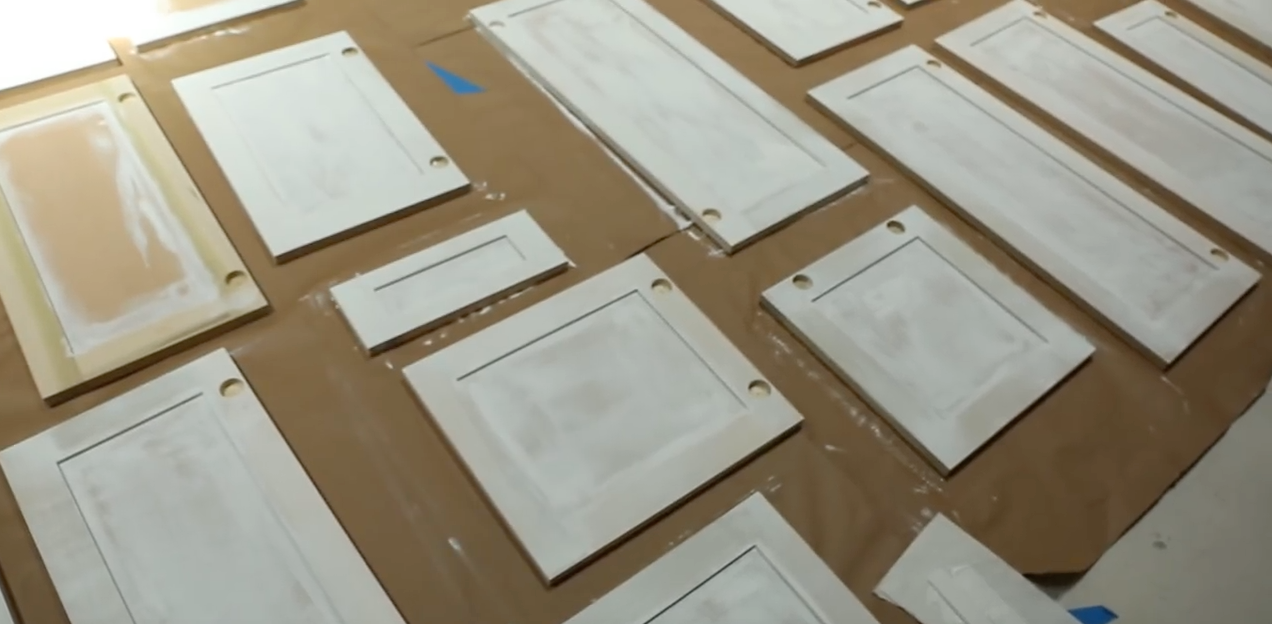
- Order or purchase the cabinet doors you need. There are websites (like Cabinet Now, also linked above) that carry almost every size and style of cabinet or drawer face imaginable. They come in different wood finishes, though you and also opt for unfinished and paint them yourself, like we did!
- If you do elect to paint your cabinet doors, set up an open space with a drop cloth or large roll of paper underneath. When it's time to paint the sides of the cabinets, we found it useful to prop them up on paint cans or other items found around the room, for an even coating. Paint all sides (back sure to paint the back, too! This will be visible when you open the cabinets!). You will probably need at least two coats!
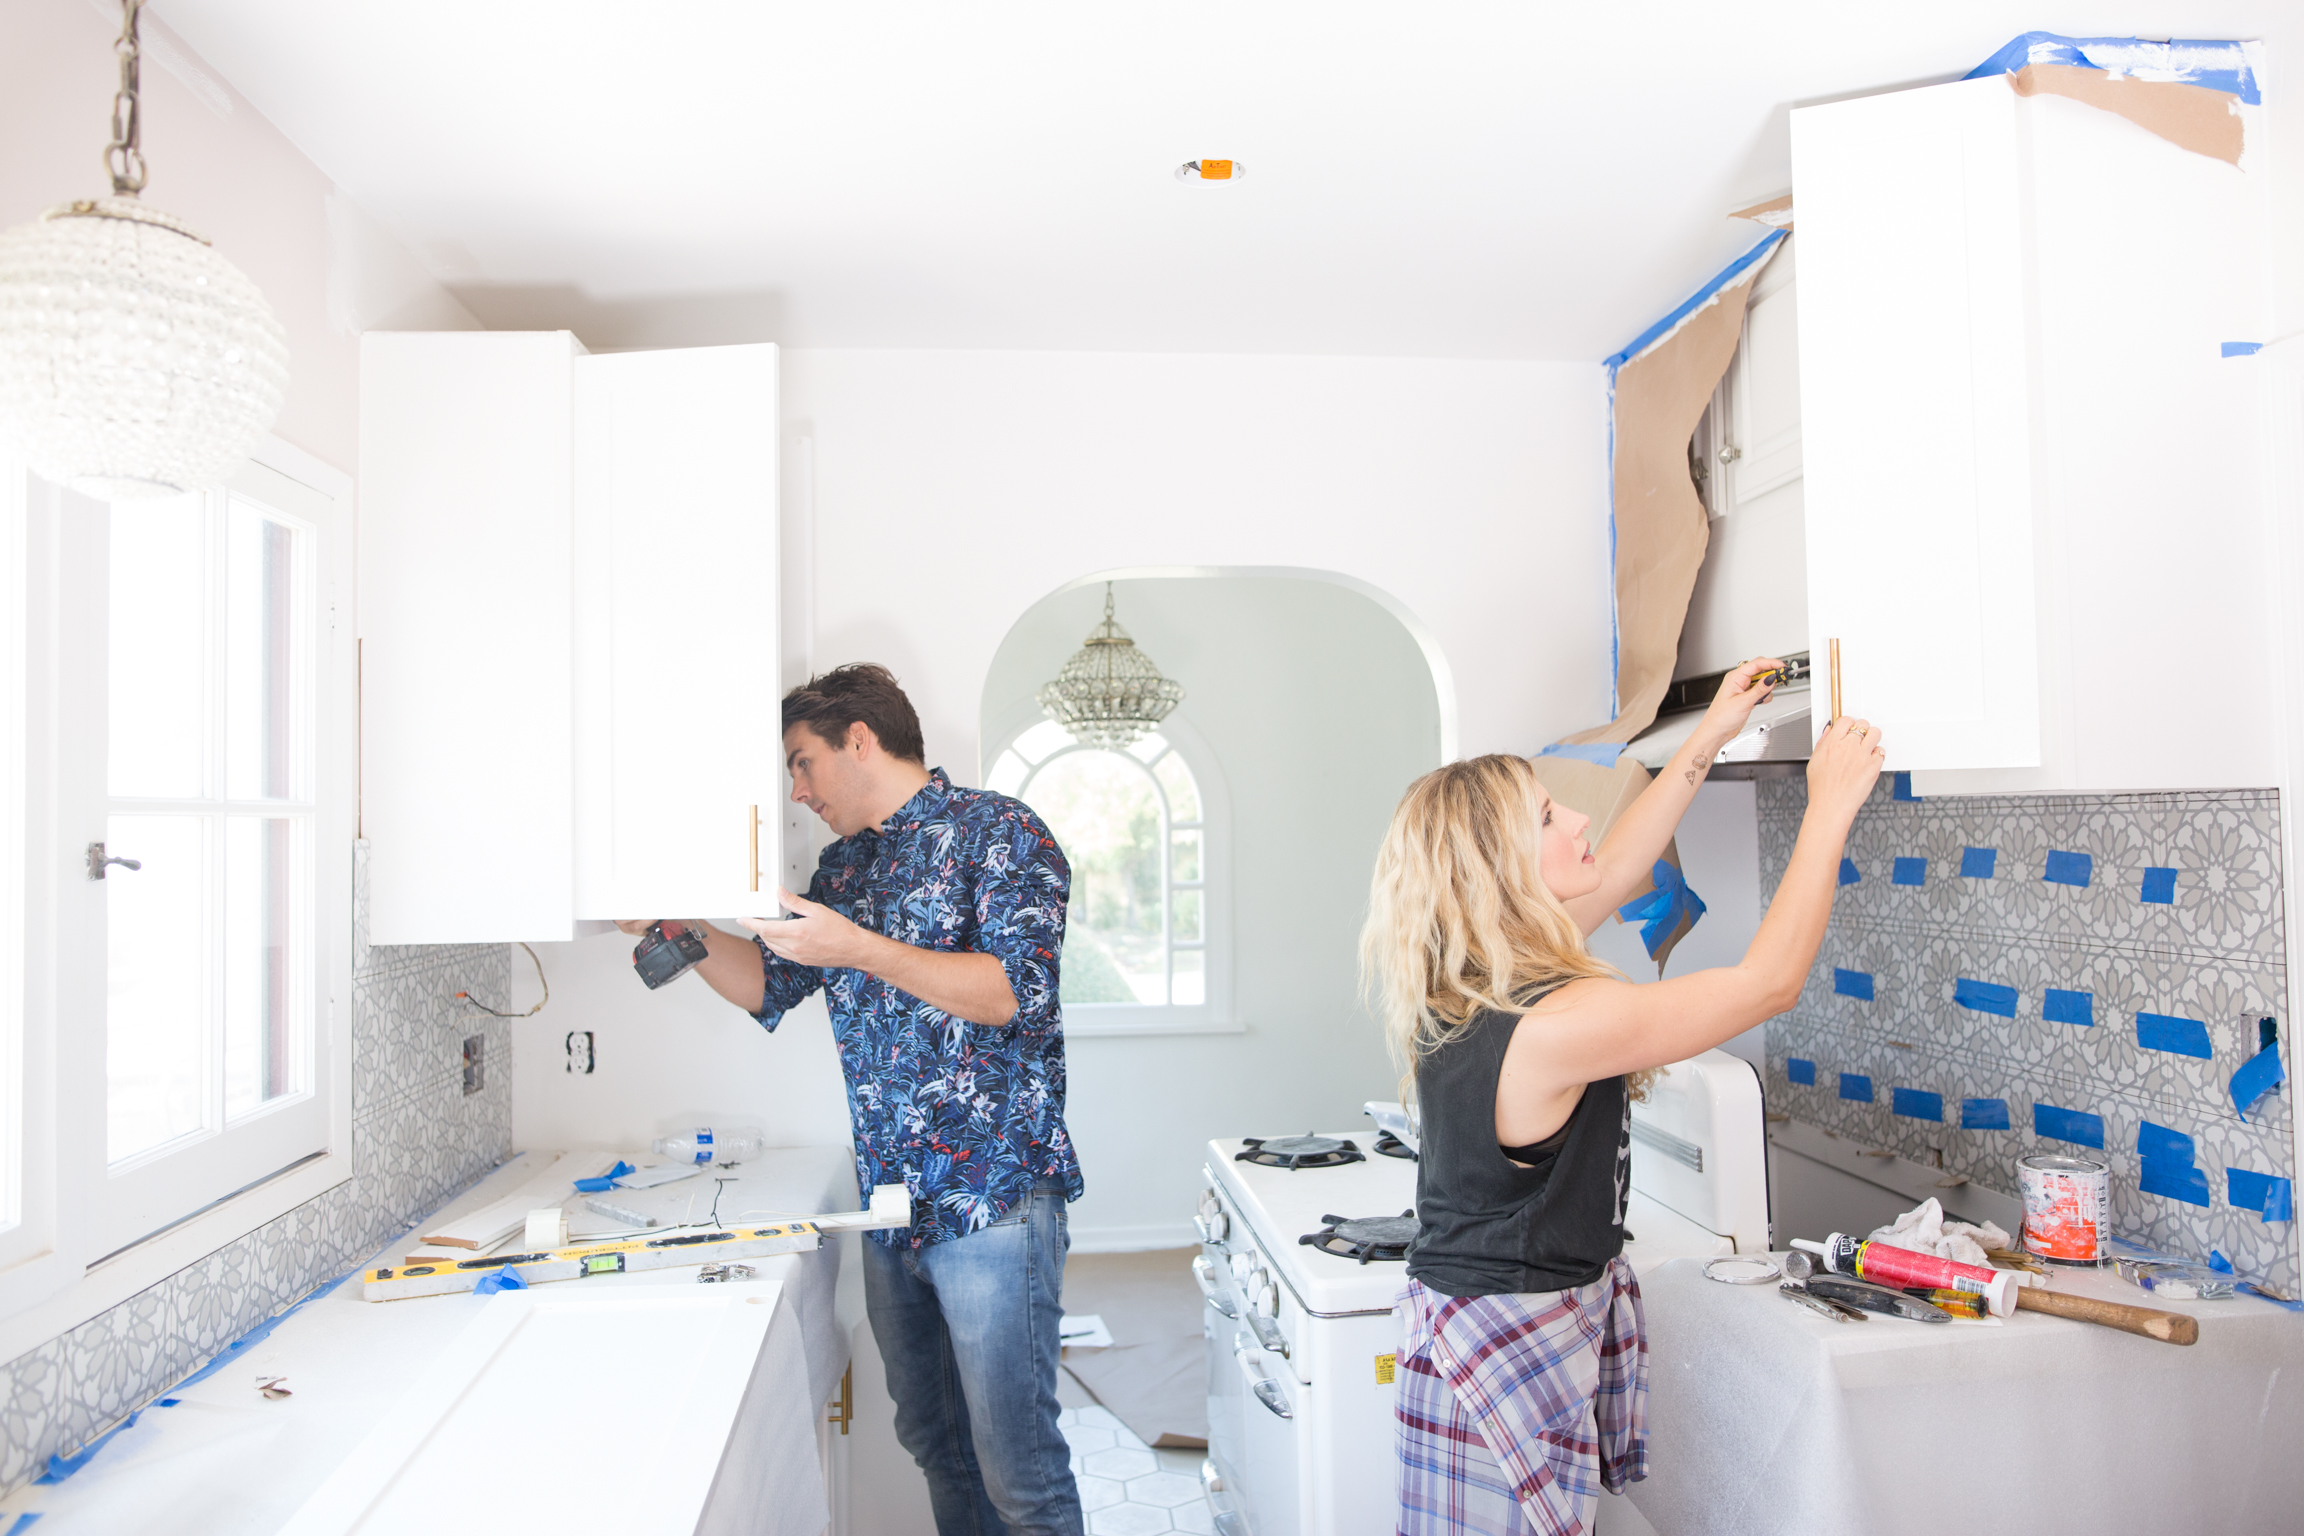
- When you're ready to install the cabinet doors, decide where on the face you'd like the handle pull to be located. Measure and mark where you will need to drill (then repeat on each cabinet.) Drill the holes necessary for the handles.
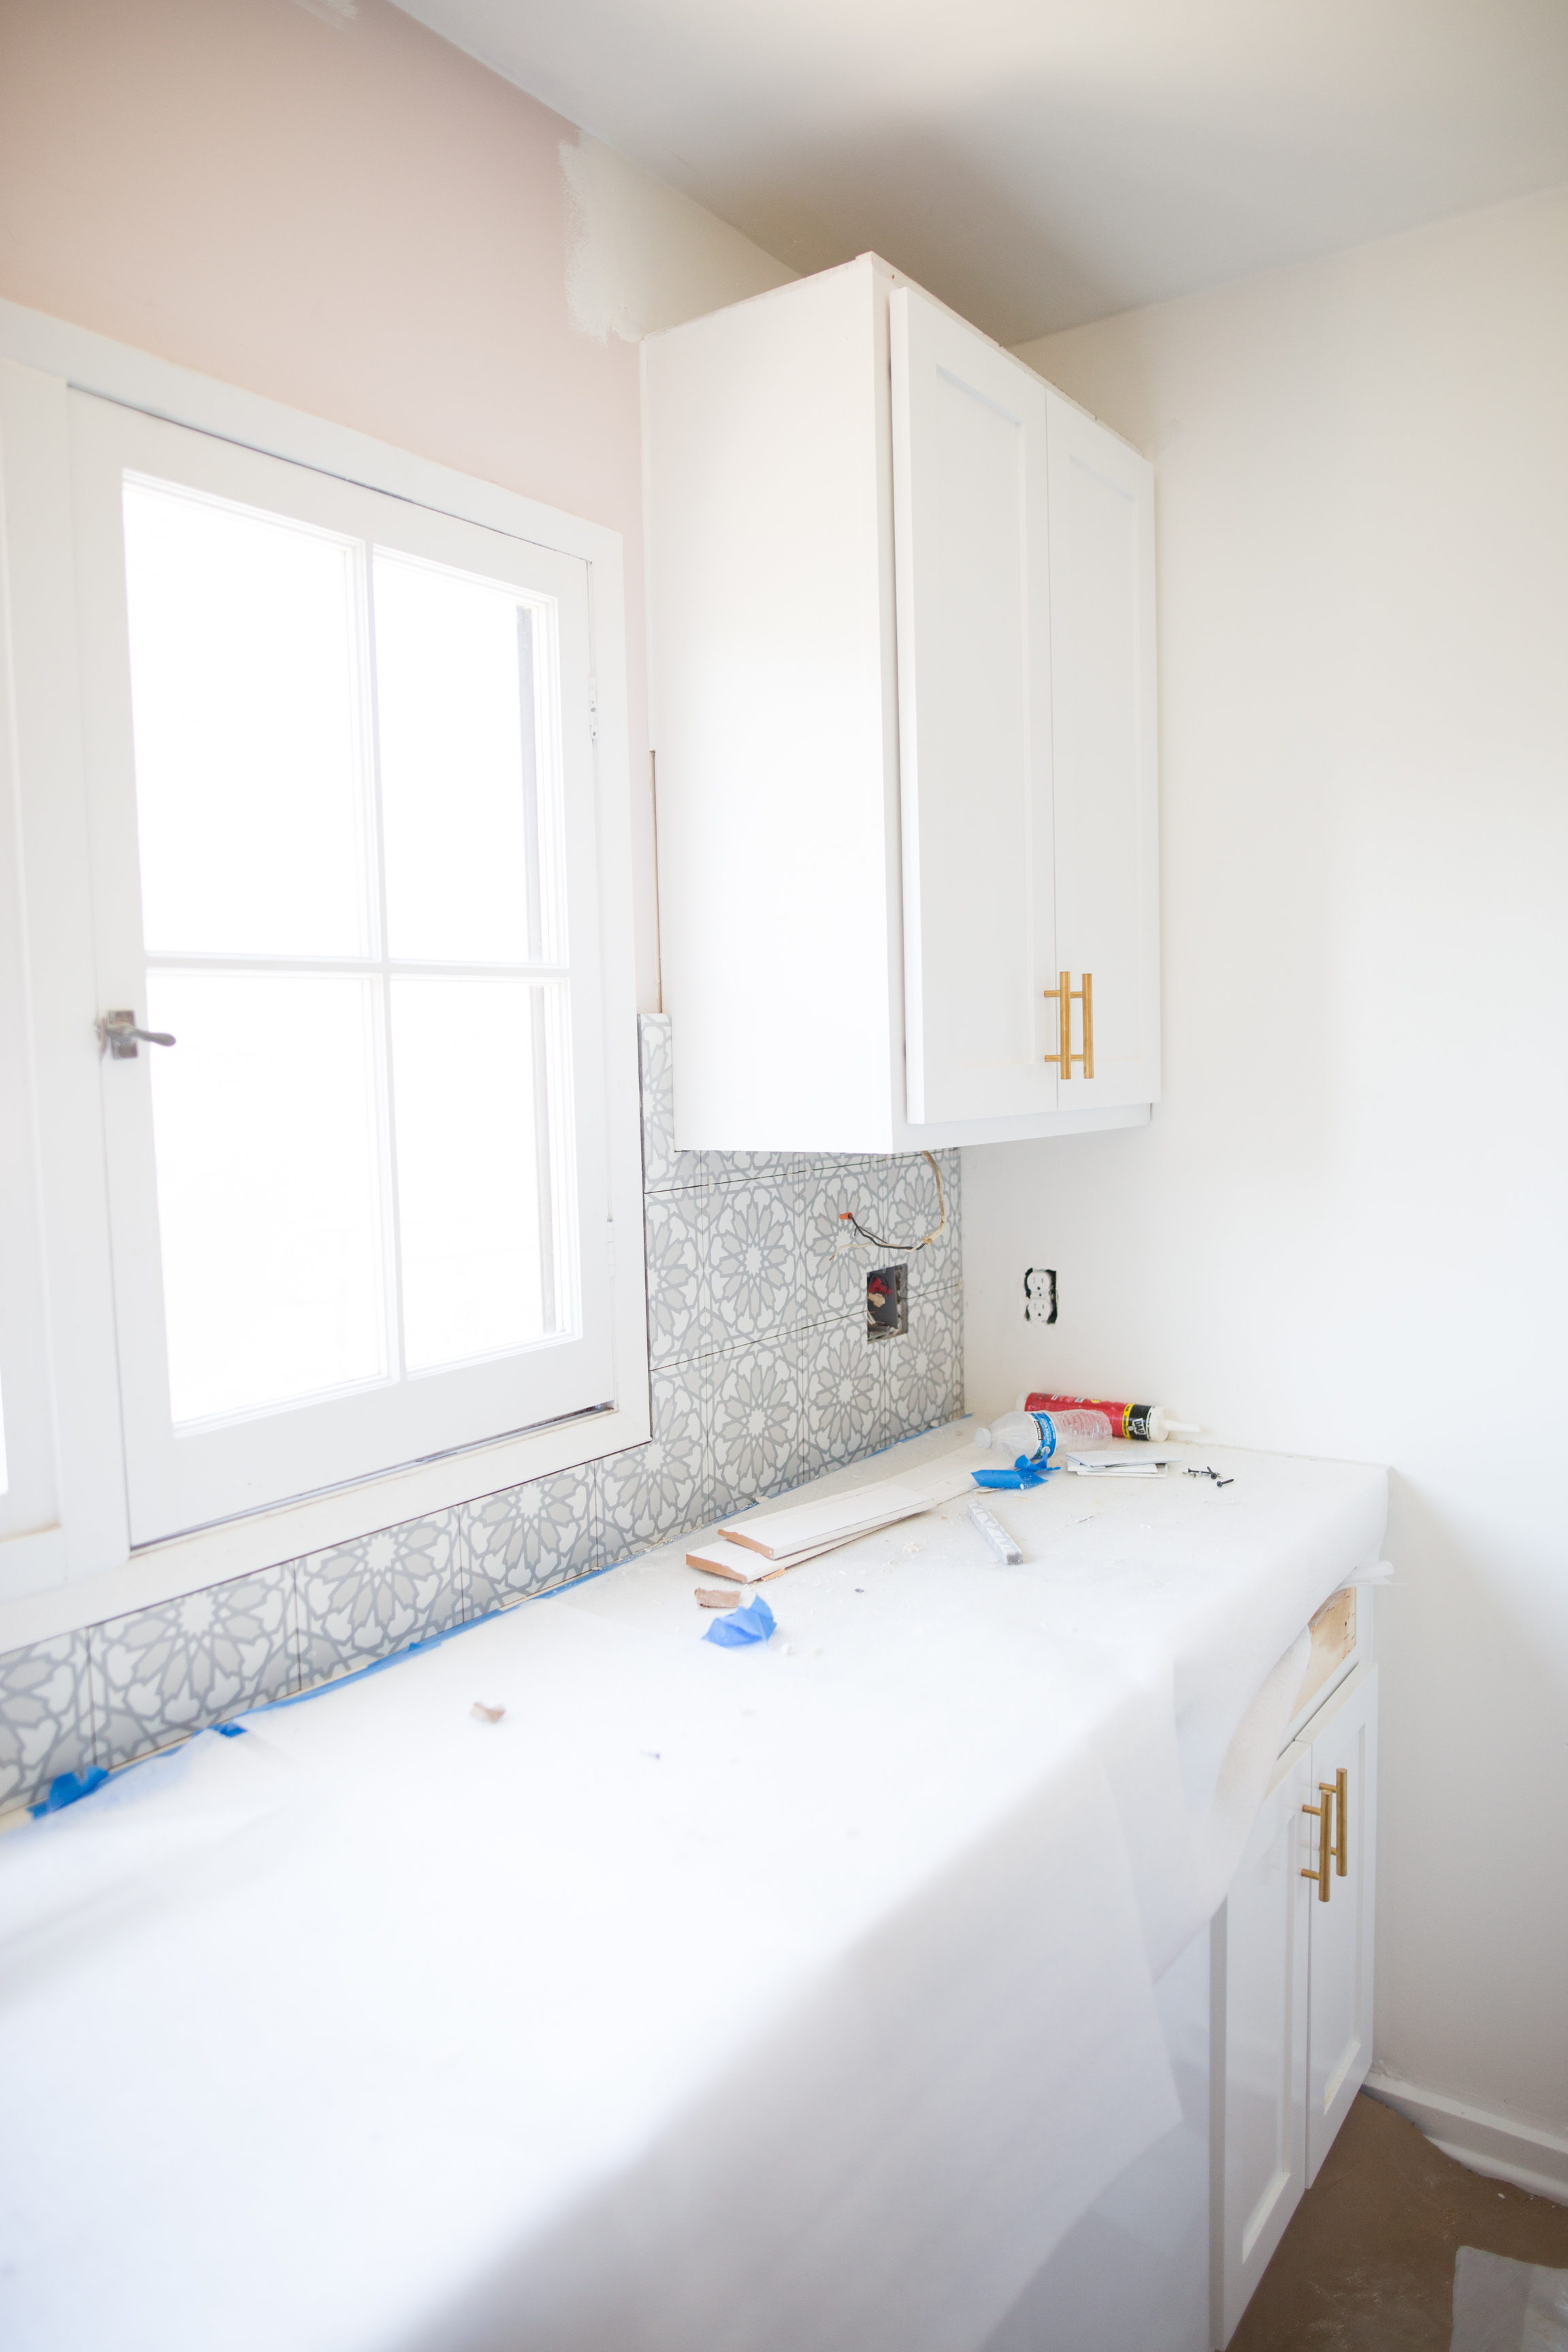
- If you haven't already, remove the current cabinet doors and hinges. Install your new cabinet doors with slow close hinges — a nice option for people who get stressed out by accidentally slammed cabinets!
- Lastly, install your handles, and voila! Your cabinets are looking good as new!