As a YouTuber, but also an obsessive Snapchatter (follow me: MrKate!), and occasional selfie-taker, I know the importance of a good background. So, when I was helping Manny Mua decorate his Beauty Room where he shoots all of his amazing videos, I immediately saw the opportunity to DIY some amazing backdrops that he couldn't find anywhere else.
We made his backdrops in silver sequined fabric, pink and teal satin fabric, and a grayish blue microsuede, but you could use this technique to make backdrops out of anything! I used a very similar technique to make posters out of Instagrams, so this is a great method to hang oversized wall art, too!


Prep It:
Fun fabric cut to 4 feet wide 4 thin wood panels (4' long) 6 nuts & bolts Nylon string Tape measurer Ruler Power drill Hot glue gun Tape Scissors


Do It!:
- Start by finding the center of your pieces of wood (which should be exactly as wide as your fabric.) Ours was easy since we cut everything to 4 feet, but if you have a more specific width, measure and find your center point! Once you've found the center, mark with a pencil on the wood.
- Measure 3 inches in from either end of the wood pieces and mark with the pencil (these marks should be as close to the center of the wood as possible. If you need to measure the distance down, instead of just eyeballing it, go for it!)
- Drill holes on all the marked spots, in the center and on the edges of the pieces of wood.
- Depending on the color/ pattern/ metallic of the fabric you chose for the backdrop, choose a color (or 3!) of nylon string and make two braids about 8 inches long, tying them off at either end. These will end up being the straps of your backdrop!
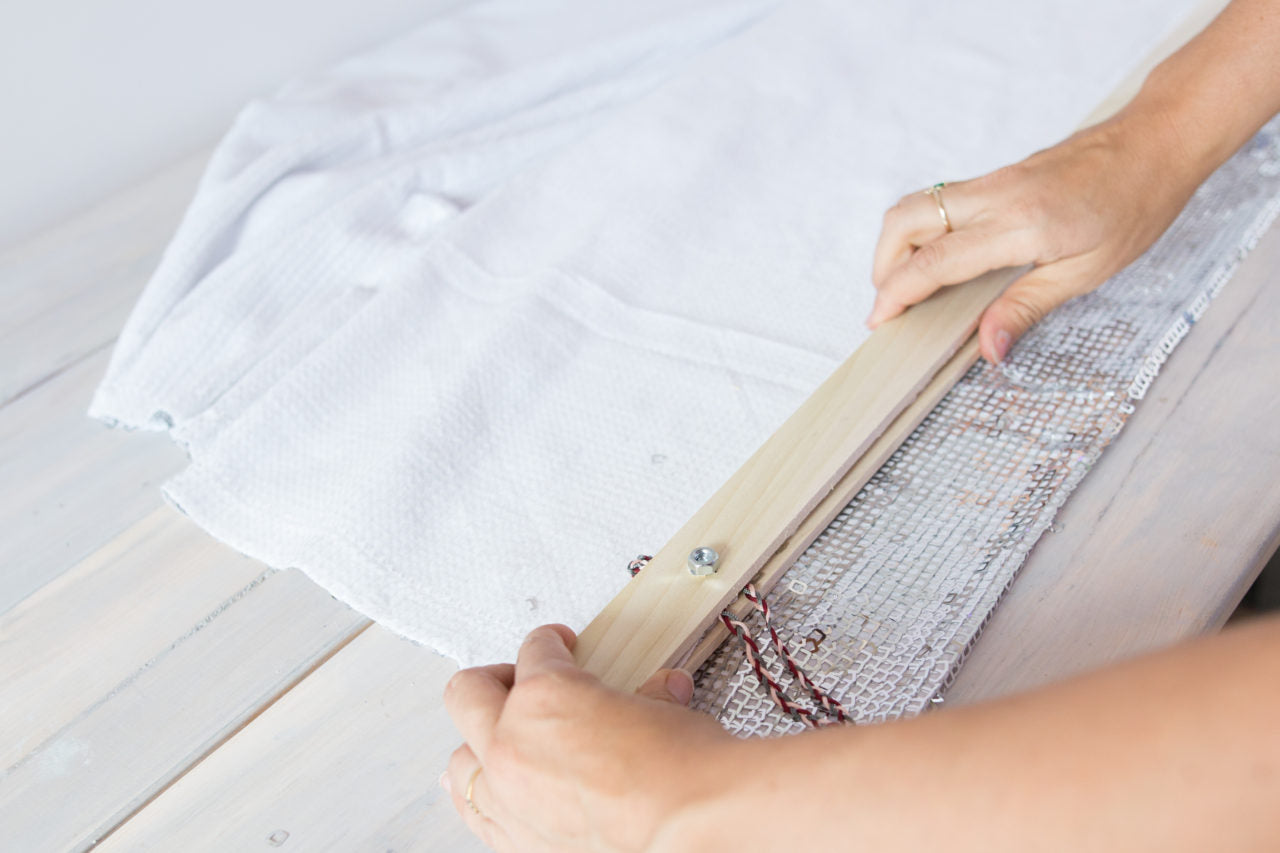
- Now it's time to line up the fabric with the wood pieces (2 on top, 2 on bottom, with the fabric sandwiched between. Cut off any excess fabric and mark through the 3 holes in the wood with the pen onto the fabric. Then remove the fabric from between the wood pieces and cut small holes on the spots you marked.
- Starting with the top pieces of wood, lay one down with the inside (where the fabric will be glued to) facing up. Tie the braided nylon into a loop and place it over the hole, then glue into place. Now line up the fabric underneath the center holes and start glueing along the length of the wood.
- When you're finished gluing the fabric to the first piece of wood, add glue to the top of the fabric and attach the second piece of wood (making sure all the holes line up!)
- Now screw this little wood & fabric sandwich together real tight with nuts and bolts through the 3 holes.
- Repeat steps 6-8 on the bottom (minus the nylon loops! Those should only be on the top.)
- Use hooks or nails to hang your backdrops on the wall! Now ... selfie time!


