Wasn't it just this past weekend I was saying that one of the best ways to occupy wall space is with your own art? OMG it was! But I don't just say these things for my health guys. When it came time to makeover my patio pergola into a home-chella springtime paradise, I put hot glue gun where my mouth was and created this colorful, textured, geometric wall art for the space.
Color me in love! If I had known that all you need is some string, paint, hot glue and a matted picture frame to add a gorgeous, welcoming touch into a room, OMG We Bought A House might have just been 2 seasons of me whipping up different variations of this DIY wall art!


Prep It:
Watercolor paper Acrylic paint (I used a pretty marigold color!) Different colors of twine Flat paintbrush Hot glue gun and glue sticks Picture frame and photo mat Scissors


Do It!:
- If your paper is larger than your photo mat, measure and mark what area will show through.
- Paint a large stripe or two down the length of your paper, letting the ends finish in an organic, brushstrokey way. No need to paint the entire length of your paper! Having some white show beneath and around your paint makes it look effortless (and effortless pretty much always equals cool.)
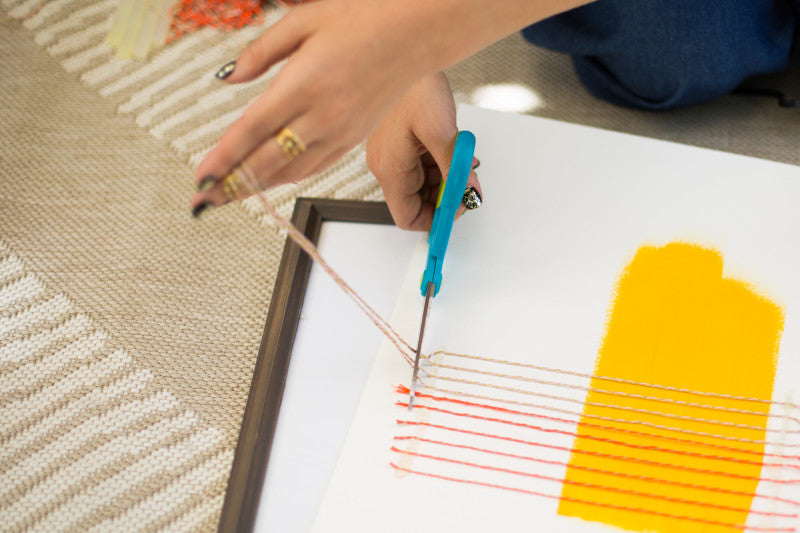
- Roll out and cut some pieces of twine, about 1-2 feet long each. Lay them out over your painting, and figure out what positioning you would like best! I wanted mine to look very structured, so I color blocked my twine into groups of 4 running perpendicular across the yellow lines.
- When you've got your twine sitch figured out, squeeze a line of hot glue on your paper. Make sure the glue isn't visible with the position of the mat! If you're not using a mat, apply the glue on the back of the paper. Moving quickly (and carefully!) lay each twine string into the glue and hold down until secure. You can repeat this process as many times as you need until all the twine is perfectly in place!
- Wait for the glue to dry, trim any excess twine, and frame that art! Hang it on a wall inside, outside, on your desk ... wherever!