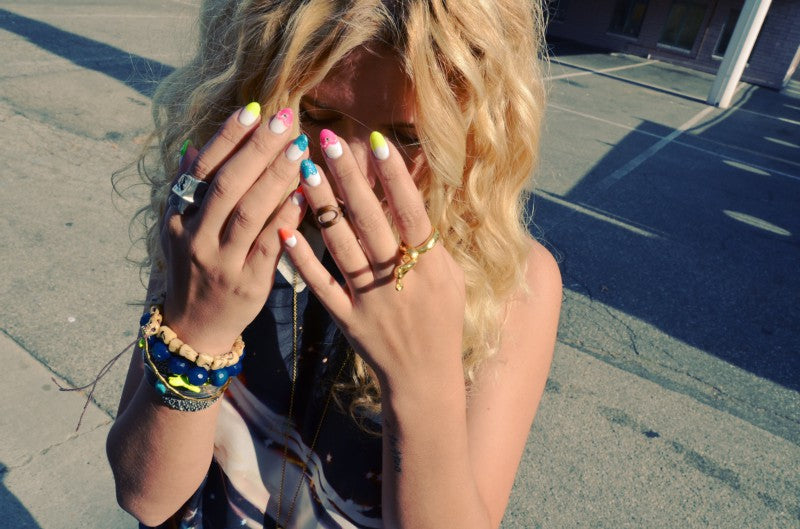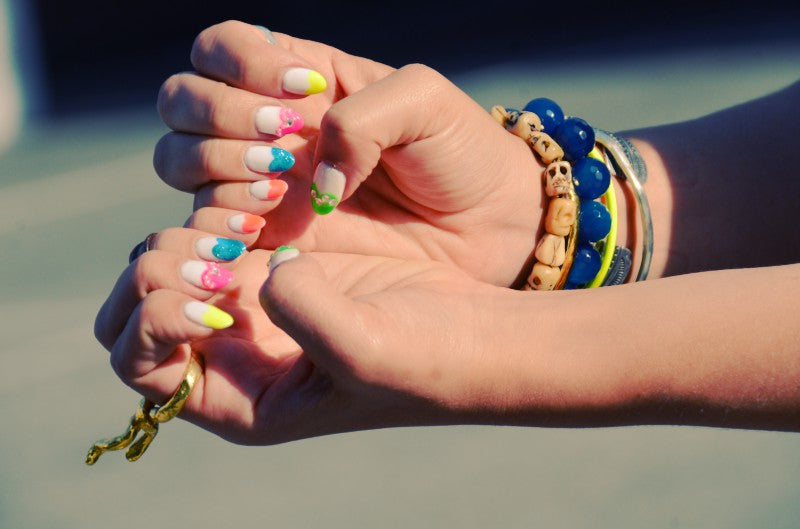
i teased this heart tipped manicure a couple weeks ago in this outfit post and here is the tutorial! the heart on shape is really easy to create using the brush that comes with the nail polish bottle.
i buy most of my Gelish gel manicure nail colors off Amazon as well as my rhinestones and 3D nail art. recently i bought a package of nail art pearls (that i used on my ring finger in this manicure) off of BornPrettyStore.com -- for more detailed info on nail art supplies see this post and for my basic gel manicure tutorial go here!
also, since you lovelies are asking on YouTube, here's more info on my tattoo!
Mr. Kate's DIY 'Heart On' Heart French Tip Nail Art
watch the video above for the Quickie tutorial
Prep It:
- if you're doing gel, have your gel manicure supplies on hand: LED light, base coat, PH prep, cleanser, etc. see this post for basics.
- nail polish base color and heart tip colors of your choosing - you could do all of your tips in the same color but i chose to use Gelish 'Sheek White' as my base and various neon colors for the tips
- clear top coat
- nail file
- 3d rhinestones and or pearls - buy from Amazon or BornPrettyStore.com - see links and info above
- tweezers
- file your nails into a point or rounded point tip - this will be the point of your heart.
- paint your base color - and cure it if you're using gel
- using your tip color, create two humps starting from the outer edges of your nail about half-way down your nail. let them meet in the middle to create a heart shape. fill in with color below your two humps towards the tip. cure or let dry and repeat if needed for deeper color.
- pick which nails you want with some 3d flair - go crazy, do all of them or just one or two like i did - and paint a coat of clear top coat (don't cure yet).
- using your tweezers, place your rhinestones or pearls along the rounded humps of your heart shapes to highlight the design. cure your gel or let your regular polish dry once they're set.
- paint a couple more coats of clear over your 3D nail art to seal.


