Here's the thing, I'm not a bag lady. I swear — I'm not. What I am is a storage lady. I can't help it, I just love me some storage. You saw the wall of DIY supply laden shelves on Office Goals! But there's no reason that this storage lady can't take a note from all those bag ladies and make my stuff-organizing a little more stylish.
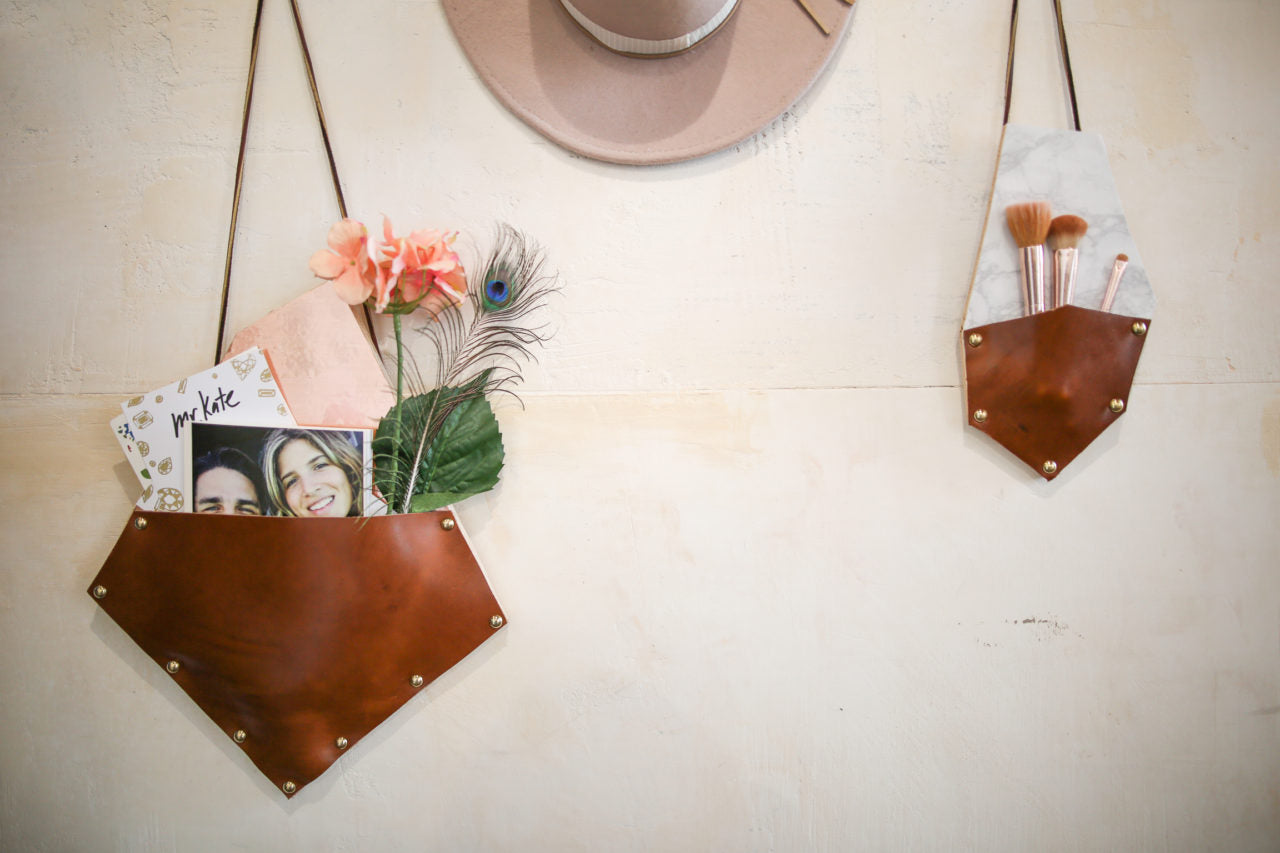
These Geometric Wall Storage Pockets are where fashion and function meet up, have a drink, get down to business, and create something pretty dang incredible. I am already so obsessed with the flair that they add to our office walls, I'm ready to unhook them from the wall, sling them over my shoulder, and carry them around like a purse!
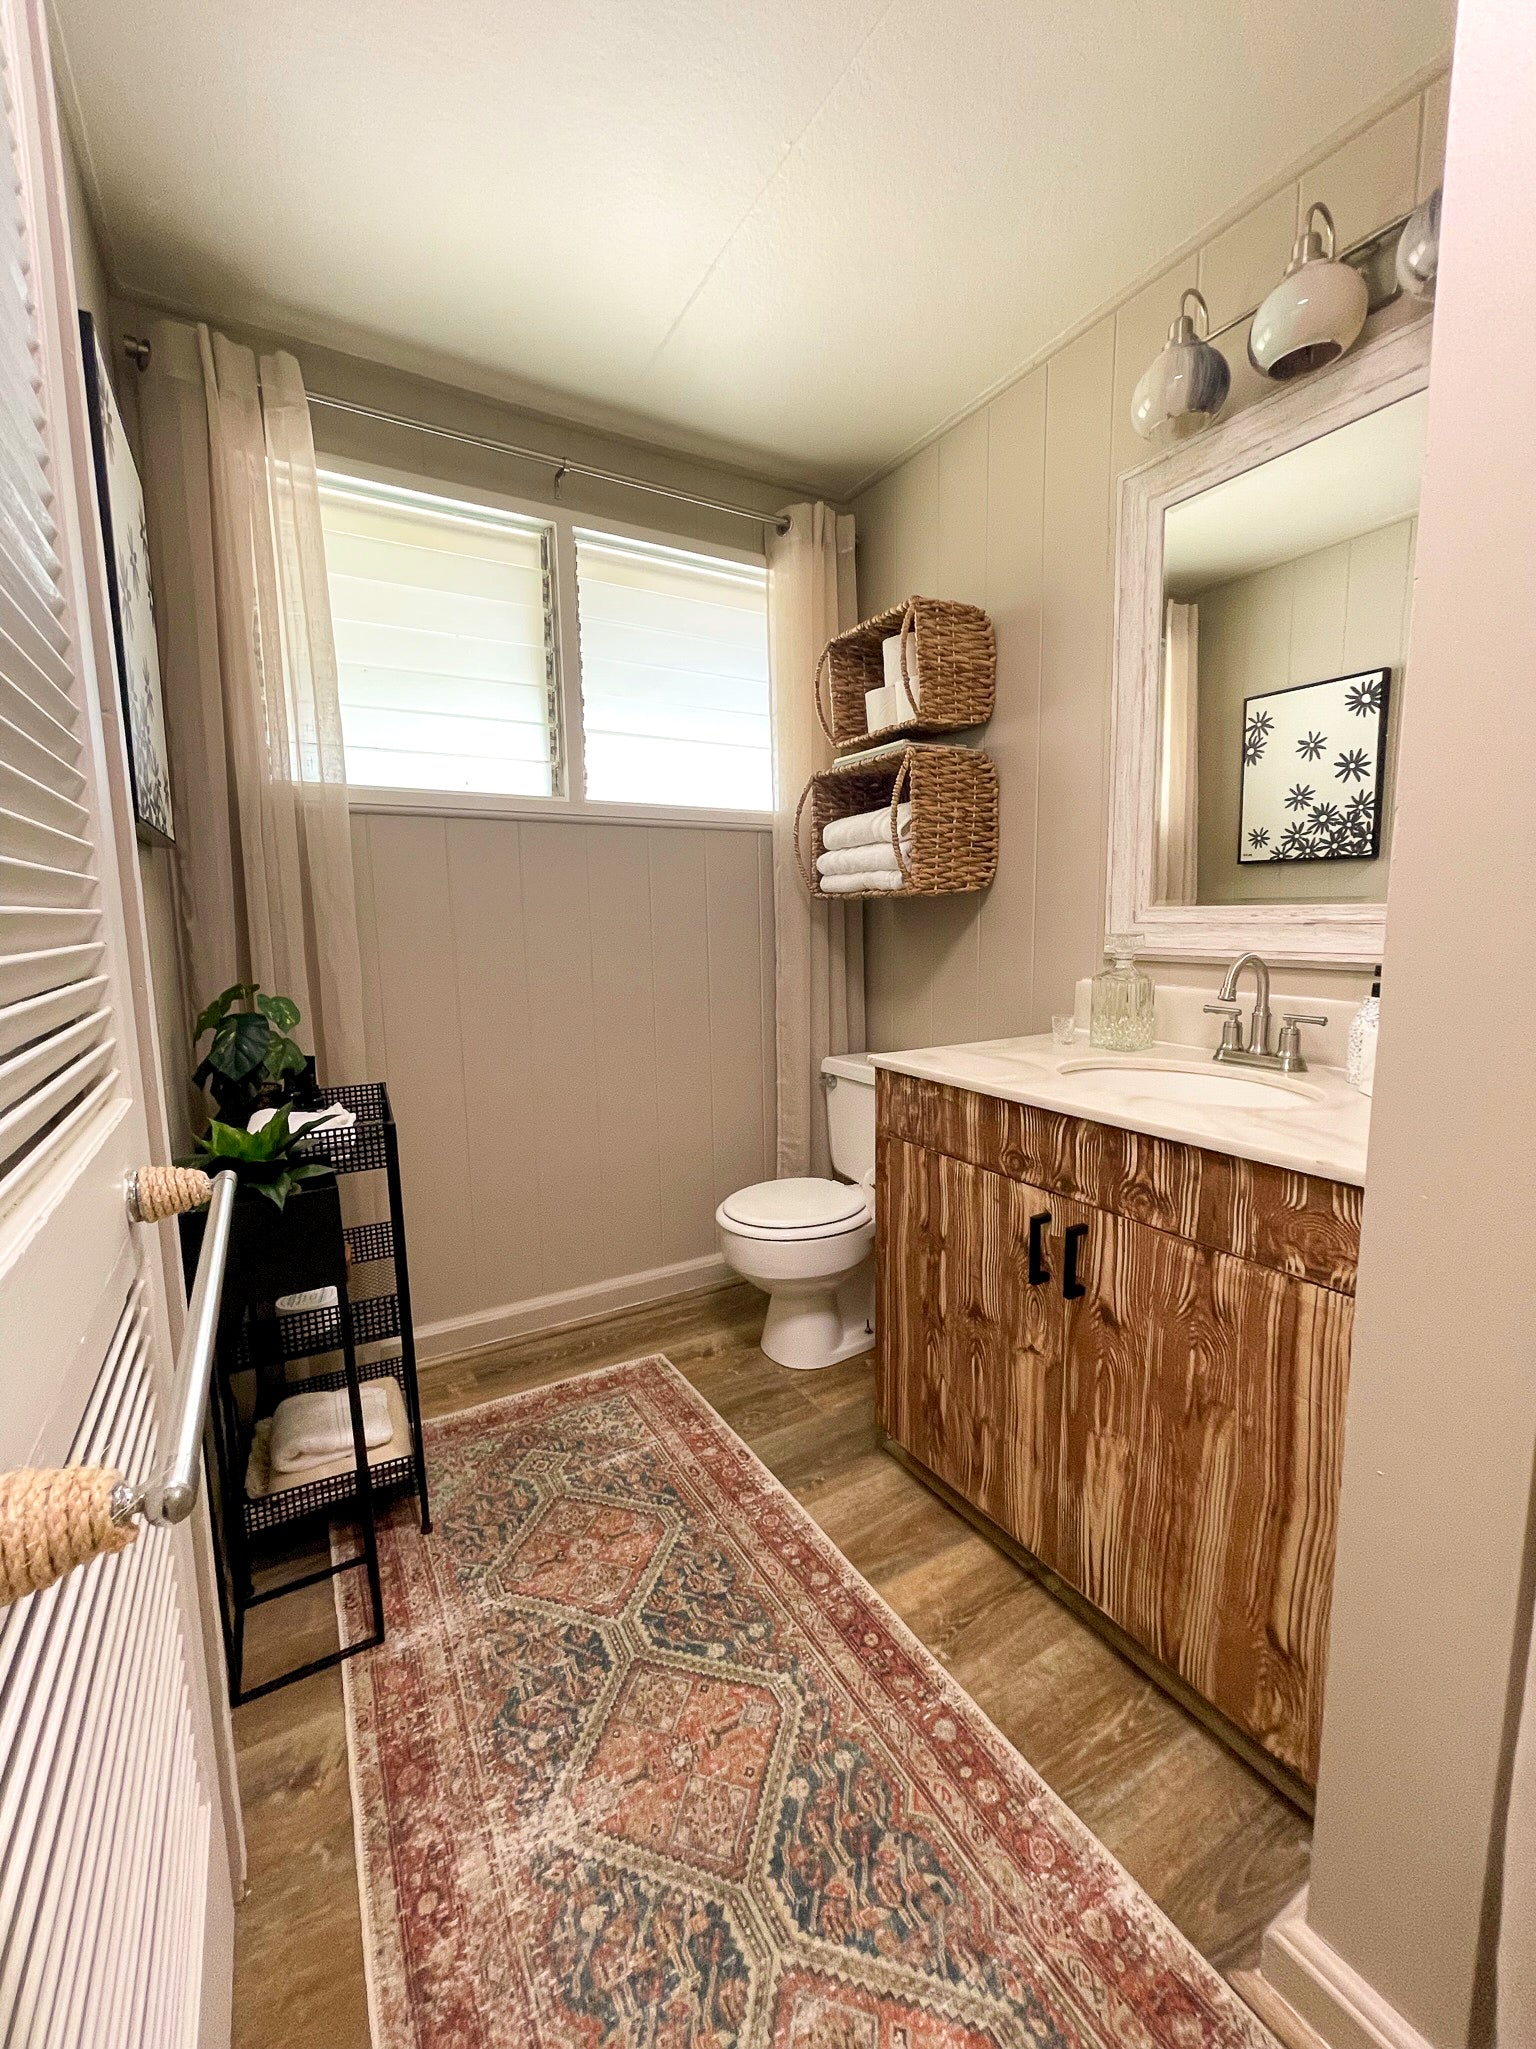
Style these: in an office, vanity area or bathroom, art/craft room, kid's room or nursery, etc!
Check out the tutorial above and the step-by-step instructions below!


Prep It:
Plywood Leather Jigsaw (though a hand saw will work, too!) Safety glasses Sandpaper Marble contact paper Copper contact paper Razor Metal ruler Upholstery tacks Hammer Leather ribbon Staple gun


Do It!:
- First things first — decide on your pocket shape. Cut the leather into the triangle/ polygon/ imaginative angled spectacle that you dreamed up with the razor.
- Use this pocket shape as the beginning template for your wall hanging. Place the leather onto the wood, trace around the pocket and where the leather ends use your creative side and a pencil to sketch out the rest of the shape. Make sure your angles are nice and angled, and don't feel inhibited by the standard hexagon or octagon shape! Use these himmeli or some gemstones as inspiration and add some peak and valley angles for visual interest!
- Now it's time to put on your big girl safety glasses and bring out the jigsaw. Making sure that your wood is anchored with either clamps or weights, use the jigsaw to cut out your angled shape. If you don't have, or don't have access to, a jigsaw, you can do this step with a hand saw, though it might go a little slower!
- Sand down the edges of your cutout so it's nice and smooth — no splinters here!
- Cut your contact paper to a size just a little larger than your plywood shape. Using the method I detail in this DIY Marble Contact Paper Side Table apply the contact paper to the plywood, and smooth out any air bubbles with a metal ruler.
- Flip the contact papered plywood over, so the pattern is facing down, and use the razor to trim right around the edges.
- Flip the plywood back over and place the leather piece over it. The key when creating pockets is to have slack at the top so there is room for things to actually fit inside it. Hammer in your upholstery tacks around the edges of the leather, loosening the leather as you go so it has a little pucker between each tack instead of a big bunch of puckering between the last two tacks.
- Now to get these babies on the wall. Flip the plywood pocket back over and use a staple gun to attach your leather ribbon strap. Make sure to attach it above the center axis of the shape so it will hang flat on the wall and not tip over when you fill it!
- Speaking of filling them, store some favorite memorabilia or maybe a cute pair of sunglasses in your pocket, hang on the wall, and enjoy!