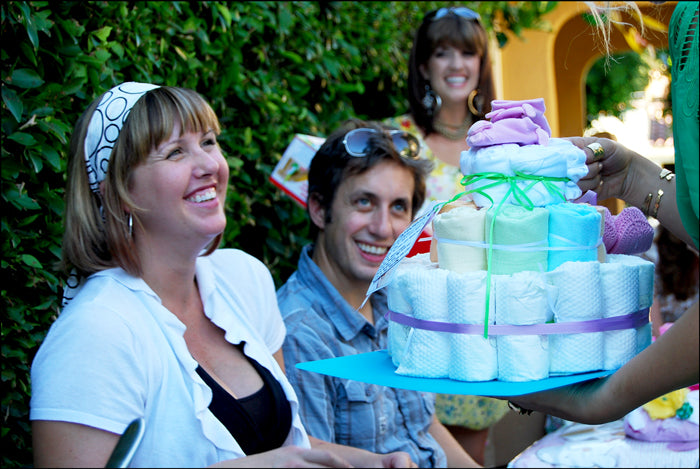
did you ever want to know how to make a diaper cake!? duuuuh everrybody does! well today is your lucky day! i got assigned the honor to make one a couple weeks ago for my friend Jenny and AJ's baby shower. it was actually pretty easy but of course i did my own Mr. Kate spin on it. usually the diaper cake consists of only diapers in a tiered cake but i went a step further and used burp clothes, onesies and embellished with booties, socks and cute ingredient and Mr. Kate logo-pig cards. awwww!
ingredients: - 1 package of disposable organic cotton newborn or up to 14lbs diapers (around 33 diapers) - 2 packages of burp cloths (8 total) - 1 package of onesies (5 total) - booties or cute baby accessories of pacifiers for cake decor - roll(s) of ribbon, same color or different (your choice) - printed or hand-drawn cards
do it: - roll all of the individual diapers, burp cloths and onesies into little rolls and secure with a piece or ribbon tied around the middle (i folded the burp clothes into 2 inch wide strips before i rolled them so they would be short and fat and sturdy). see photos 1 and 2 above - make the bottom diaper tier by starting with 7 rolled diapers and bundling them into a circle shape (1 in the center and 6 surrounding). secure with a piece of ribbon tied tight enough to keep the together but not too tight to distort. - surround your small bundle of 7 diapers with more diapers to create a larger circle and tie with ribbon again. repeat this step until you've used all the diapers to make one large, flat-topped tier all secured with ribbon. photo 3 above. - next tier repeat the same step with the burp cloths as the diapers by making them into a smaller tier and securing together with a ribbon. photo 4 above. - repeat with the onsies (i used a balled up piece of tissue paper as the center-holder and then secured the 5 onesies around it. it was fine because the "cake" topping covered the tissue paper center. fasten with more ribbon. - once all your tiers are finished, stack them! you can hold the tiers in place by inserting small pieces of cardboard or chopsticks to keep them stacked and not sliding around. just make sure the cardboard or chopsticks are buried in the layers so they don't show. - finish off your cake by topping it with your cake-topping (in my case i used piggie socks). fasten to the onsies with a small safety pin. use more ribbon to fasten other hanging decor onto the ribbon wrapped around your tiers. i used crocheted mary-janes and also hung my cluster of cards the same way!
- transport on plate (or turquoise Ikea cutting board) and mmmm tasty!


