Mr. Kate Advent Calendar Day 11: DIY Gift in a Clutch!
This time of year, everyone's thinking about packaging. Boxes, bows, ribbon, running to the Post Office before it closes to get express shipping ... you know the drill! But all these parcels and presents got me thinking ... wouldn't it just be *clutch* to create a DIY that is both chic and giftable, and helps you carry all your things?
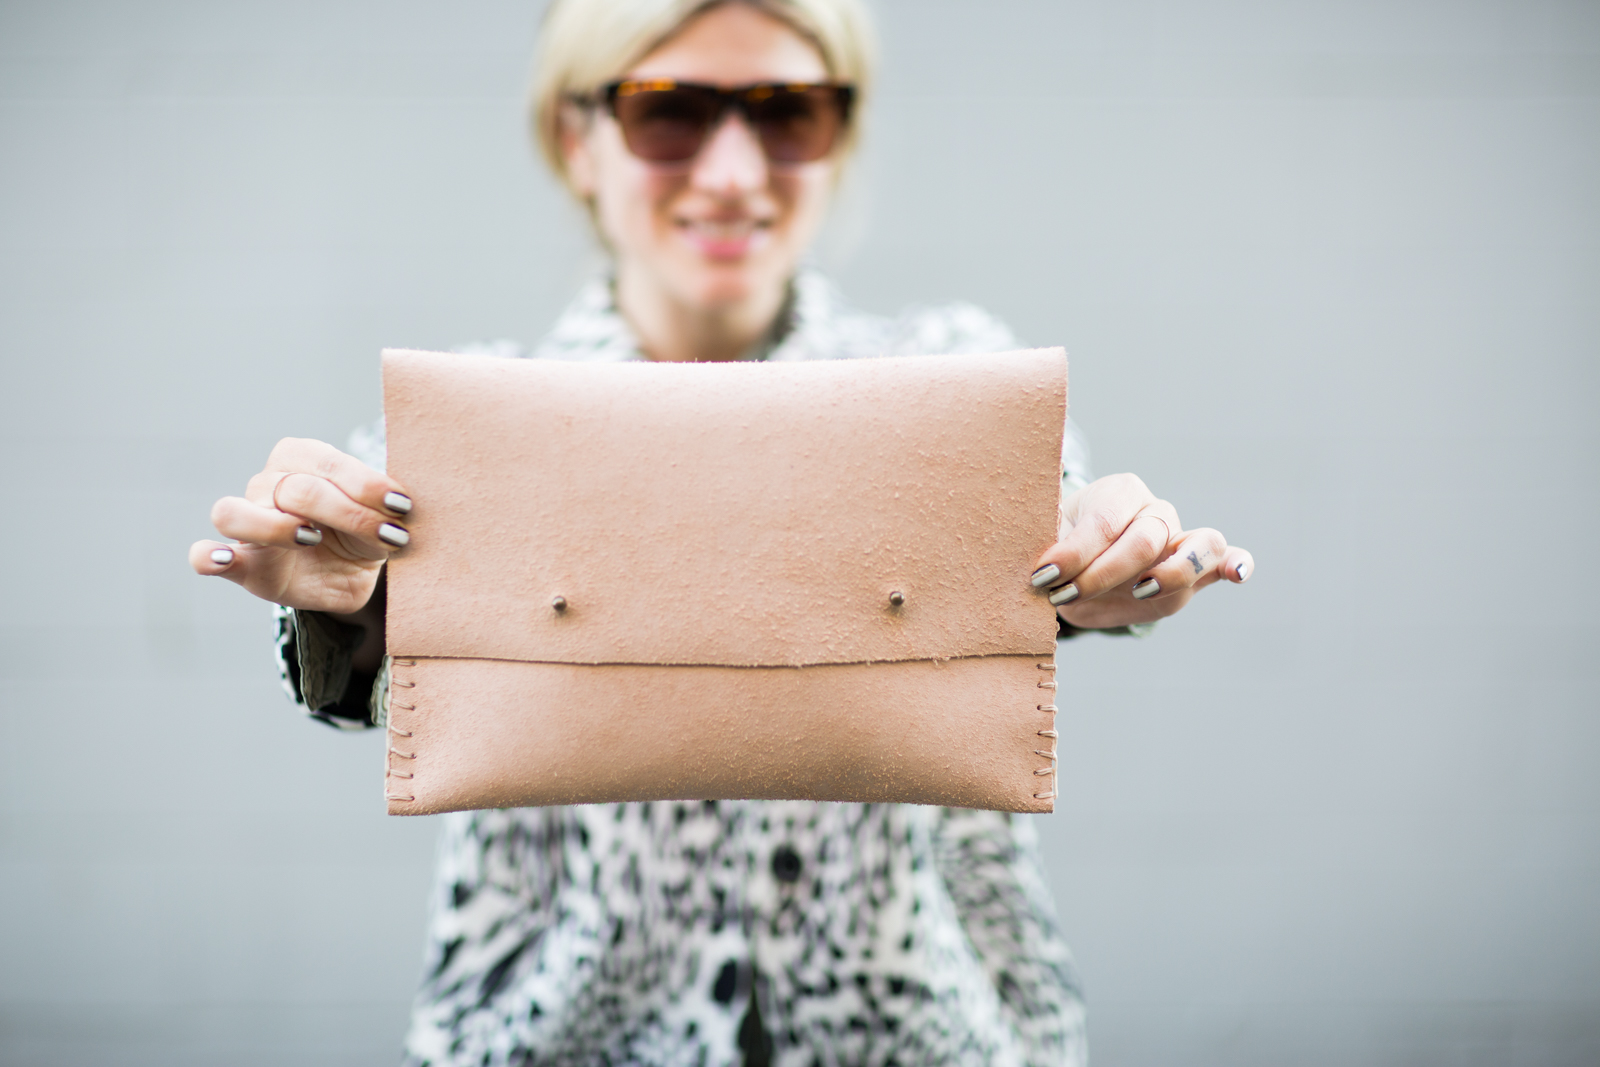
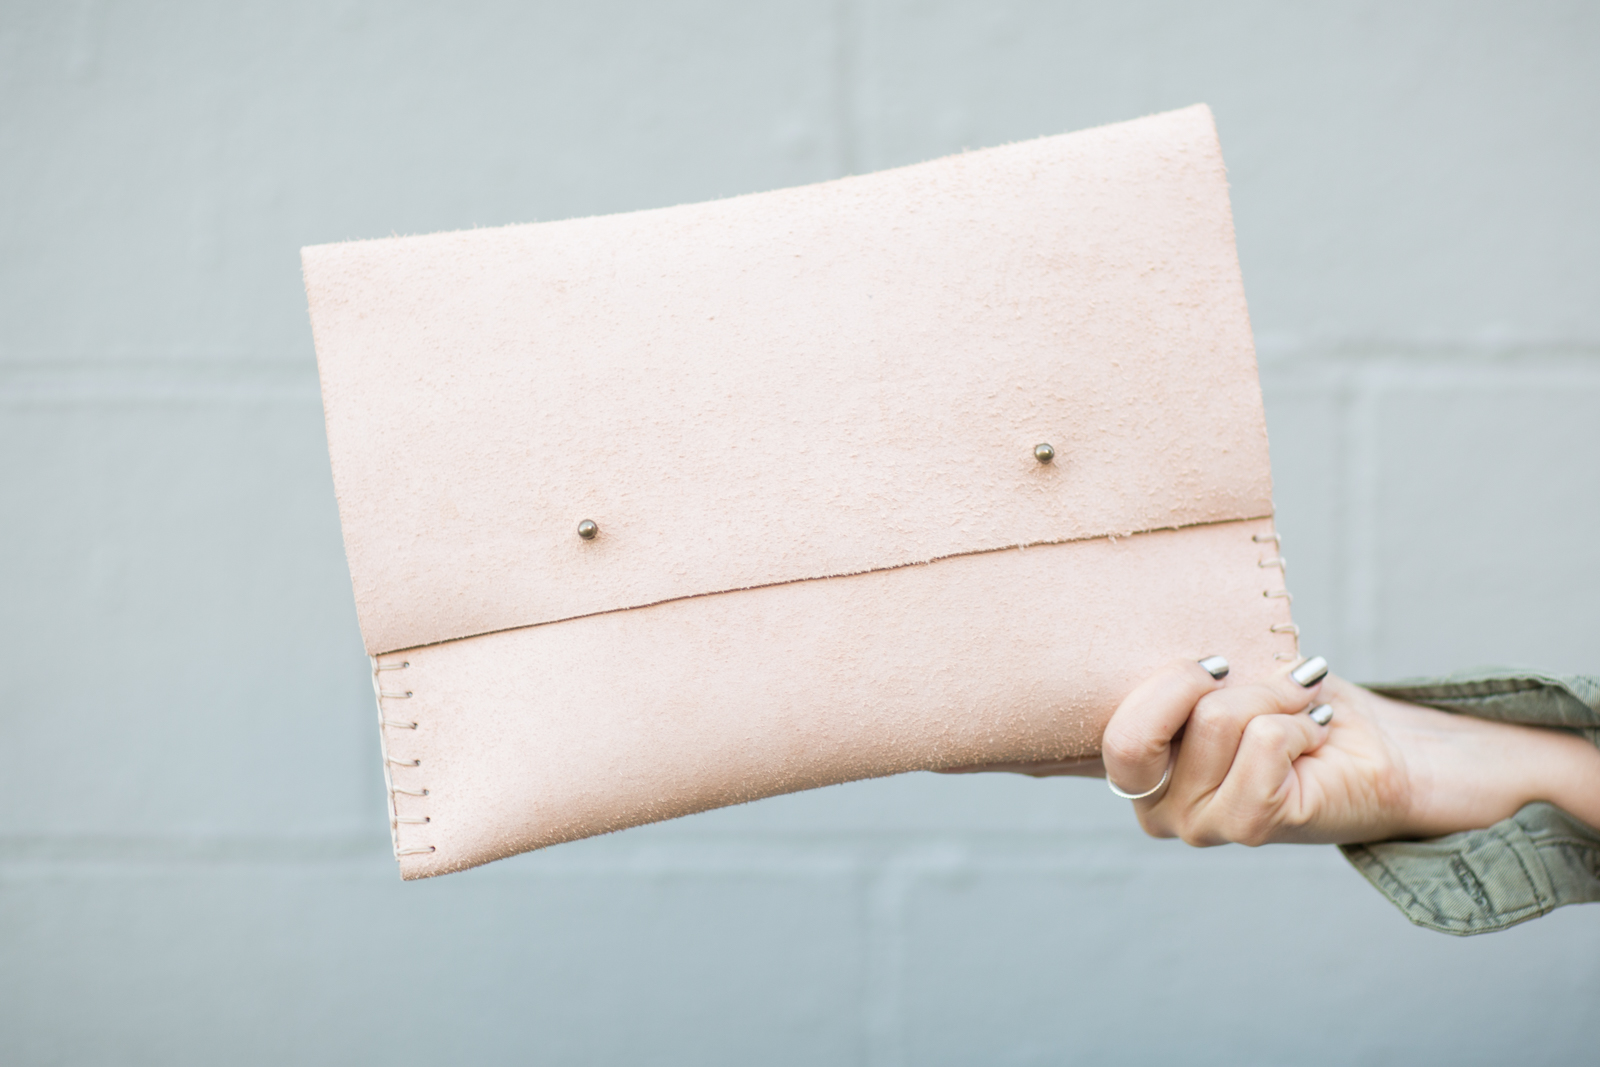
This DIY leather envelope is the perfect marriage of fashion and function. Its minimalist design means it will add an effortless touch to any outfit, while its sturdy construction holds up against all your worst hoarding habits. Want a bag that can carry you from the office to a night out dancing? Of course! Want a bag that can do all that and fit 2 boxes of Thin Mints for easy access? Look no further.
Double the fun: use that spare leather to add fringe to another purse! Check out the DIY Fringe Bag.
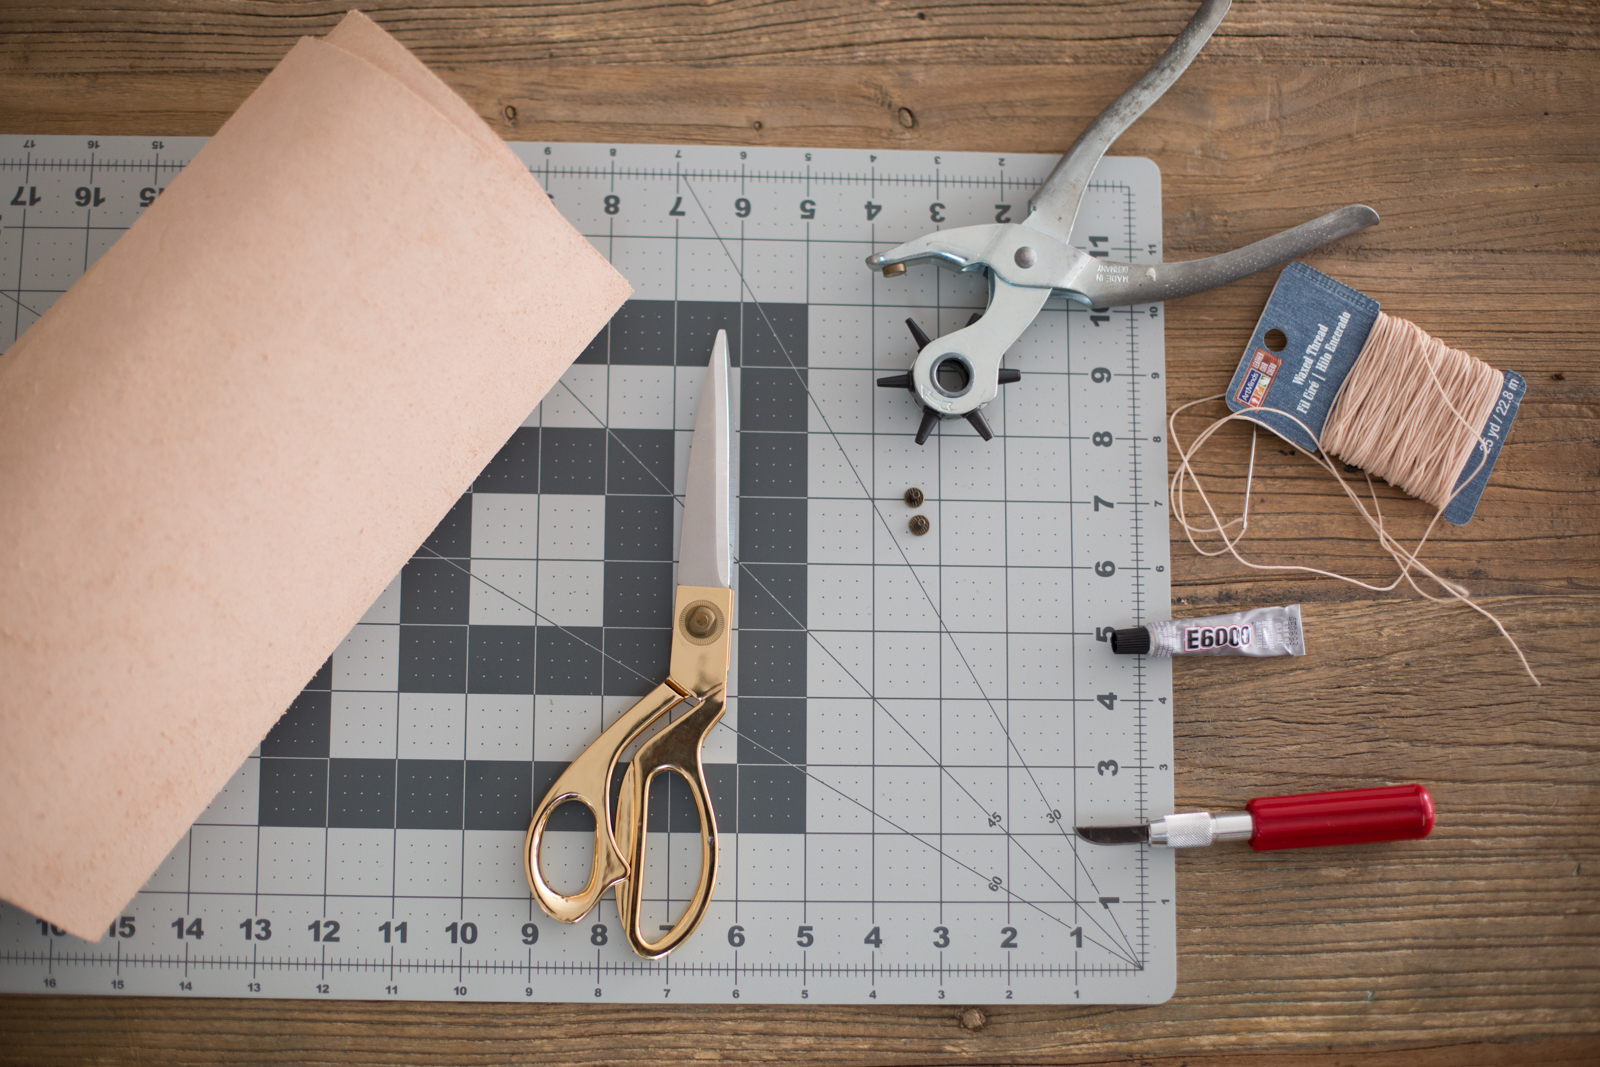
Prep It:
Big piece of leather (or pleather) 2 hitch fasteners Waxed thread X-Acto knife Cutting mat Thick needle Leather hole punch Glue Scissors Pen


Do It!:
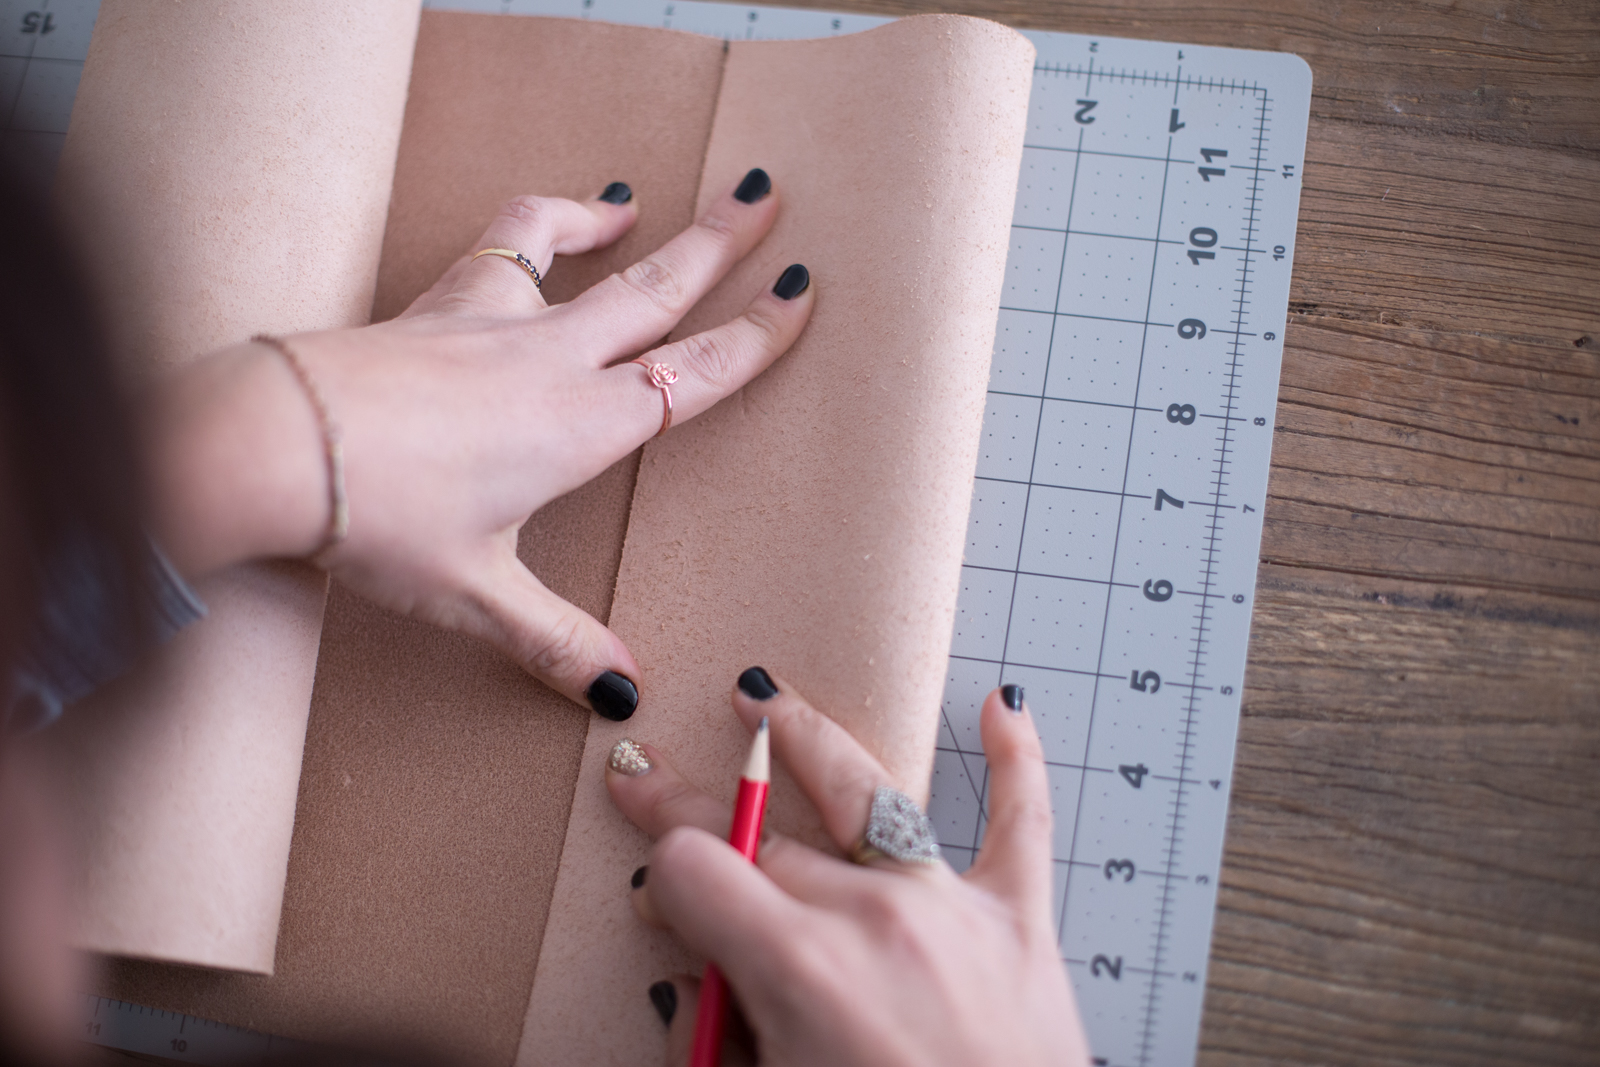
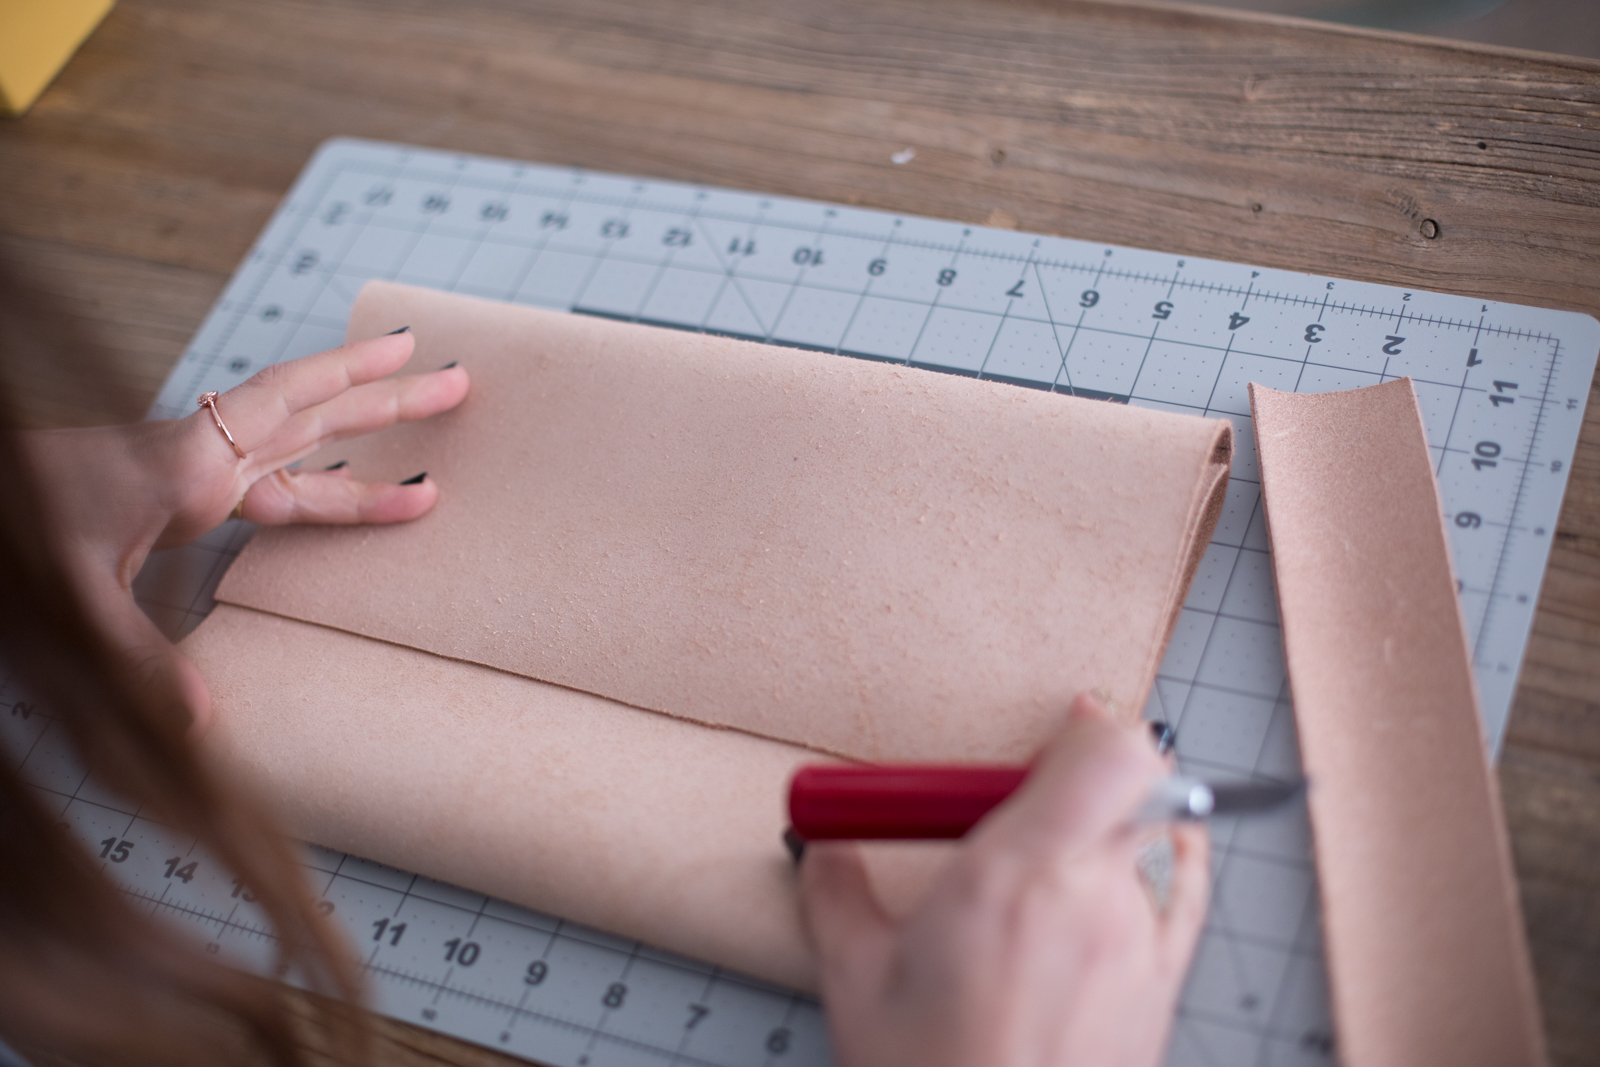
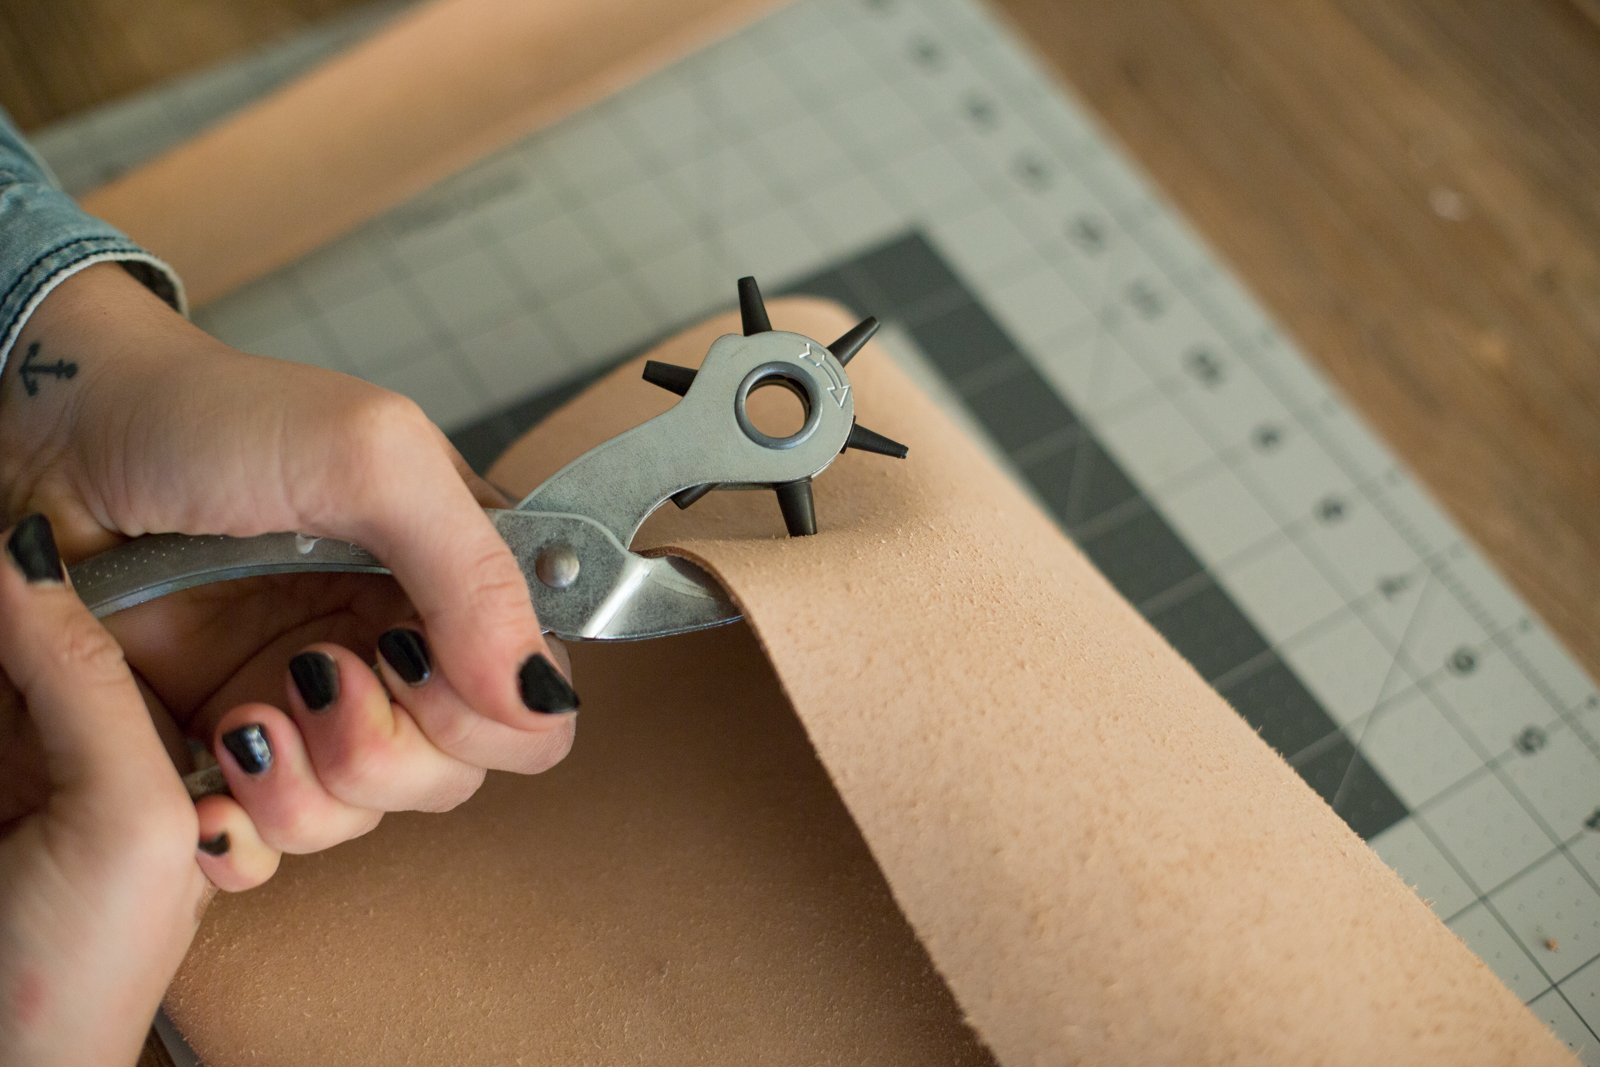
- Pick any leather or faux leather that speaks to you! We chose a tanned raw one for a natural look. Measure a 22 x 12 inch rectangle, and draw the outlines in pen, so you can cut straight.
- Use an x-acto knife to cut out the rectangle. If you want the flap of the envelop to have a triangular or round shape, use the blade to create this shape on one of the ends.
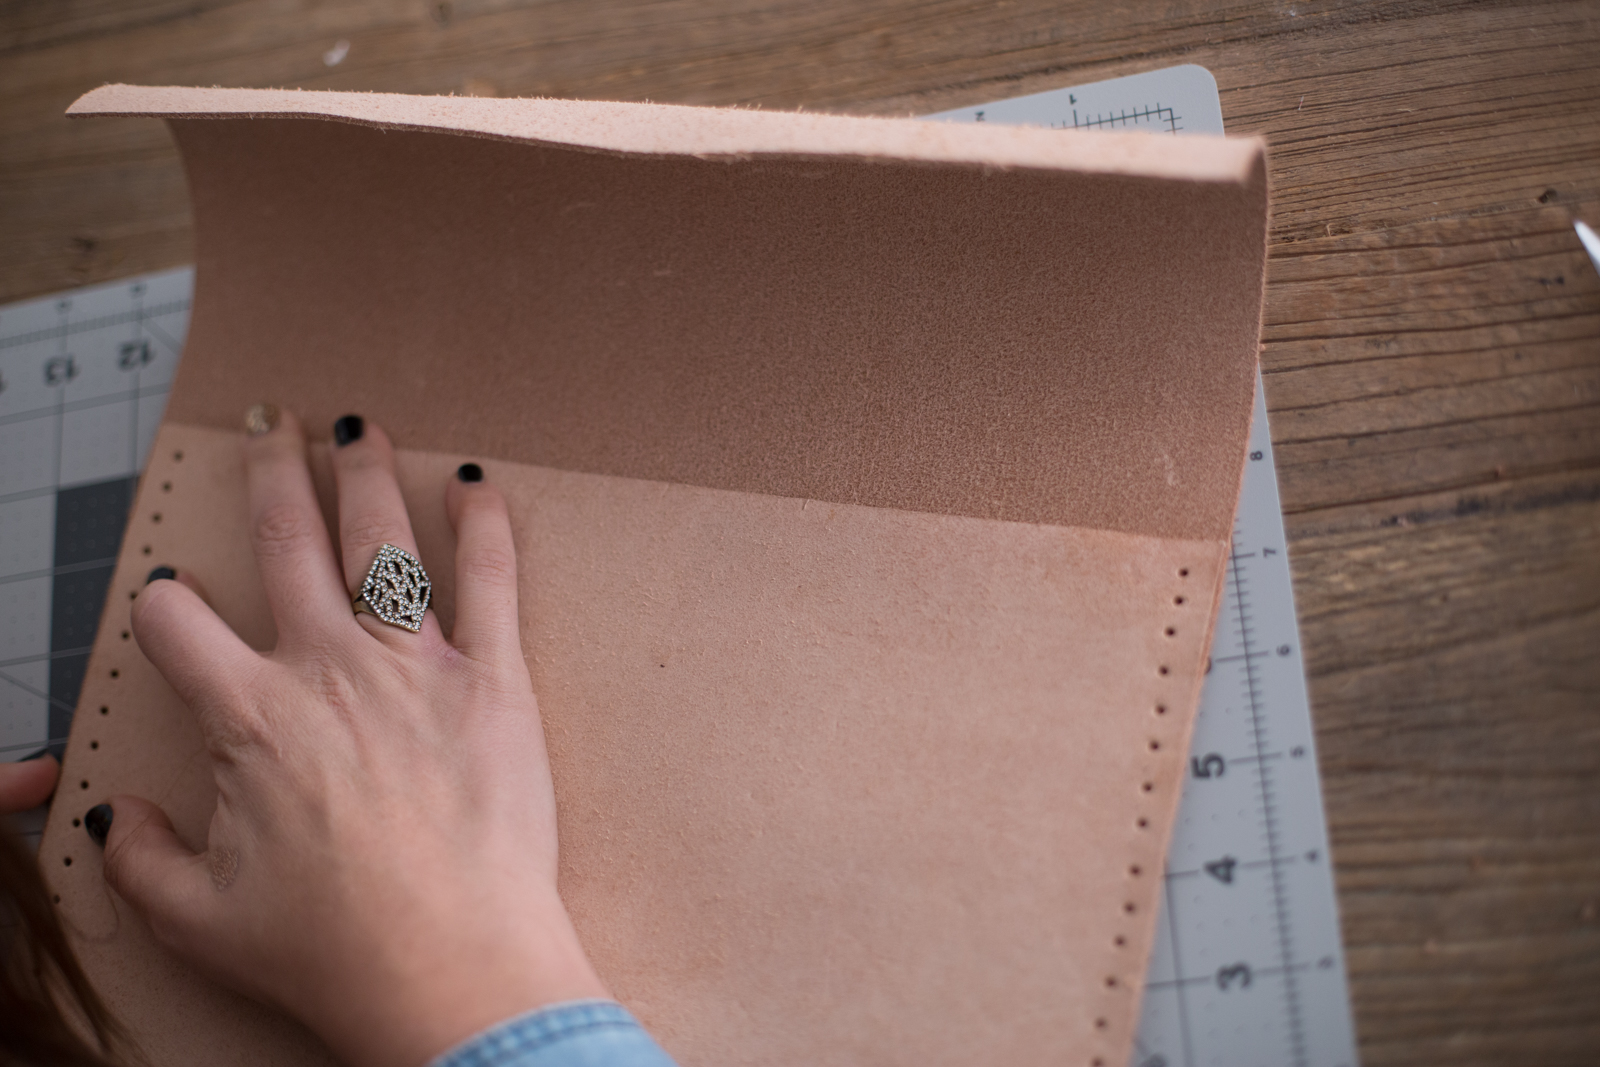
- Fold your leather into thirds to create the envelope. Fold 8 inches of the end that won't be the flap in over the middle of the leather, to create what will be the pouch. Then, fold the top 6 inches, in over this piece, creating the flap. You can choose to have a shorter or smaller flap, in which case you should cut your leather shorter. 16 inches length is necessary to create the pouch, then however many inches you'd like the flap to be added to that. You could even have the flap reach the bottom of the envelope! In that case, cut 24 inches length.
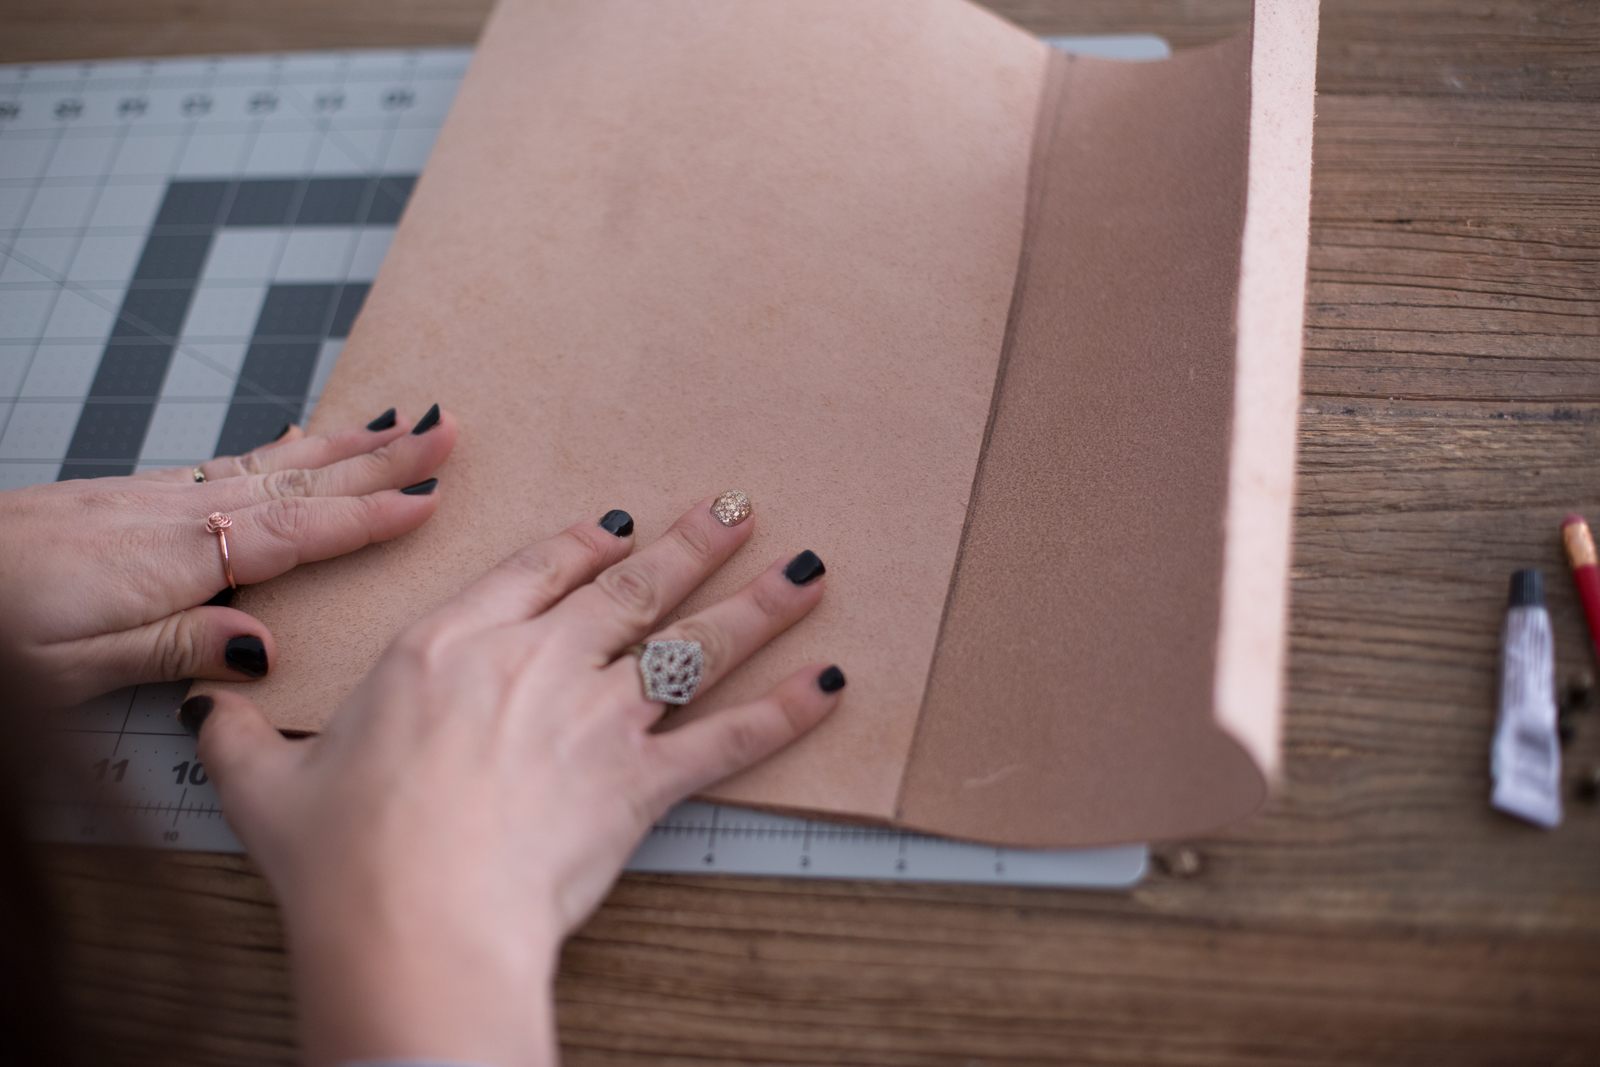
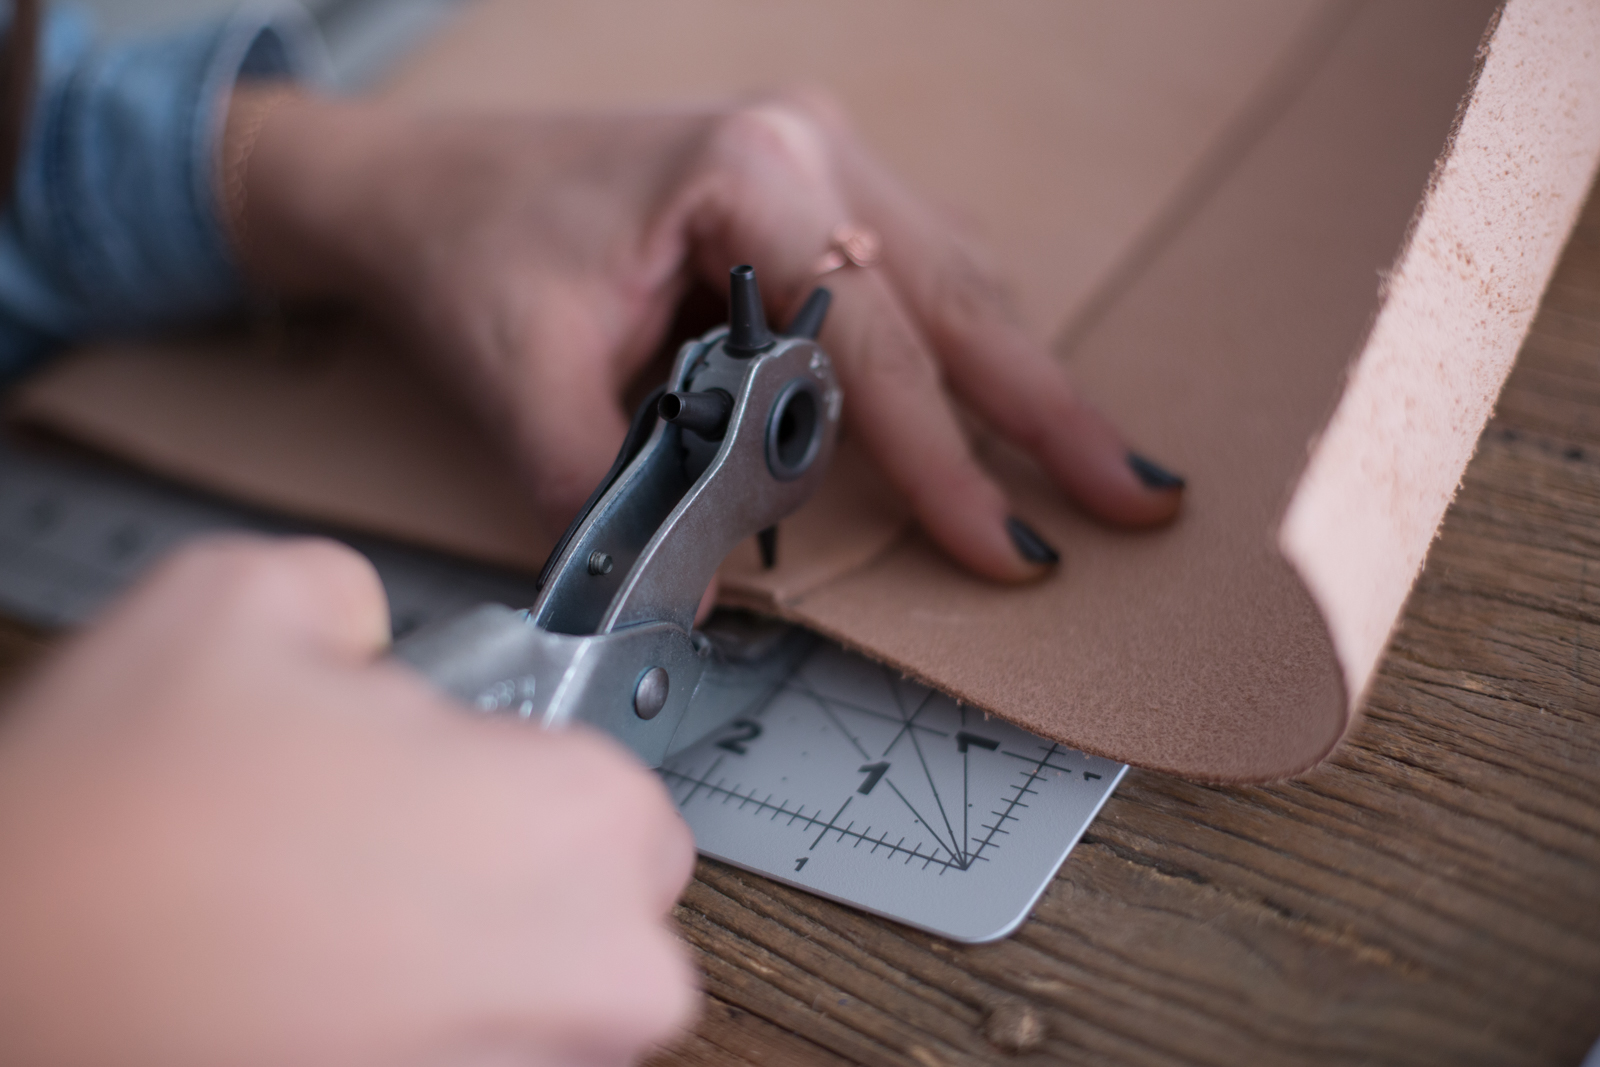
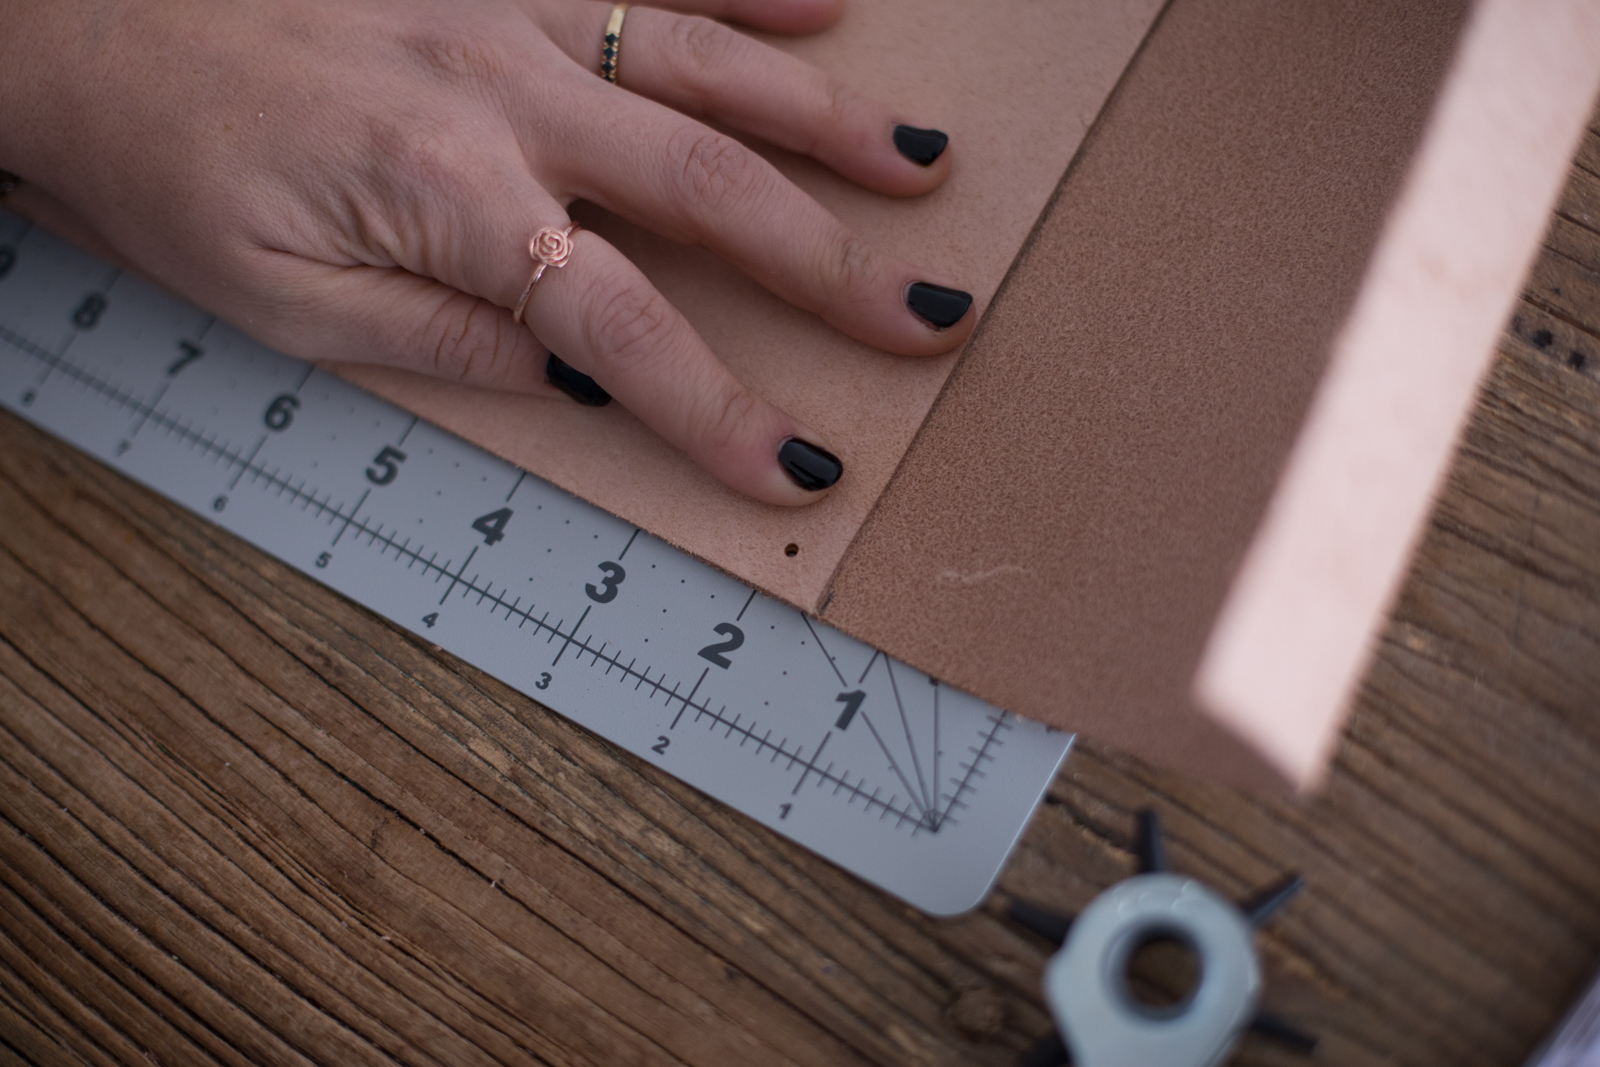
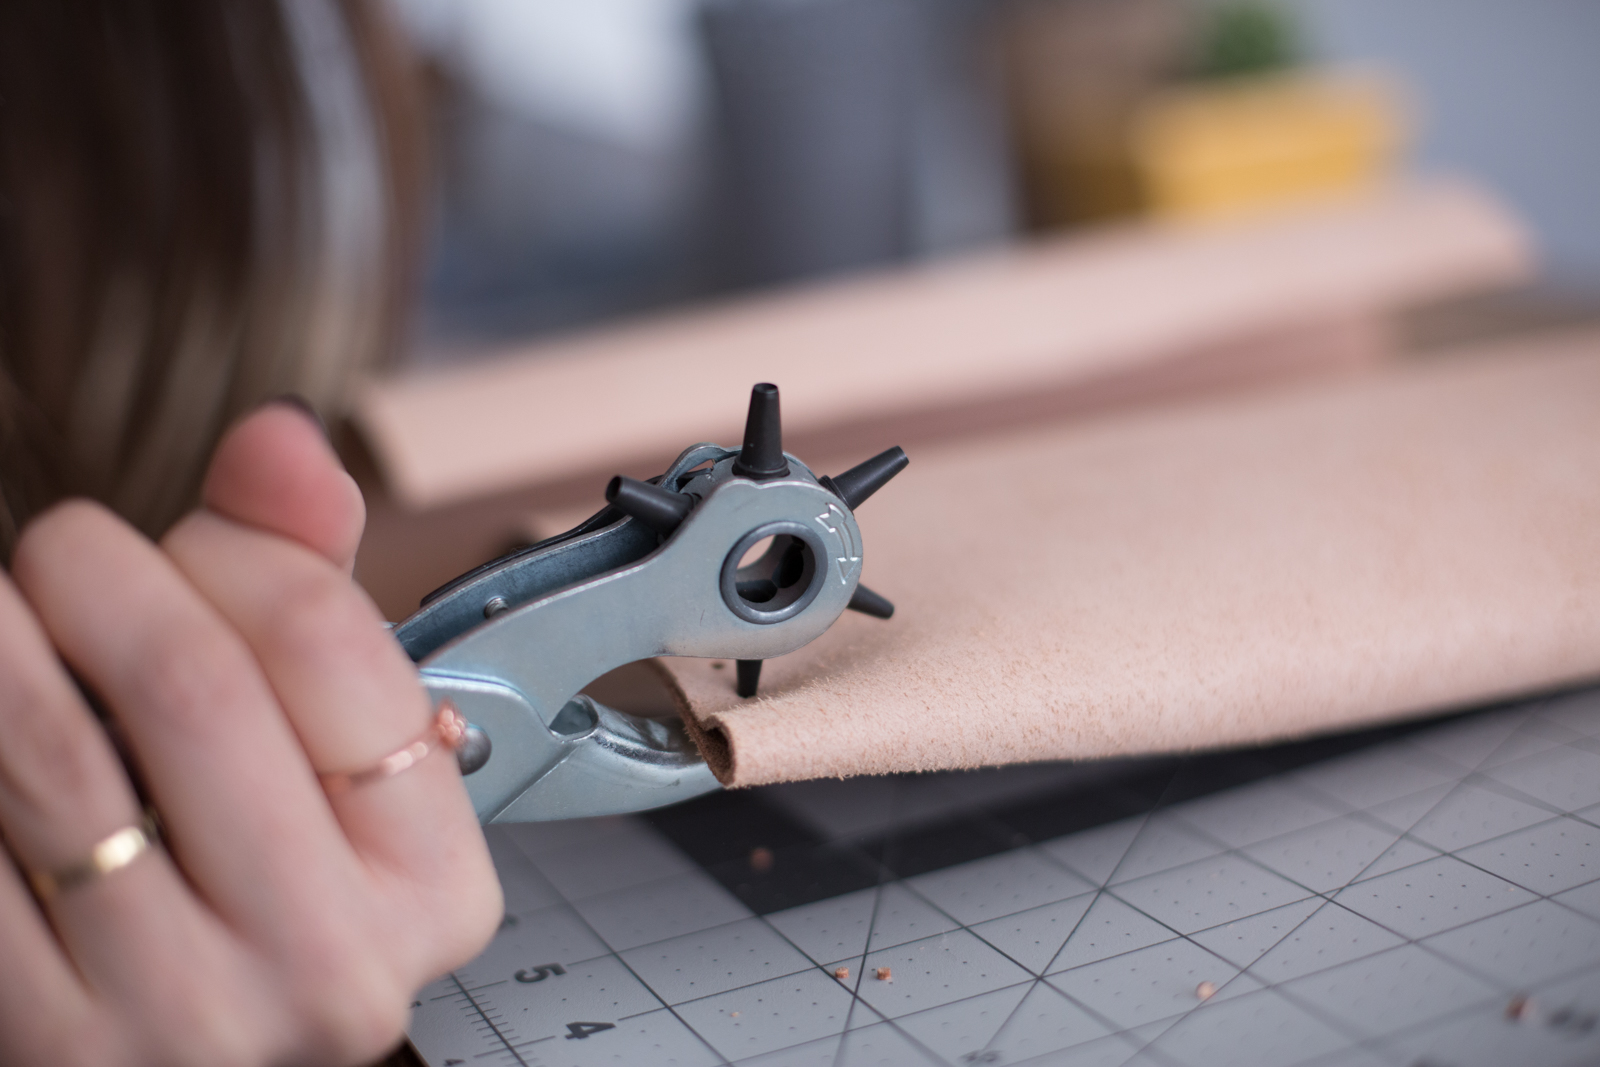
- Line up the 8 inch pieces exactly as you'd like them to be, and start punching holes 1/2 inch apart along the open sides, about 1/2 inch in. Stop where the pieces reach the flap! You don't want any holes on that piece of the envelope.
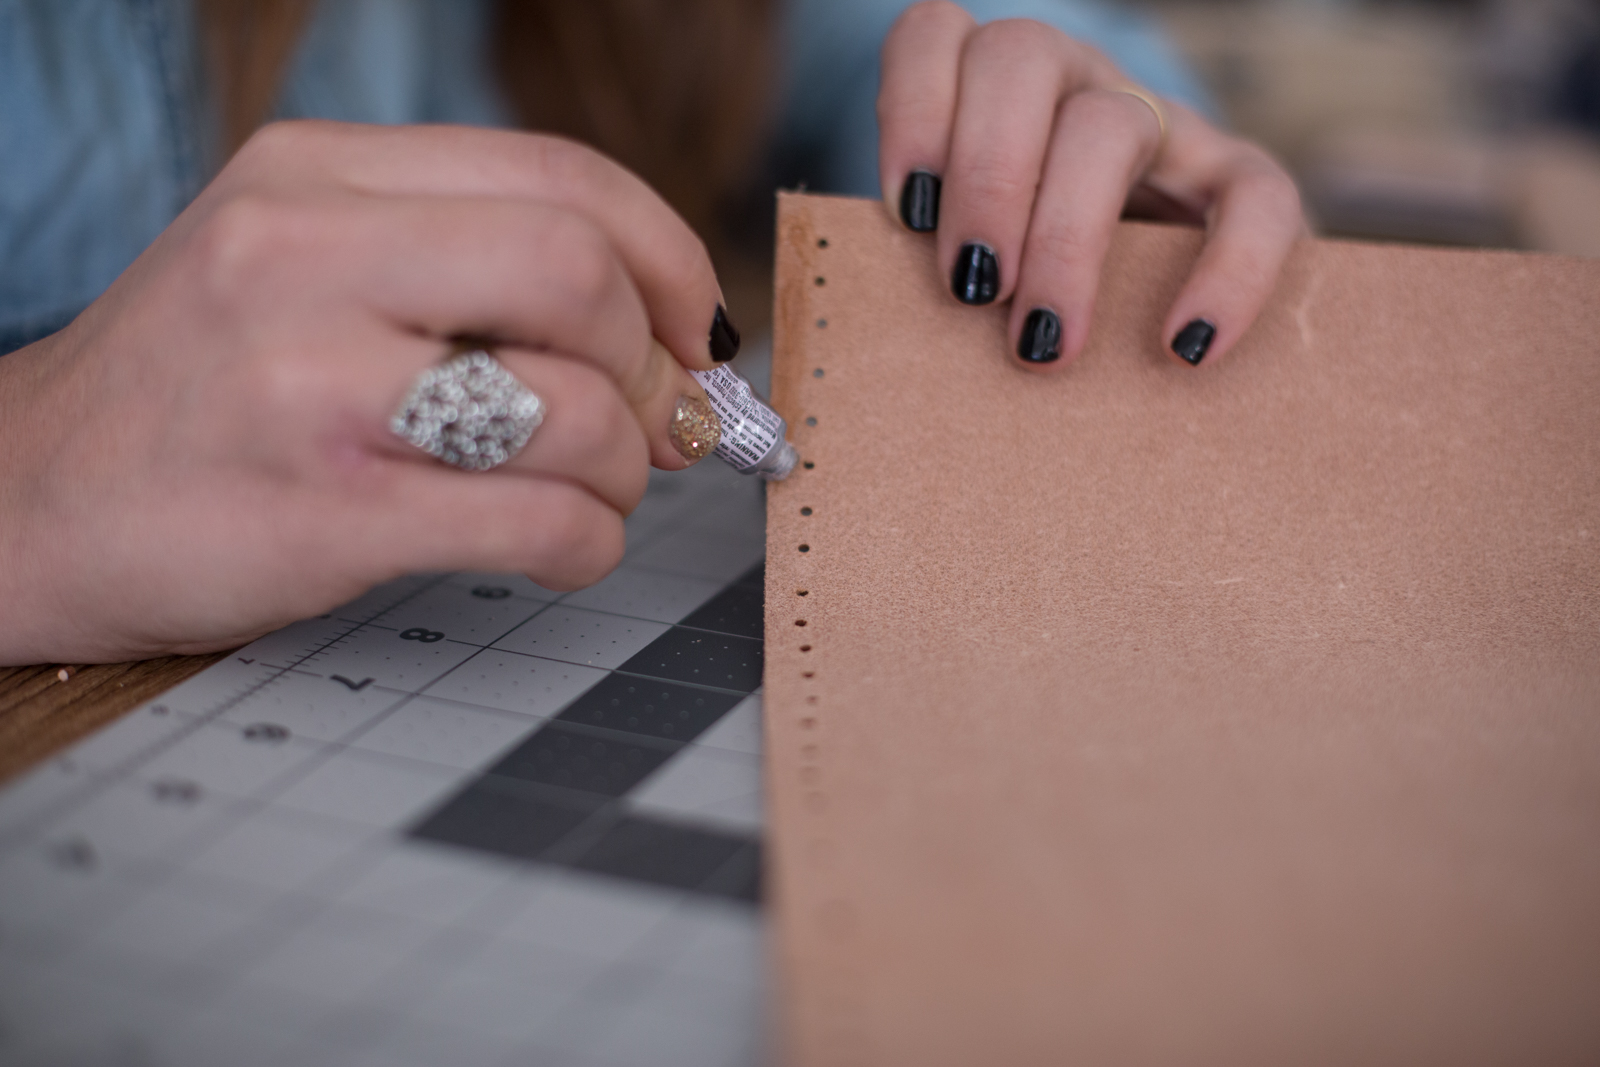
- Make sure the holes on the sides line up, then fold it open and carefully glue the edges, making sure to stay on the edge and not to reach the holes. Fold back together, making sure the holes line up once more. Press lightly to encourage the glue to hold.
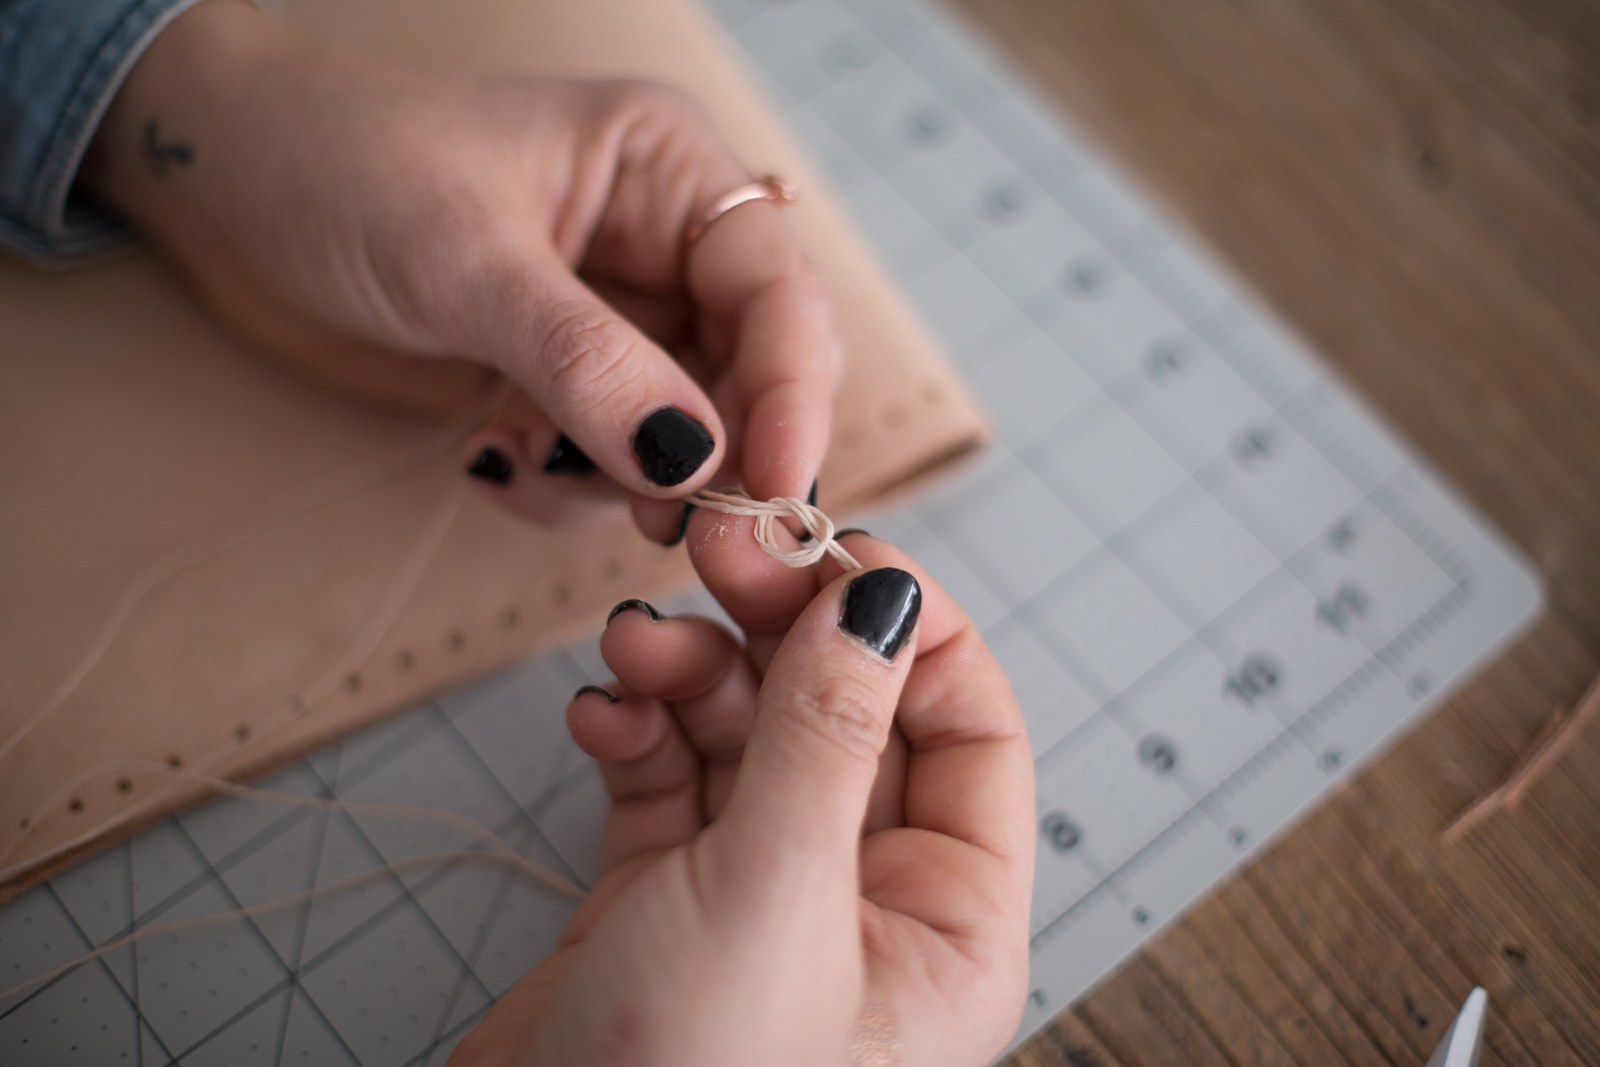
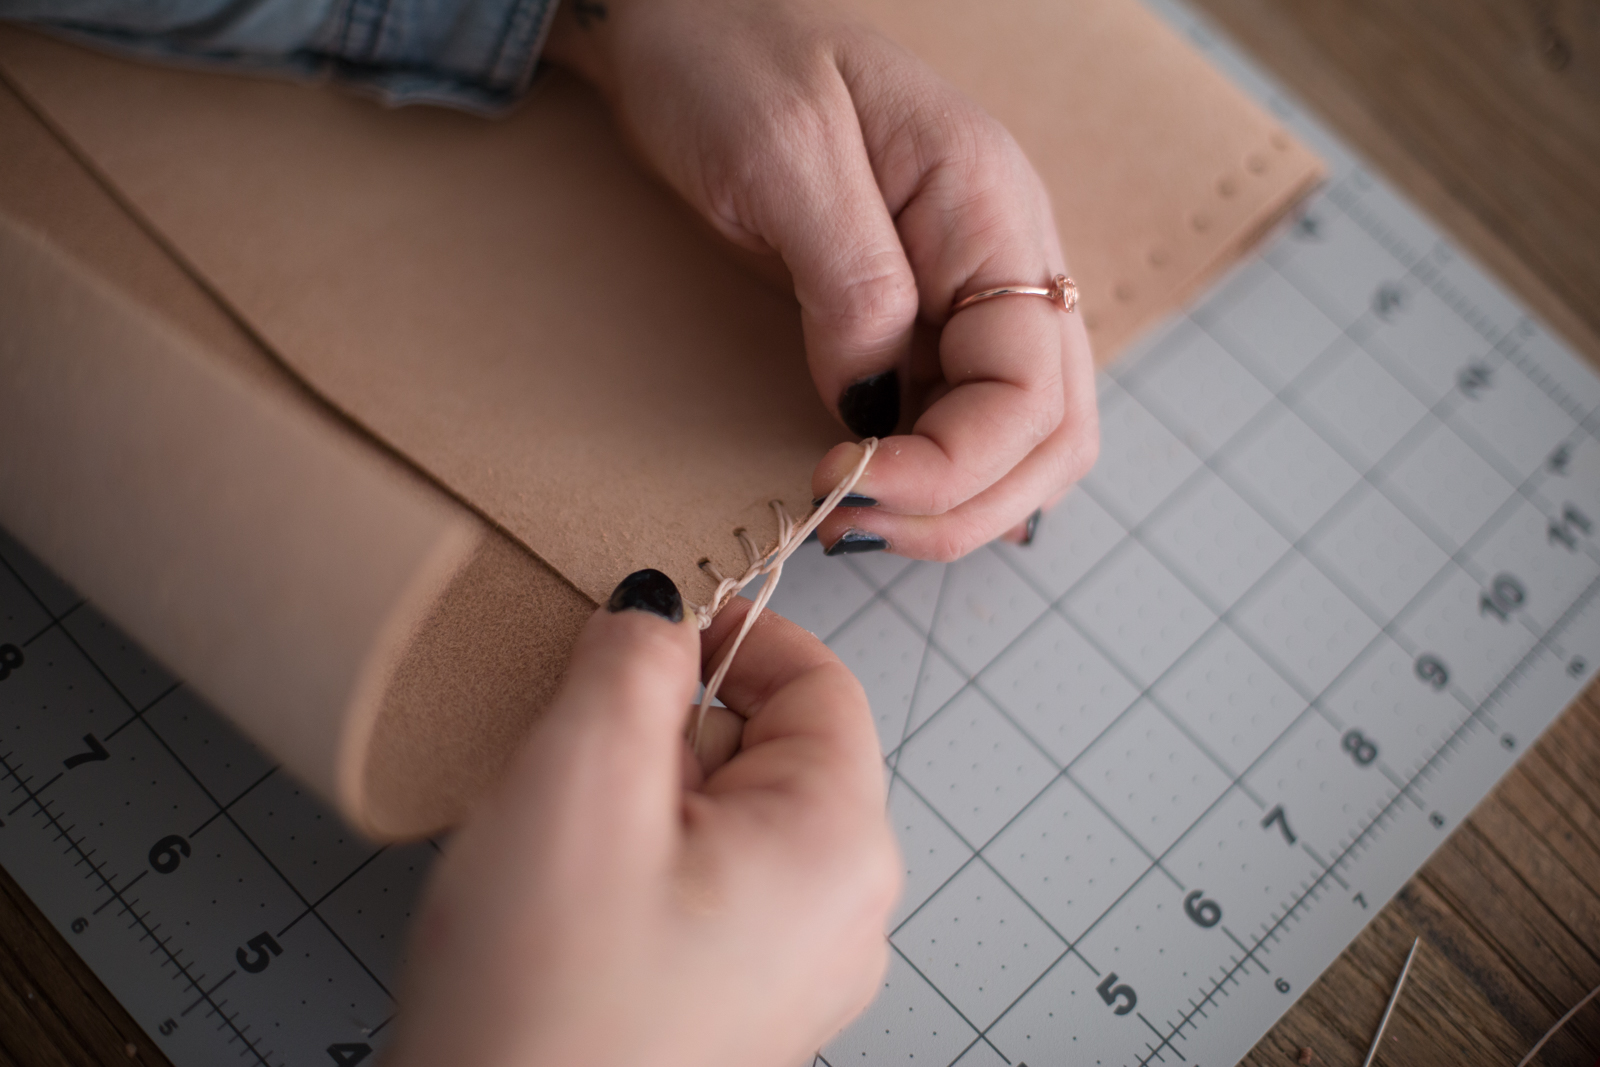
- Measure a long piece of wax thread, at least 16 inches long. Thread the needle and knot the two pieces together at the end. Push thread through one of the top holes on the envelope, then create a slip knot (tutorial here!)
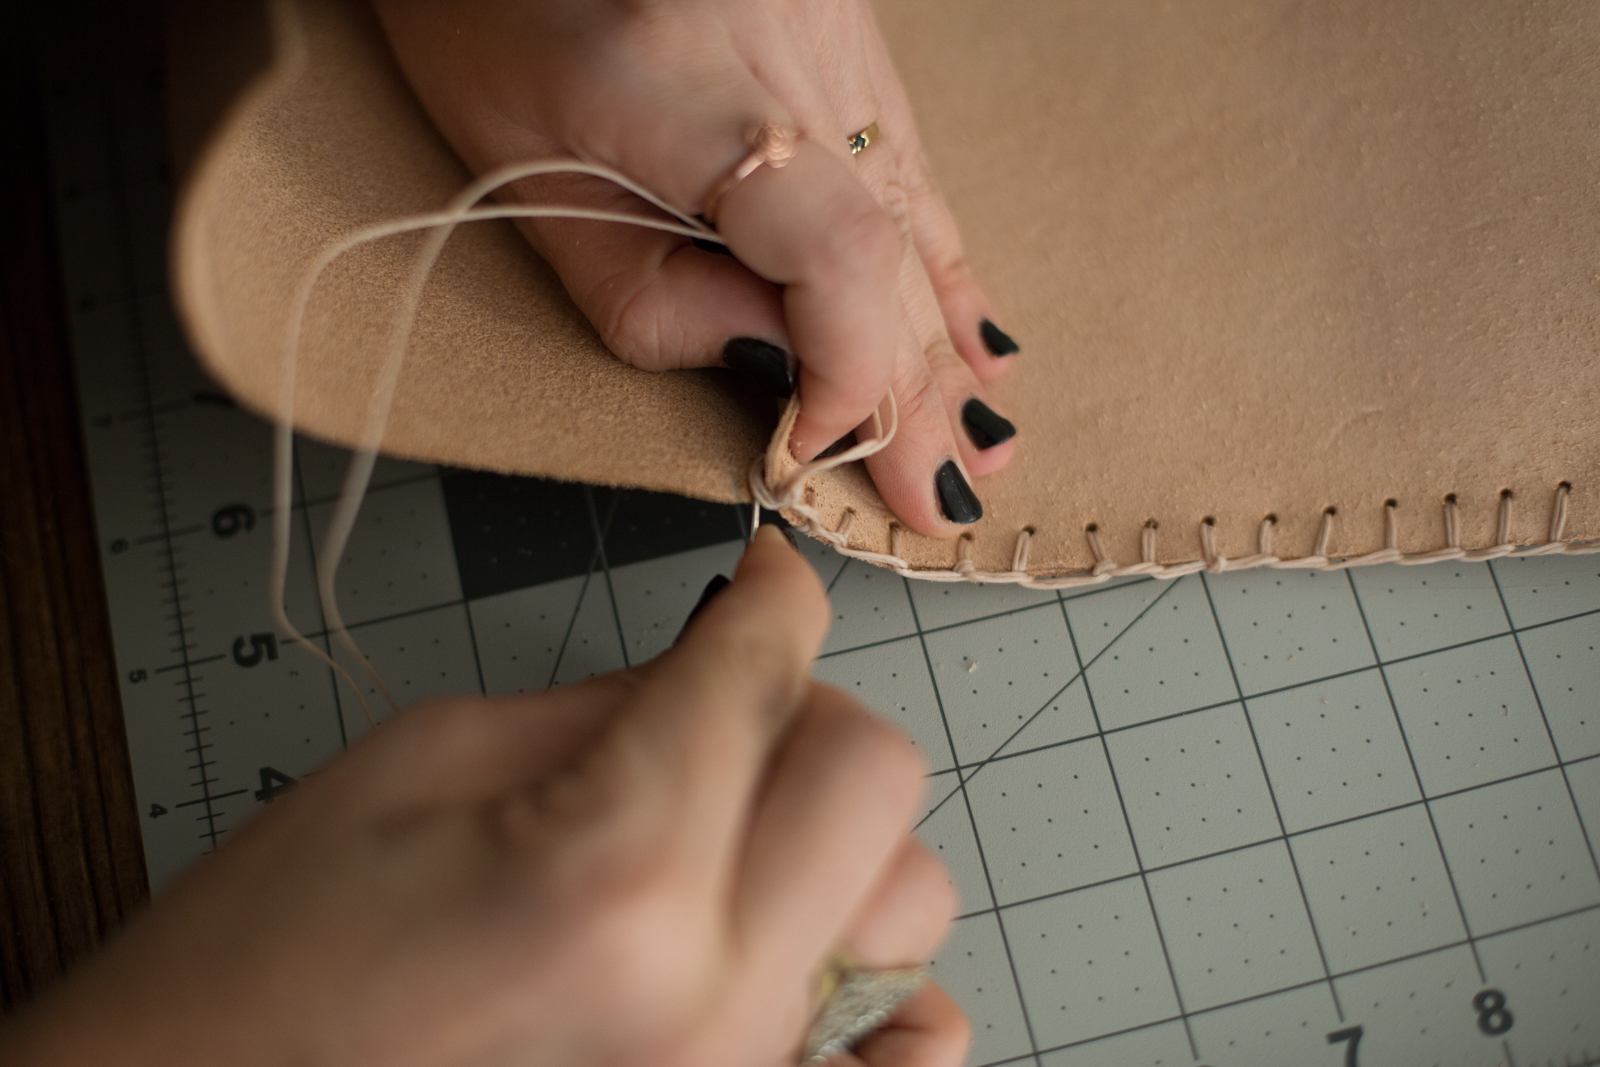
- Create a chain stitch up the side of the envelope, by simply pushing the thread through the loop created into the next hole before pulling tight. If you'd like a different look, experiment with your stitching!
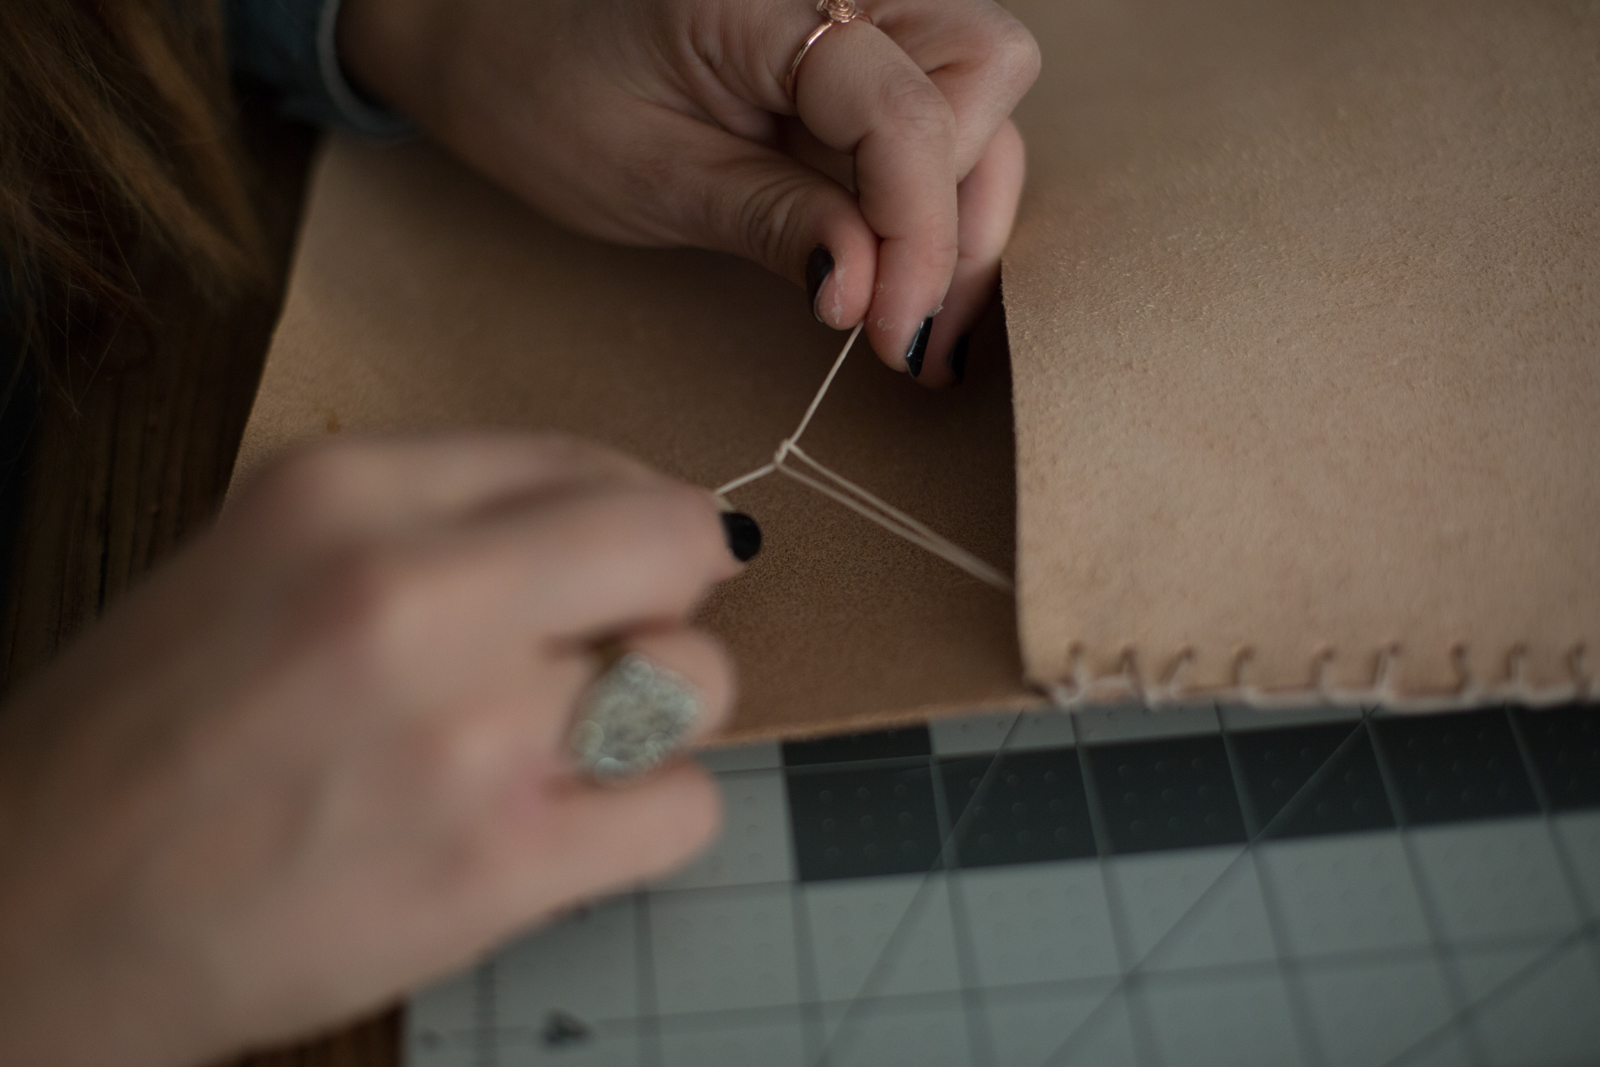
- When you reach the bottom, push the thread inside the envelope, and reach inside the pouch to pull it through. Push the needle back through the very first hole, then tie a few times. Cut the excess thread. Repeat this stitching process on the other side.
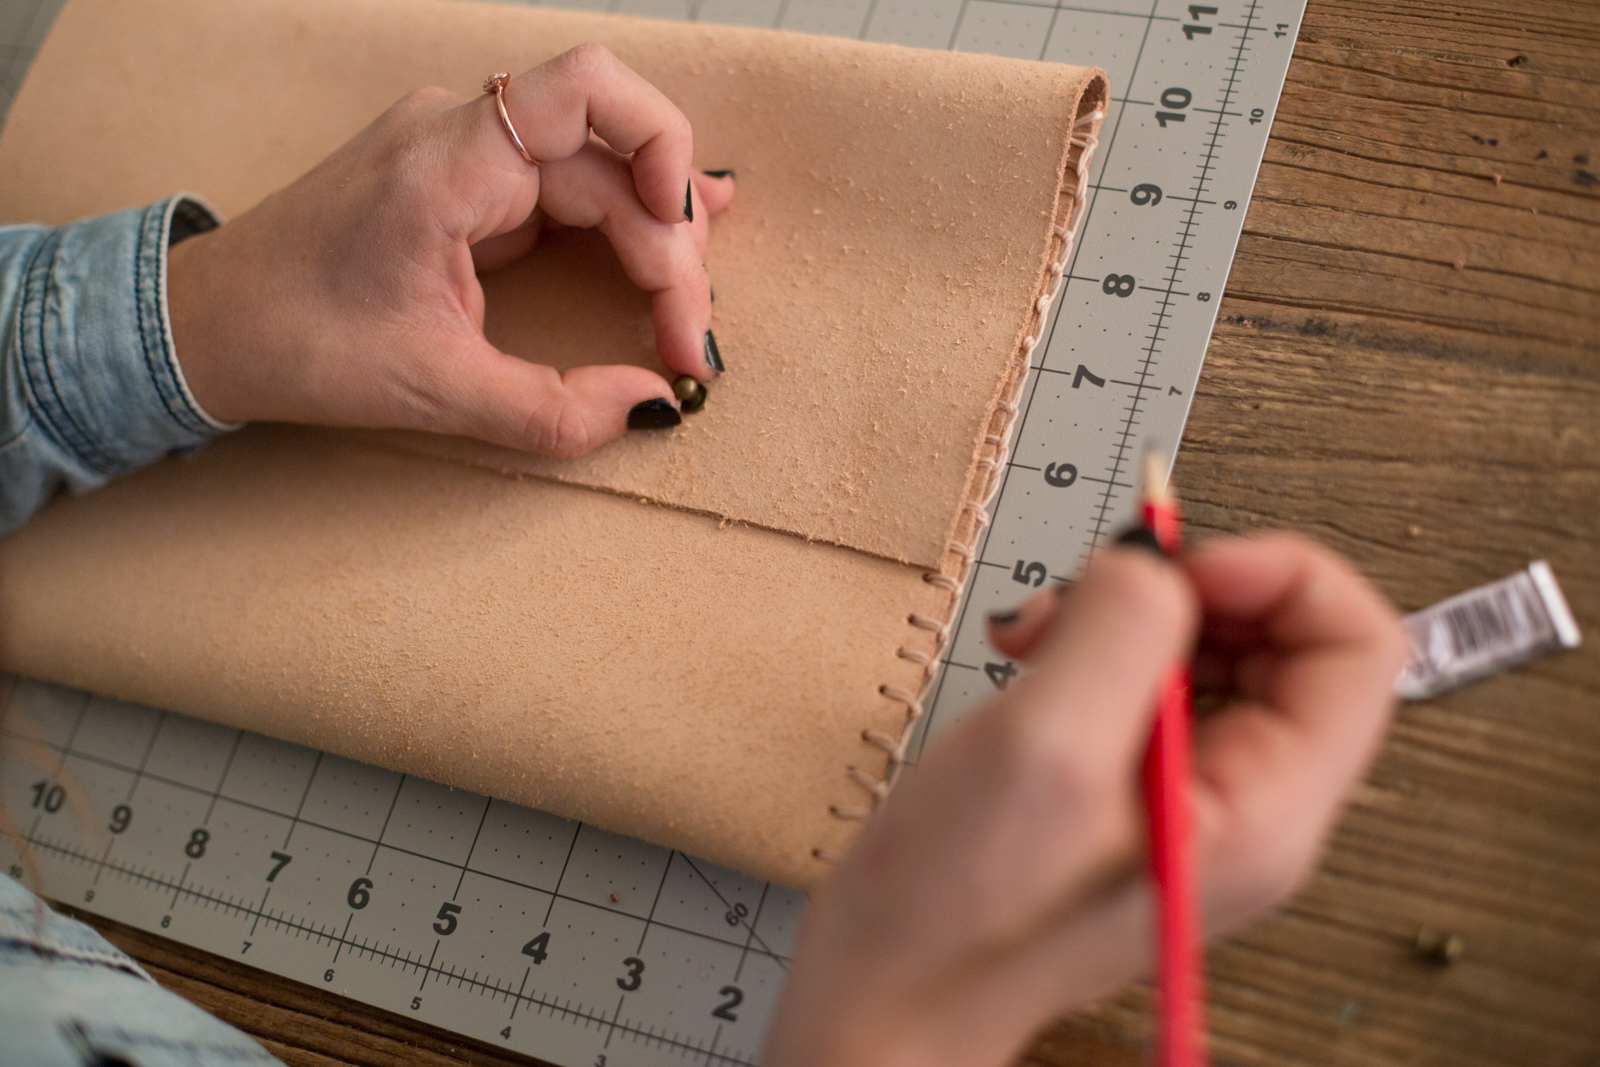
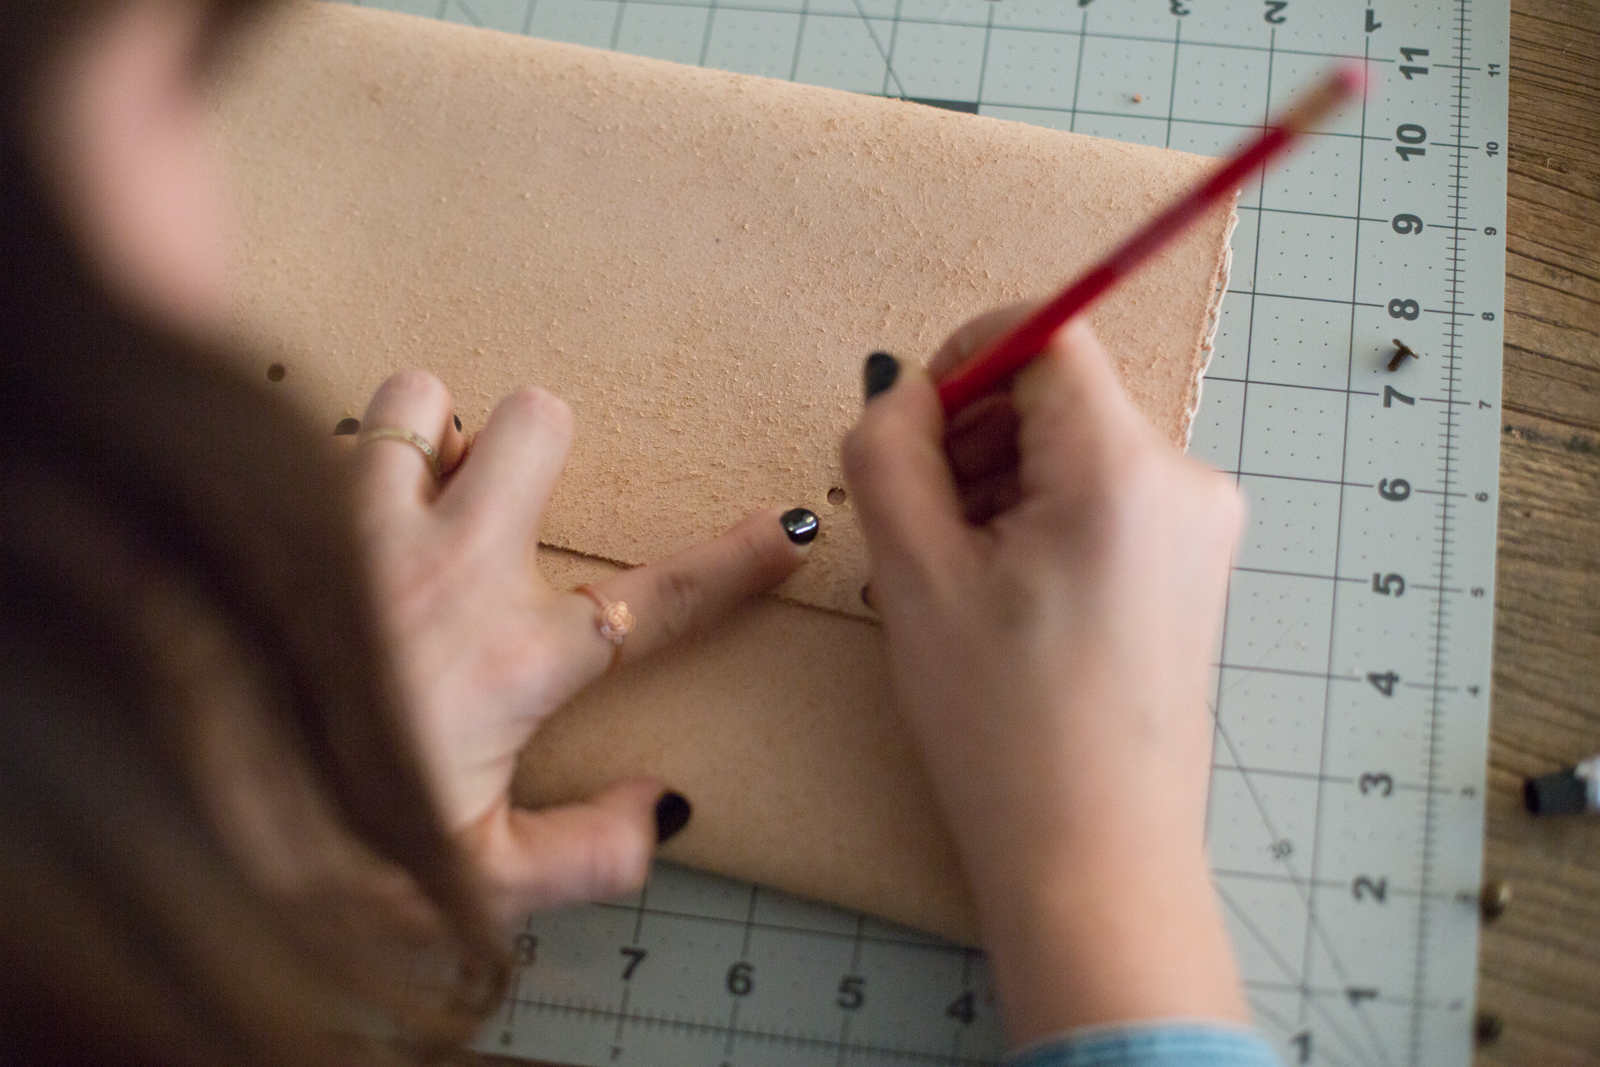
- For the studs, measure 2 dots on your top flap. They should be centered, mine were 1 inch up from the bottom of the flap and 3 inches in from the sides. Punch holes through the dots. Lay the flap over the pouch and mark a dot in the center of each hole onto the layer below. Then, use the x-acto knife to make small x-shaped incisions there for the fasteners to go through.
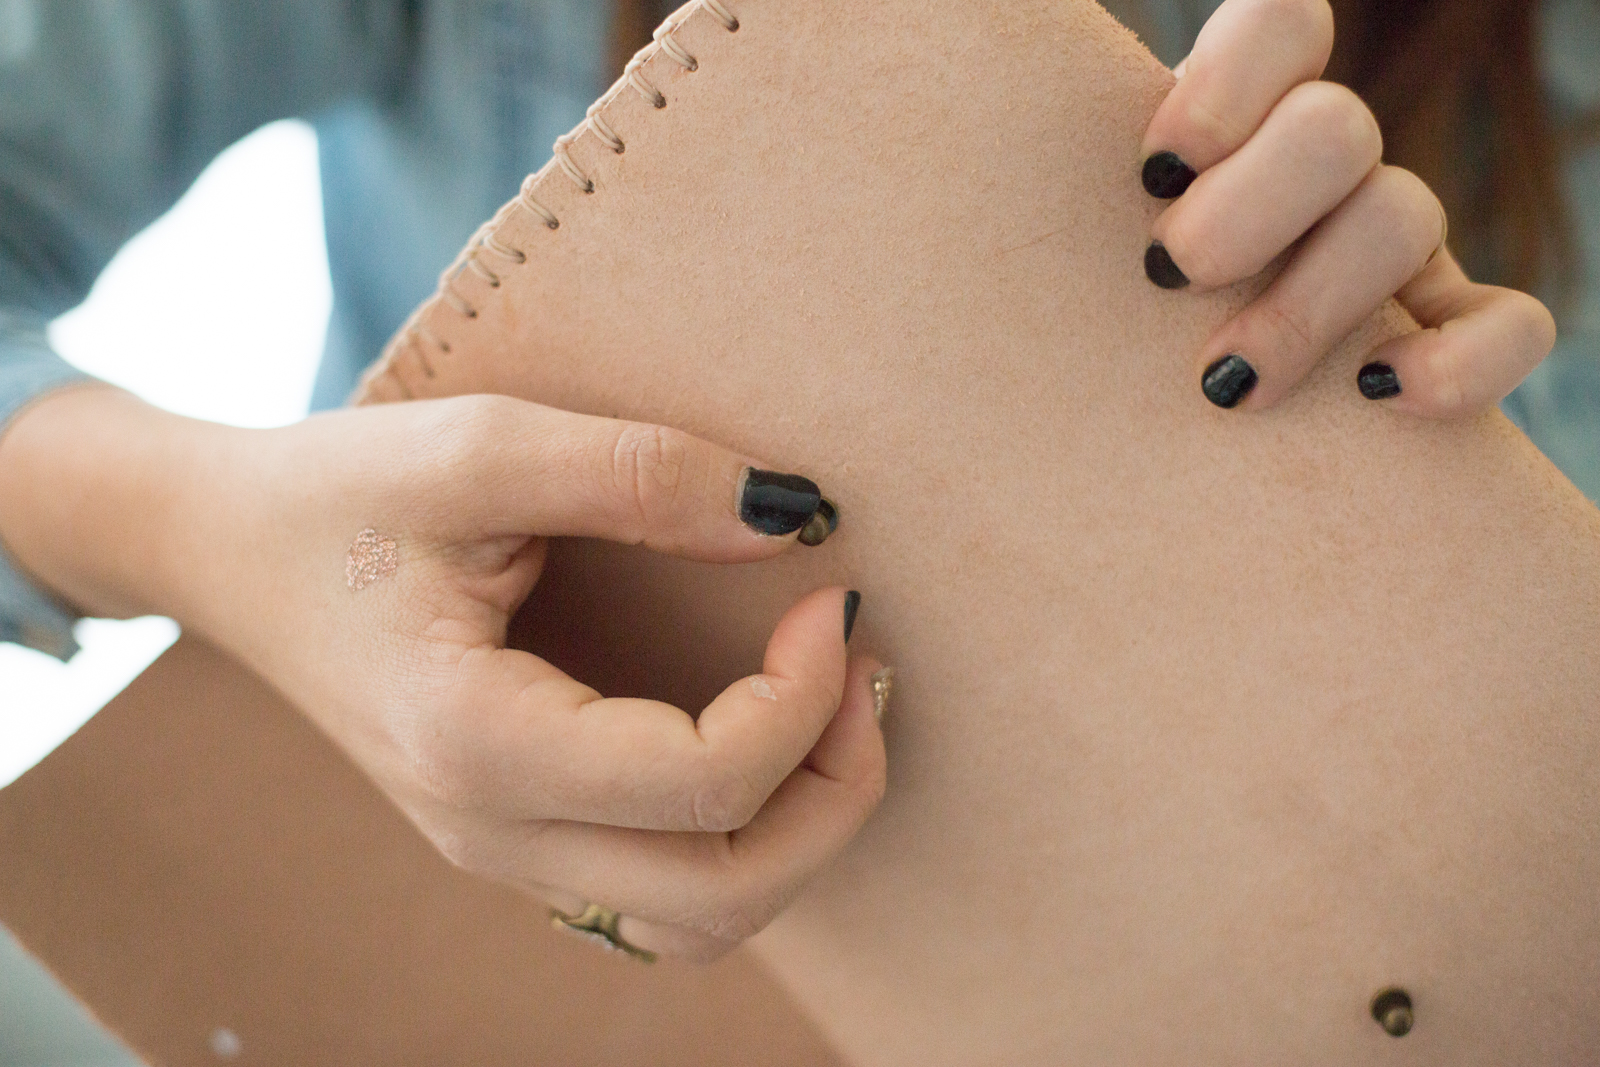
- Attach the fasteners to the pouch, per the instructions on the package you purchased, and now you should be able to fully close your envelope! You worked hard to create this little clutch, so rock it! Customize with paint, embroidery, rhinestones, or just leave plain. Whatever your creative soul chooses.