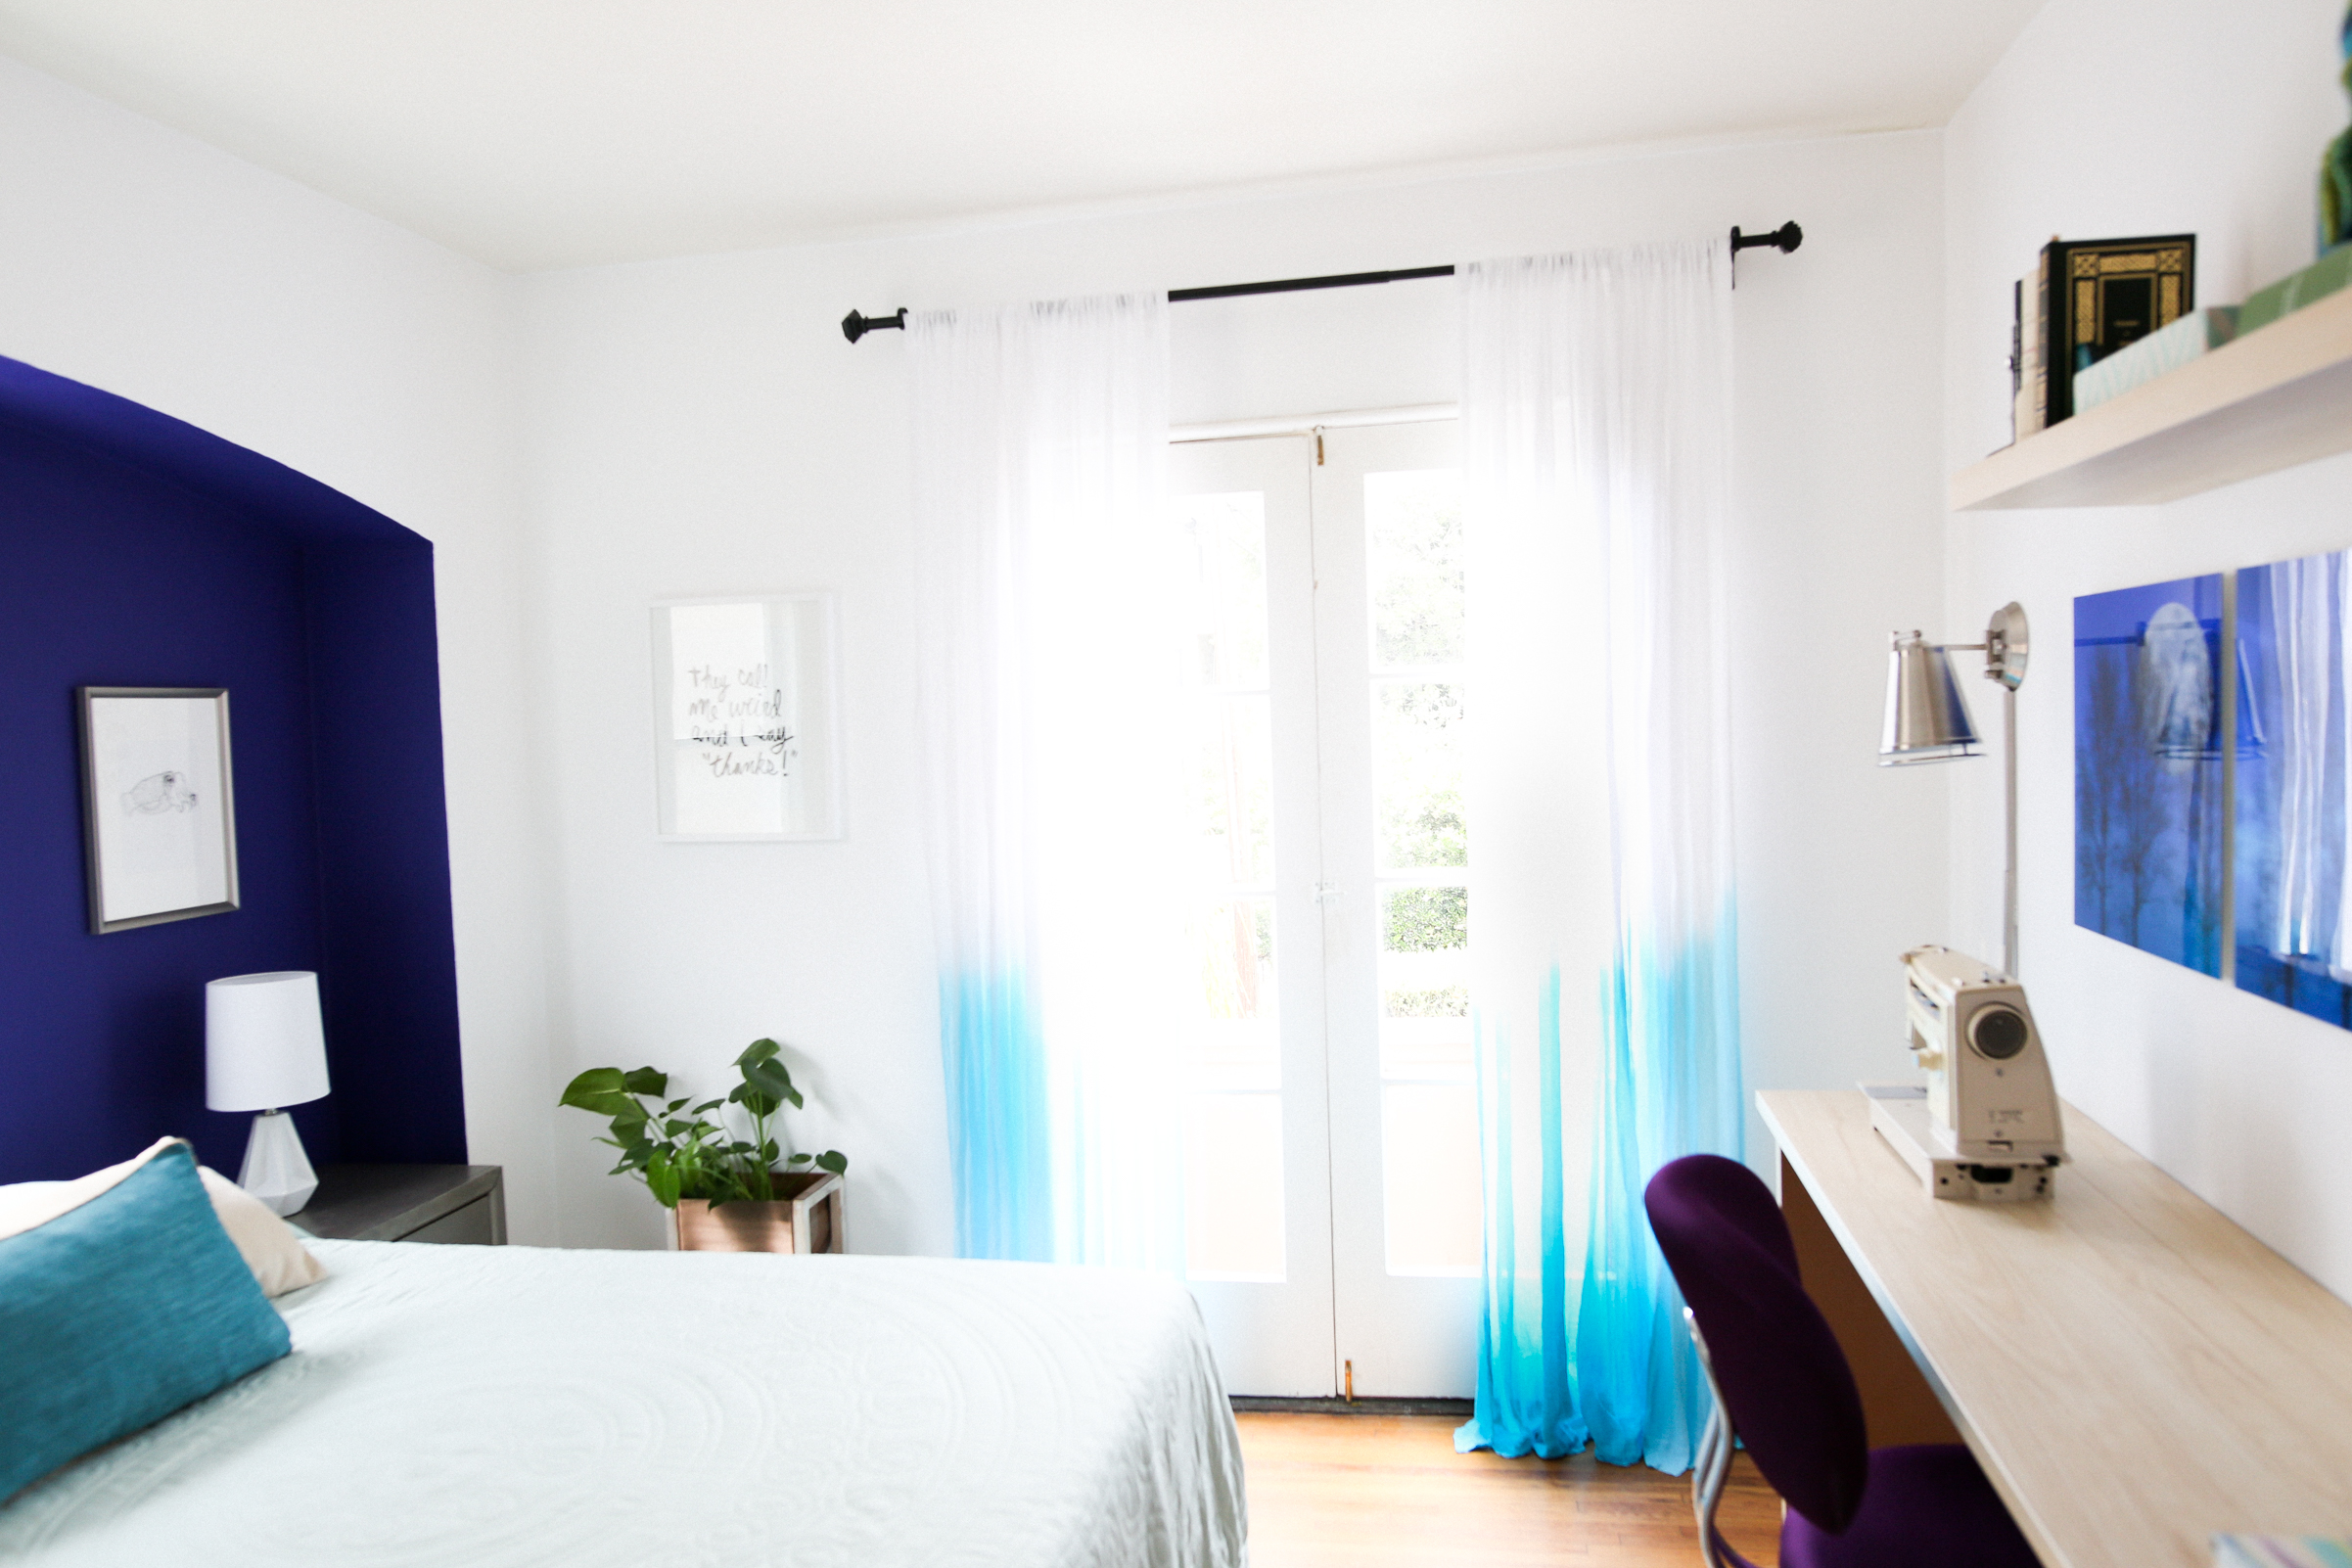
For this DIY, I was inspired by Yelena, the recipient of this Breaking Beige room makeover and her bright blue hair. When something is feeling a little uninspiring in life ... #whynot dye it?!
This obviously isn't a creative cure all. You can't dye a car or your kitchen table, for example. But if it's your hair or, for this DIY, more accurately — some white curtains, you feel needs a little something new, it's highly encouraged by this creative weirdo to break out the blue dye, get dipping, and see what colorful, cool masterpiece awaits you on the other side!
Prep It:
Cotton gauze curtain Rit dye Water Salt Bucket Drop cloth (water resistant!) Rubber gloves Drying rack
Do It!:
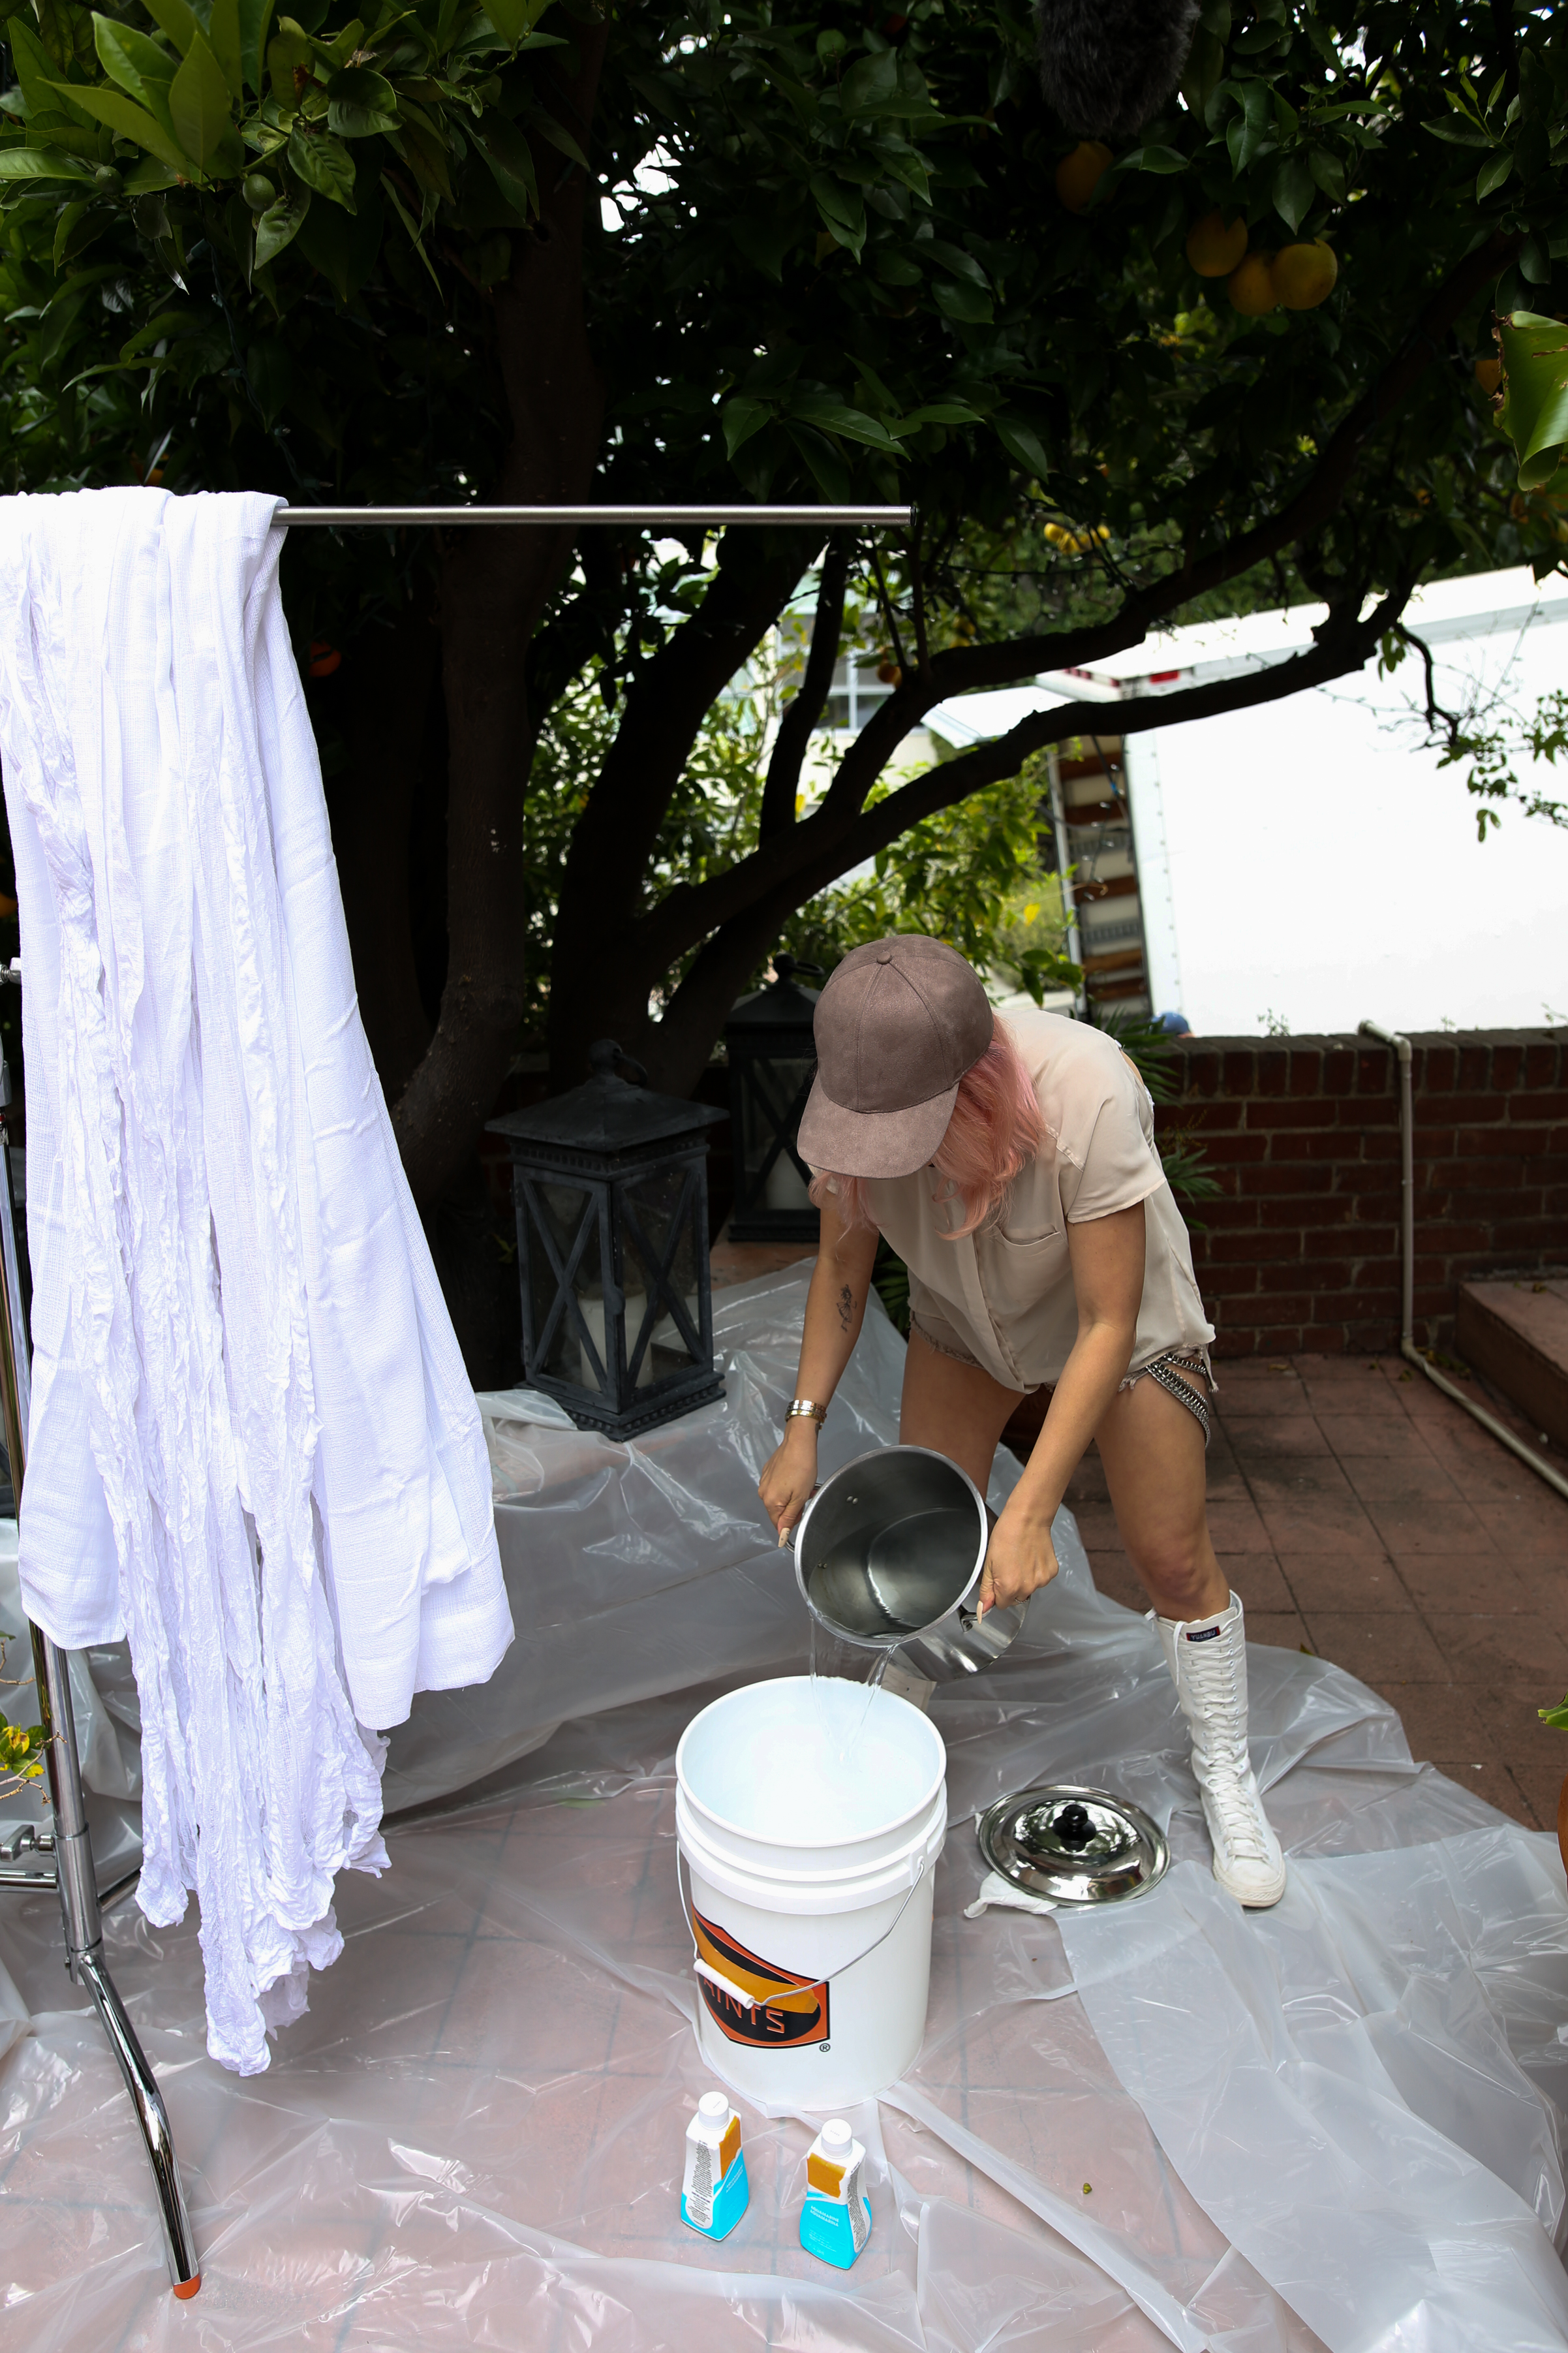
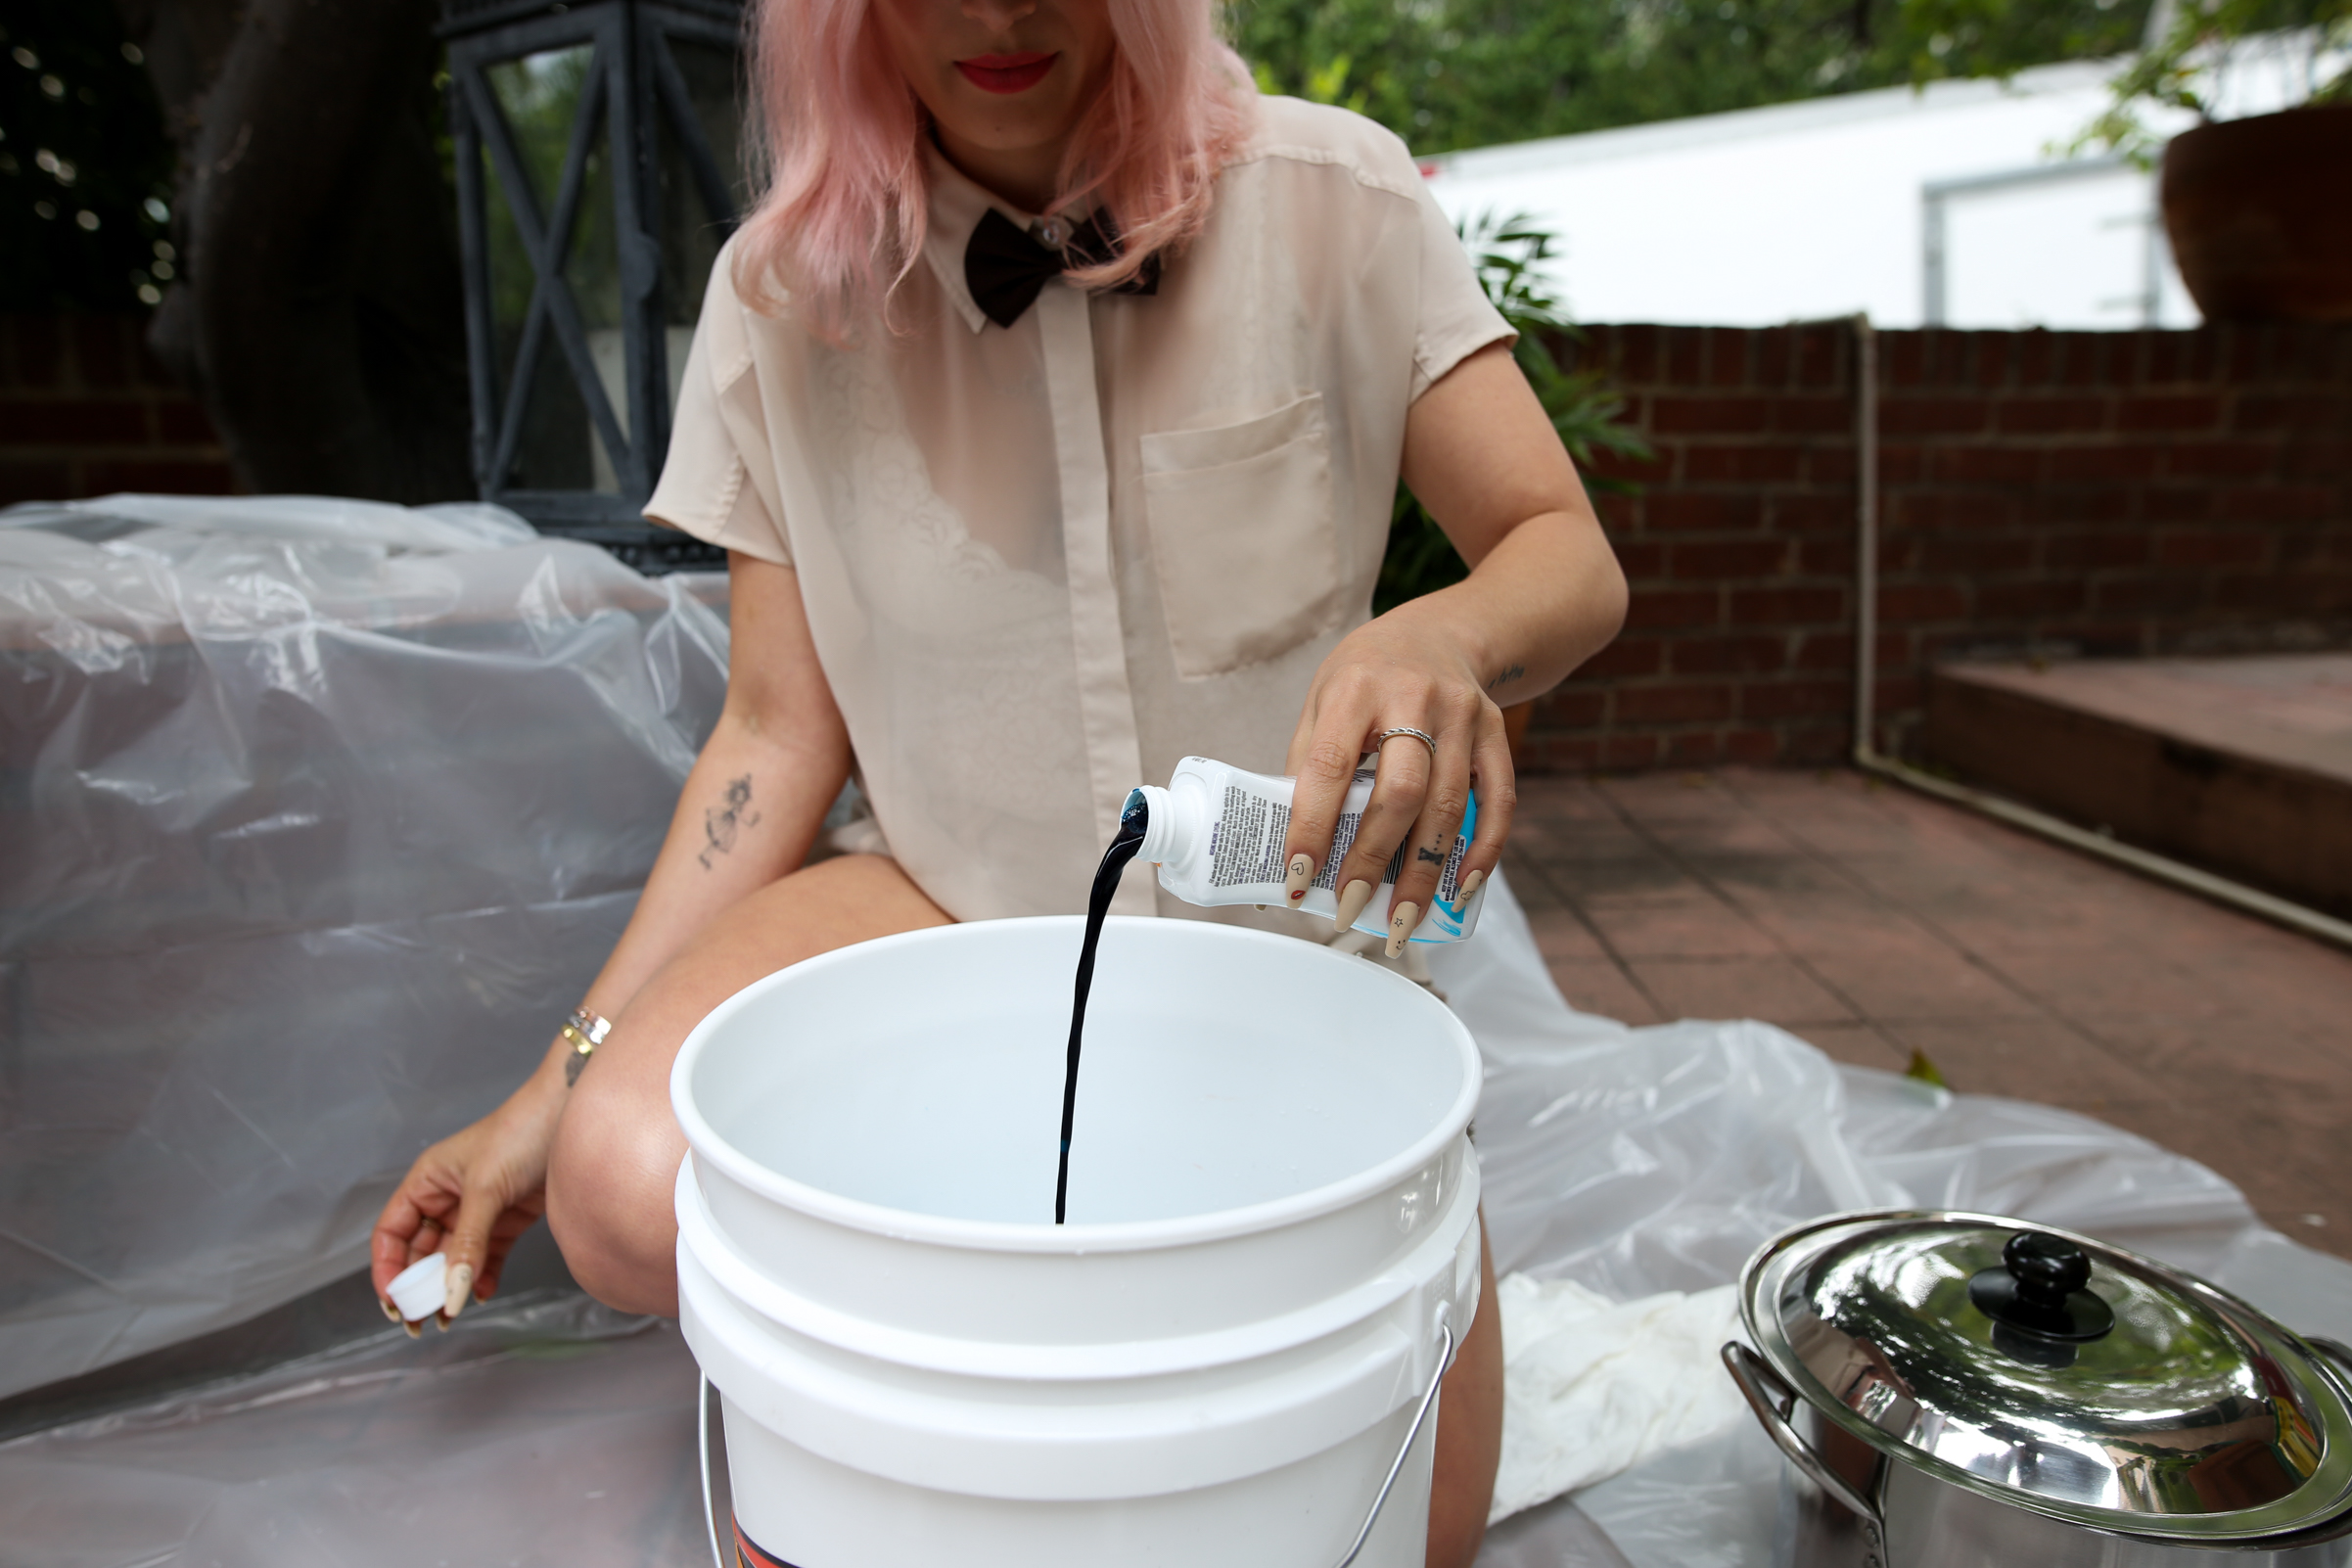
- Prep your water as indicated by your dye of choice. Usually the water needs to be heated with salt added! Mix the water and dye in a large bucket.
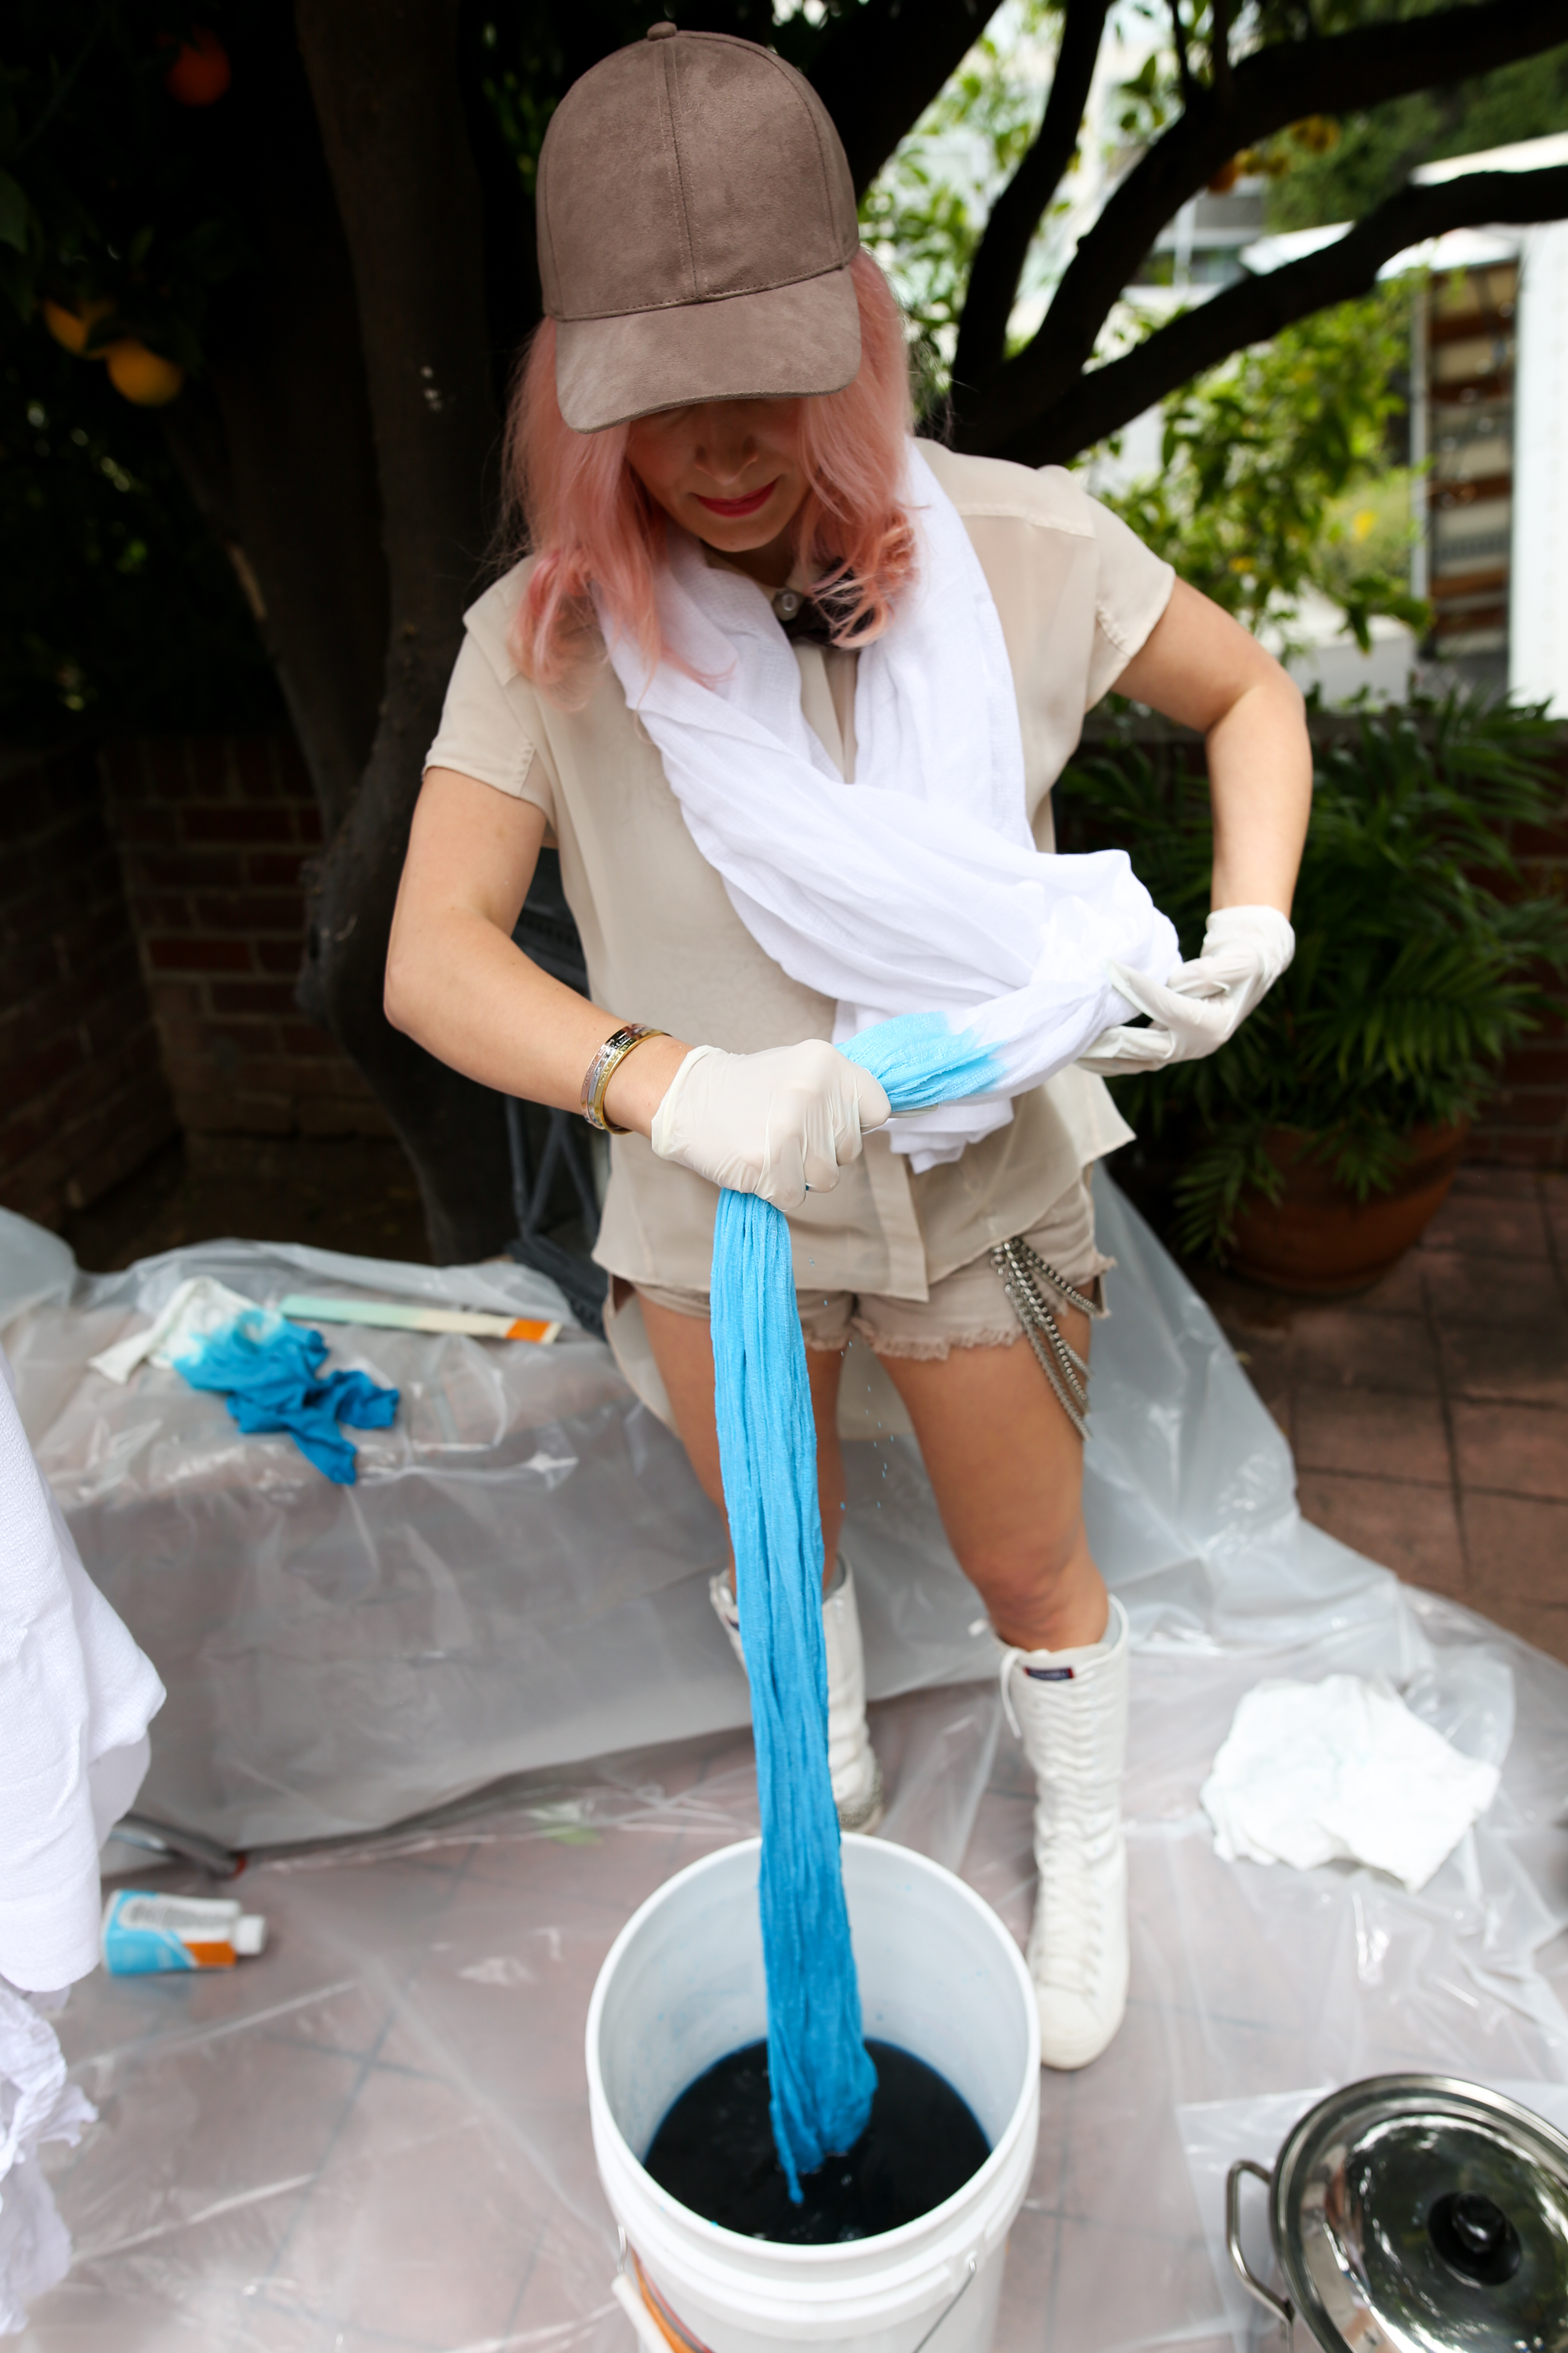
- Don those rubber gloves and lay out your drop cloth (additionally, I suggest doing this DIY outside, so if any dye escapes it's only getting into the ground on not on any furniture or carpets!
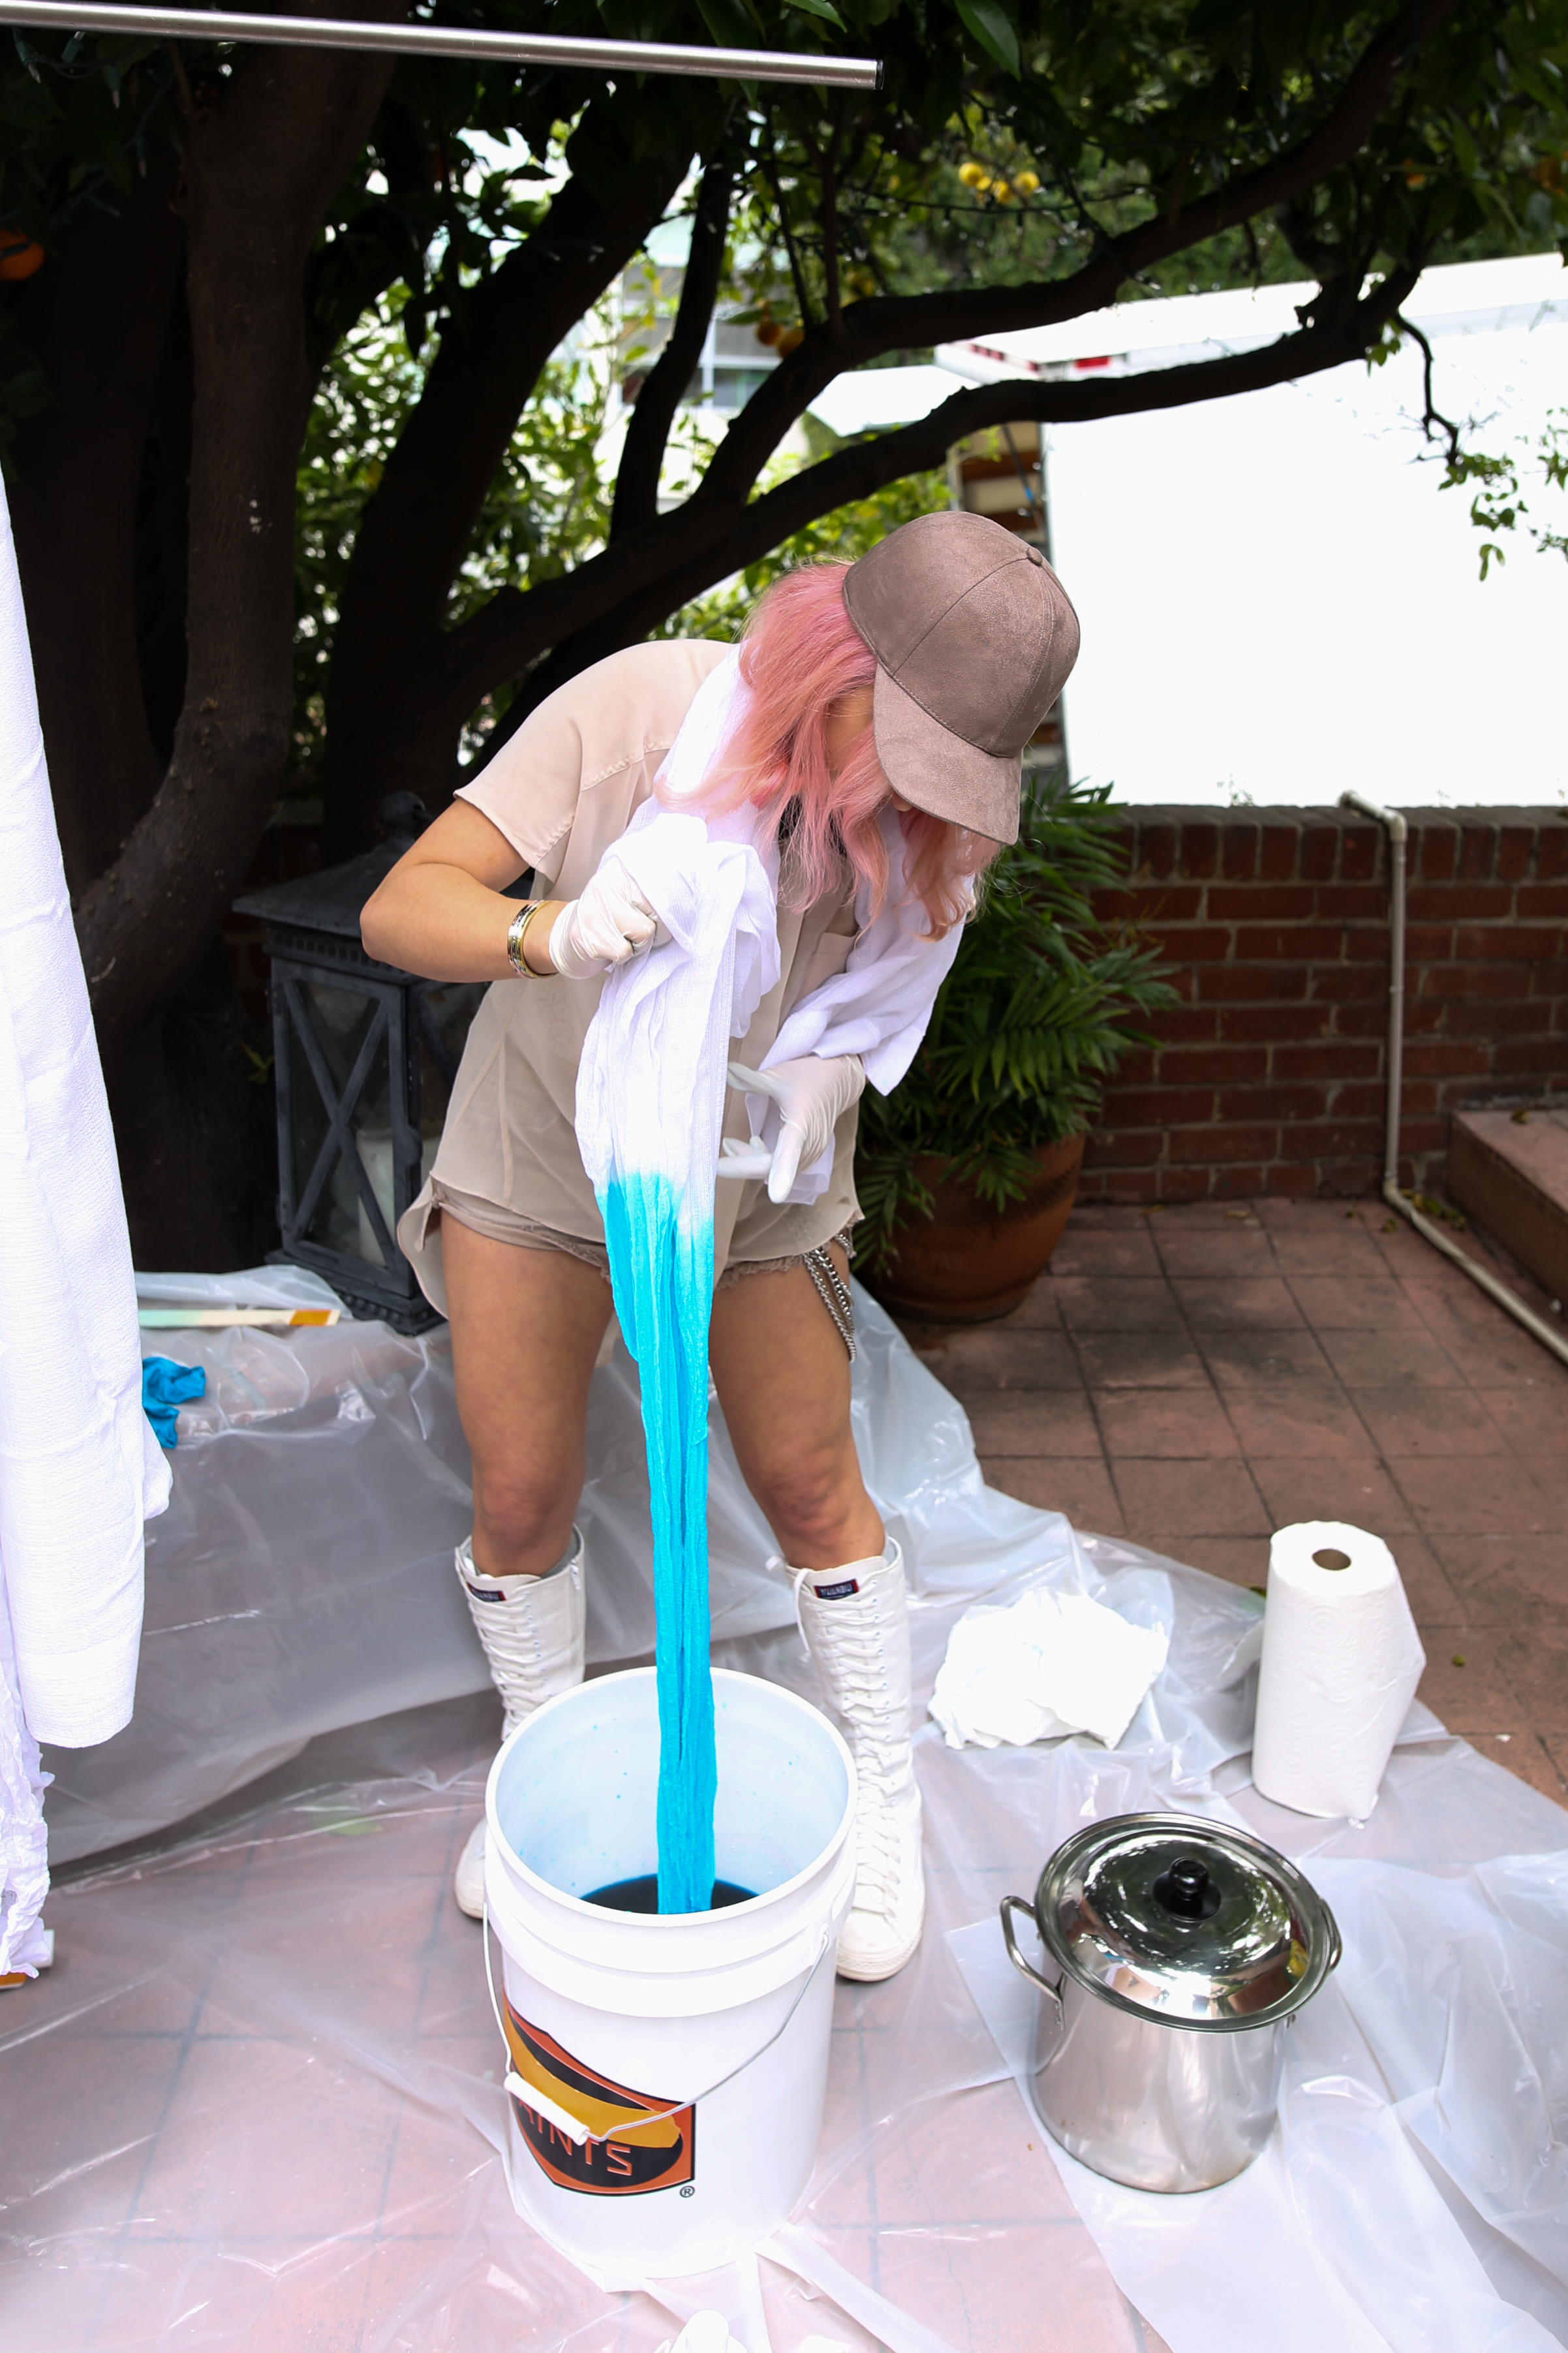
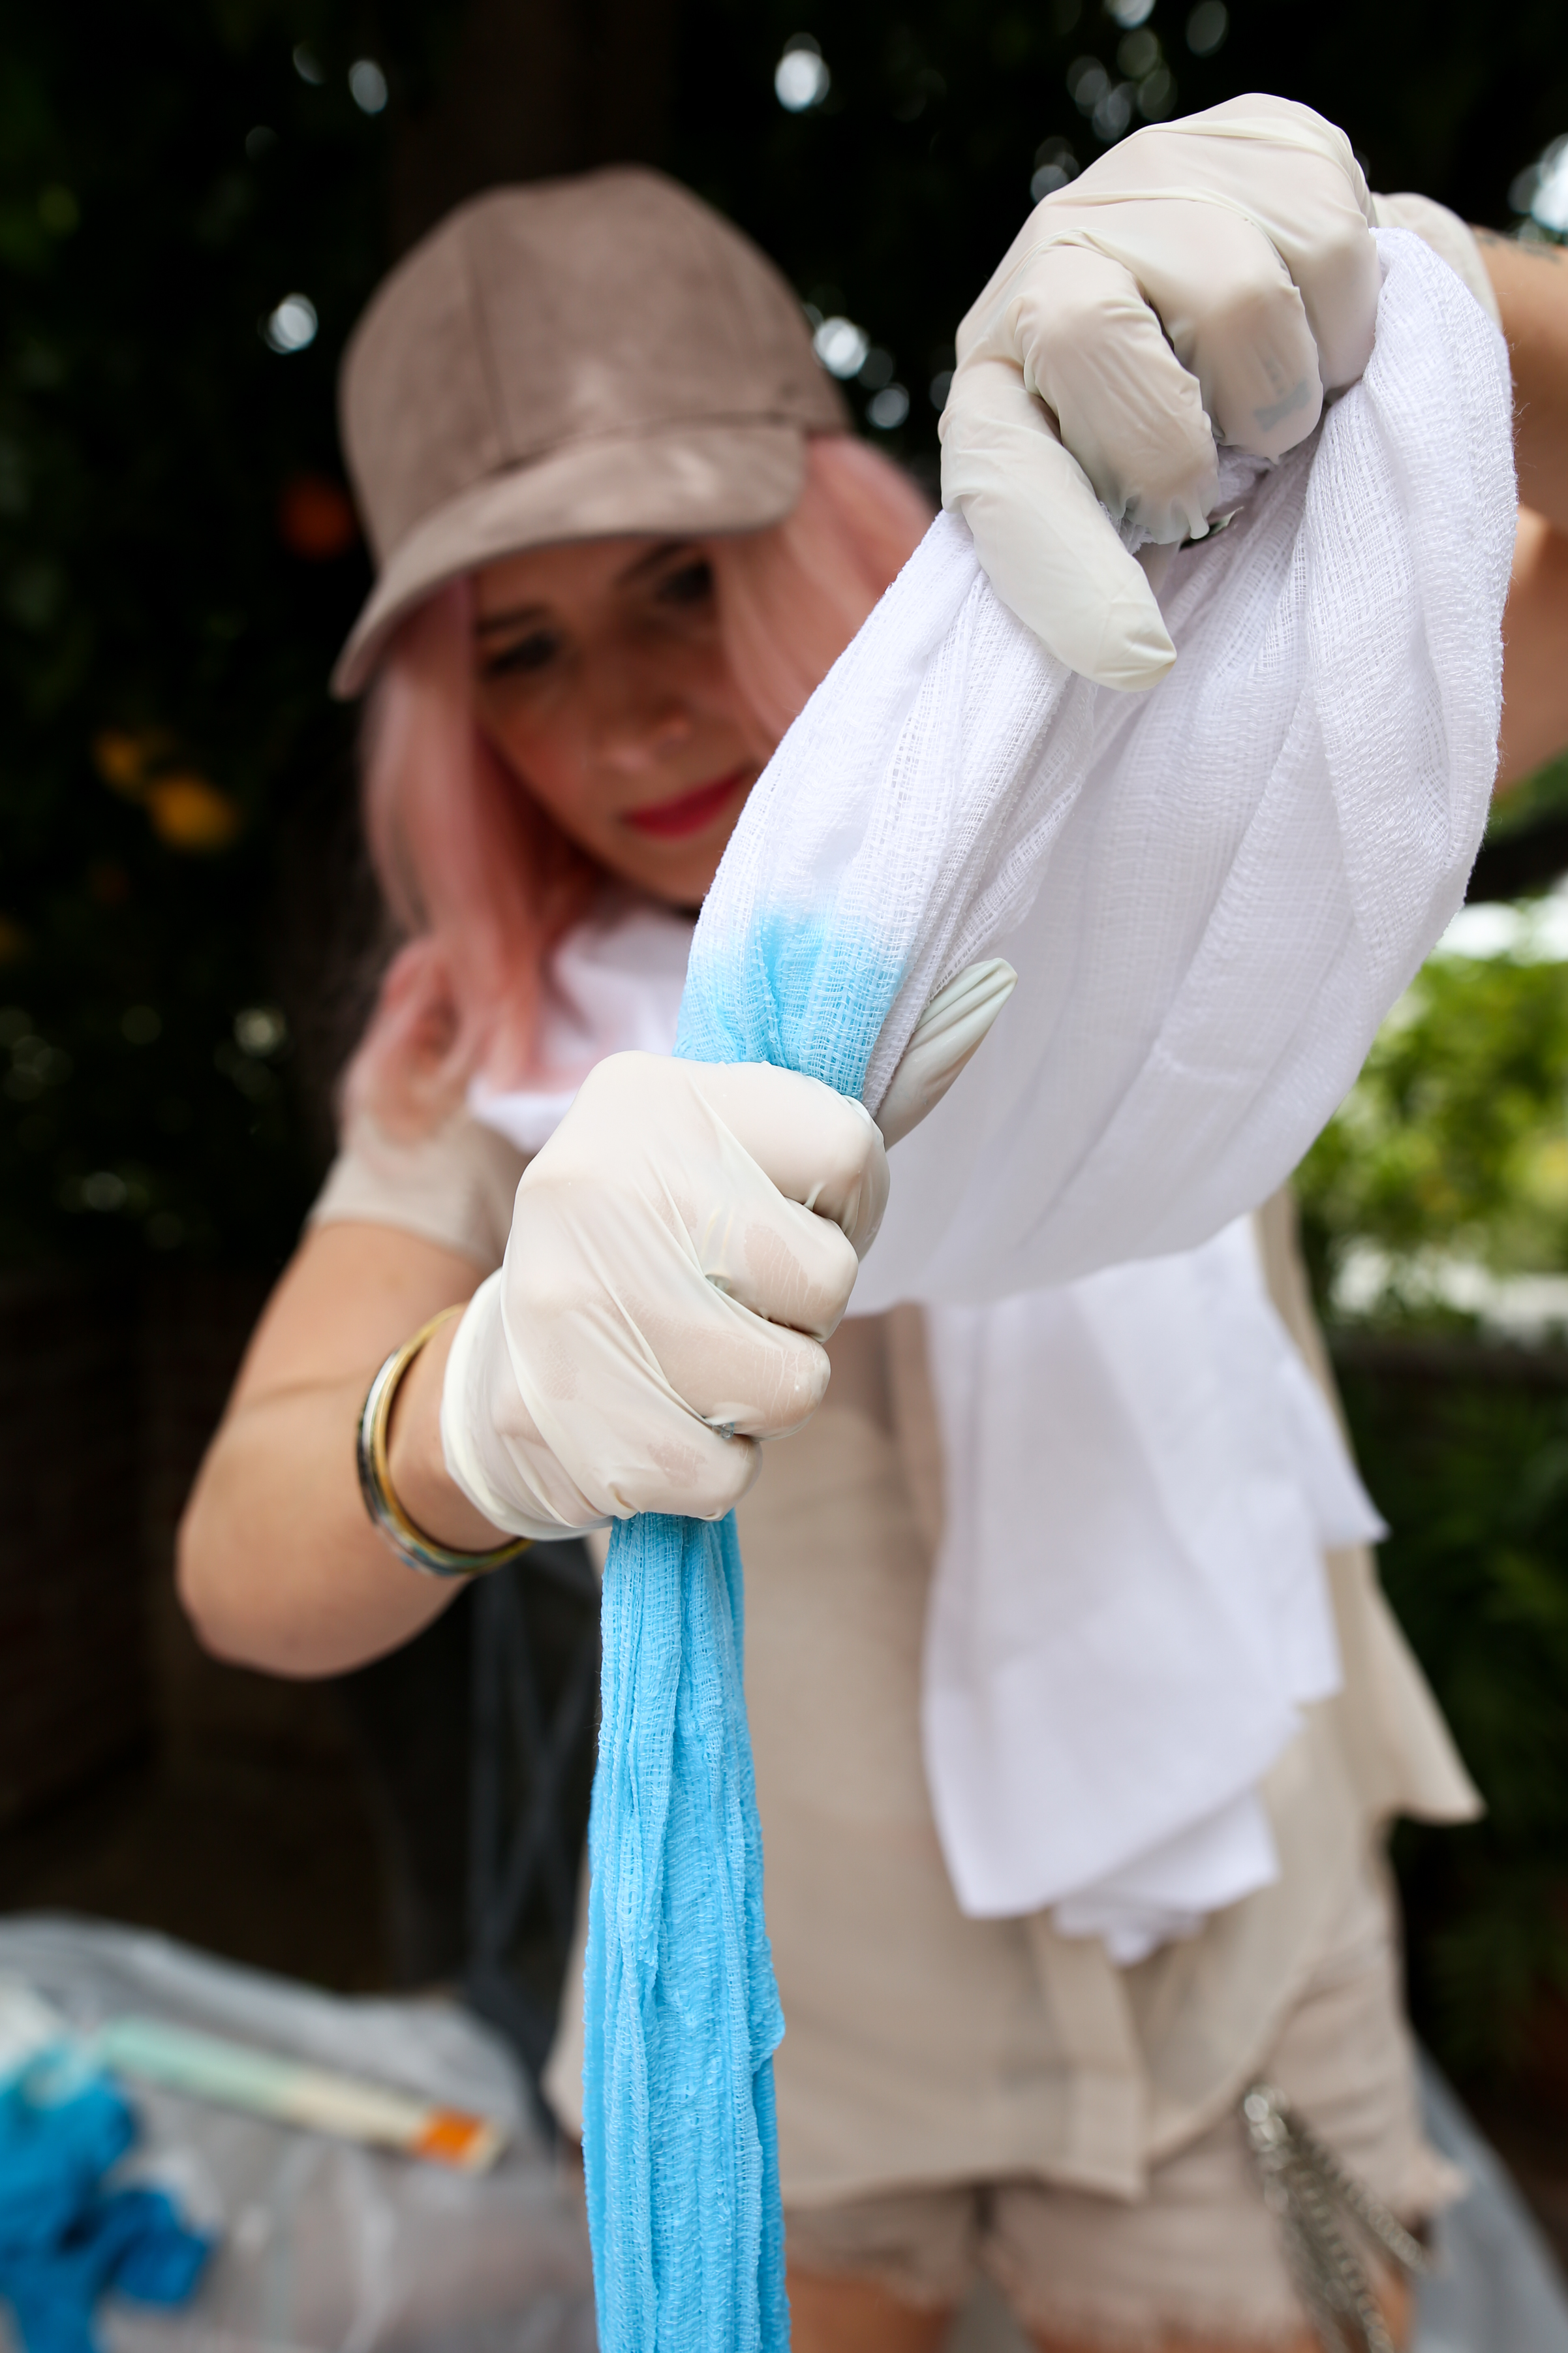
- Grab one of your curtains and dip the bottom few feet into the dye! Tip: You can pre-wet and wring out the area of the curtain you plan to dye so the dye doesn't spread too much through the dry fabric. I suggest using a cotton fabric for this project because the natural fiber is more absorbent and will retain the dye better, and the color will also spread more organically through the fibers of the cotton, giving the ombre look you desire! You can definitely do this project with a synthetic fabric, just be prepared to have the final result look a little different!
- Slowly lift the bottom of the curtain out of the dye, leaving the lower parts in the dye for increasing amounts of time. This will give the curtain the ombre look!
- Once you've removed the curtain from the dye fully, gently squeeze any excess dye and rinse your curtains in the tub or sink. Then hang it up to dry or tumble dry low (if it says it's ok to do so on your curtain panel tags). Use the first curtain as a visual cue for how much of the second curtain to dip into the dye! They won't match exactly, but that's part of the organic, DIY appeal!
- Once both your curtains have been dyed, rinsed and dried, steam or iron them a little and hang them up to enjoy!