Mr. Kate Advent Calendar Day 10: Wintery Nail Art!
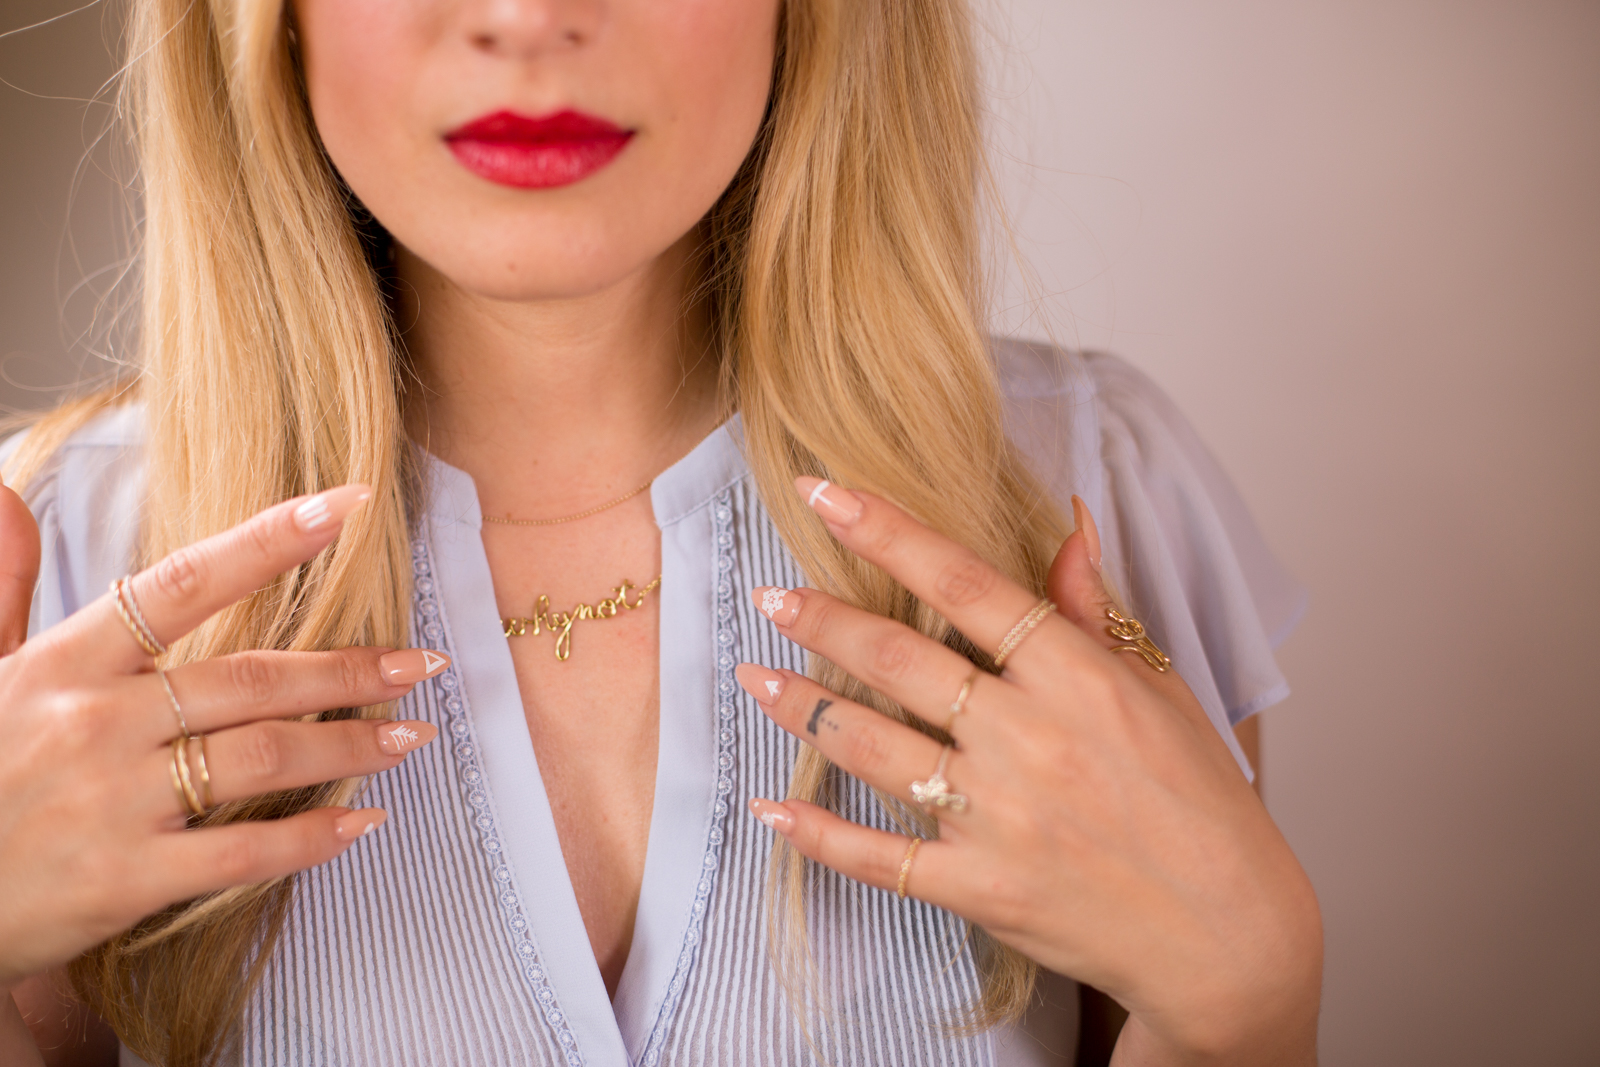
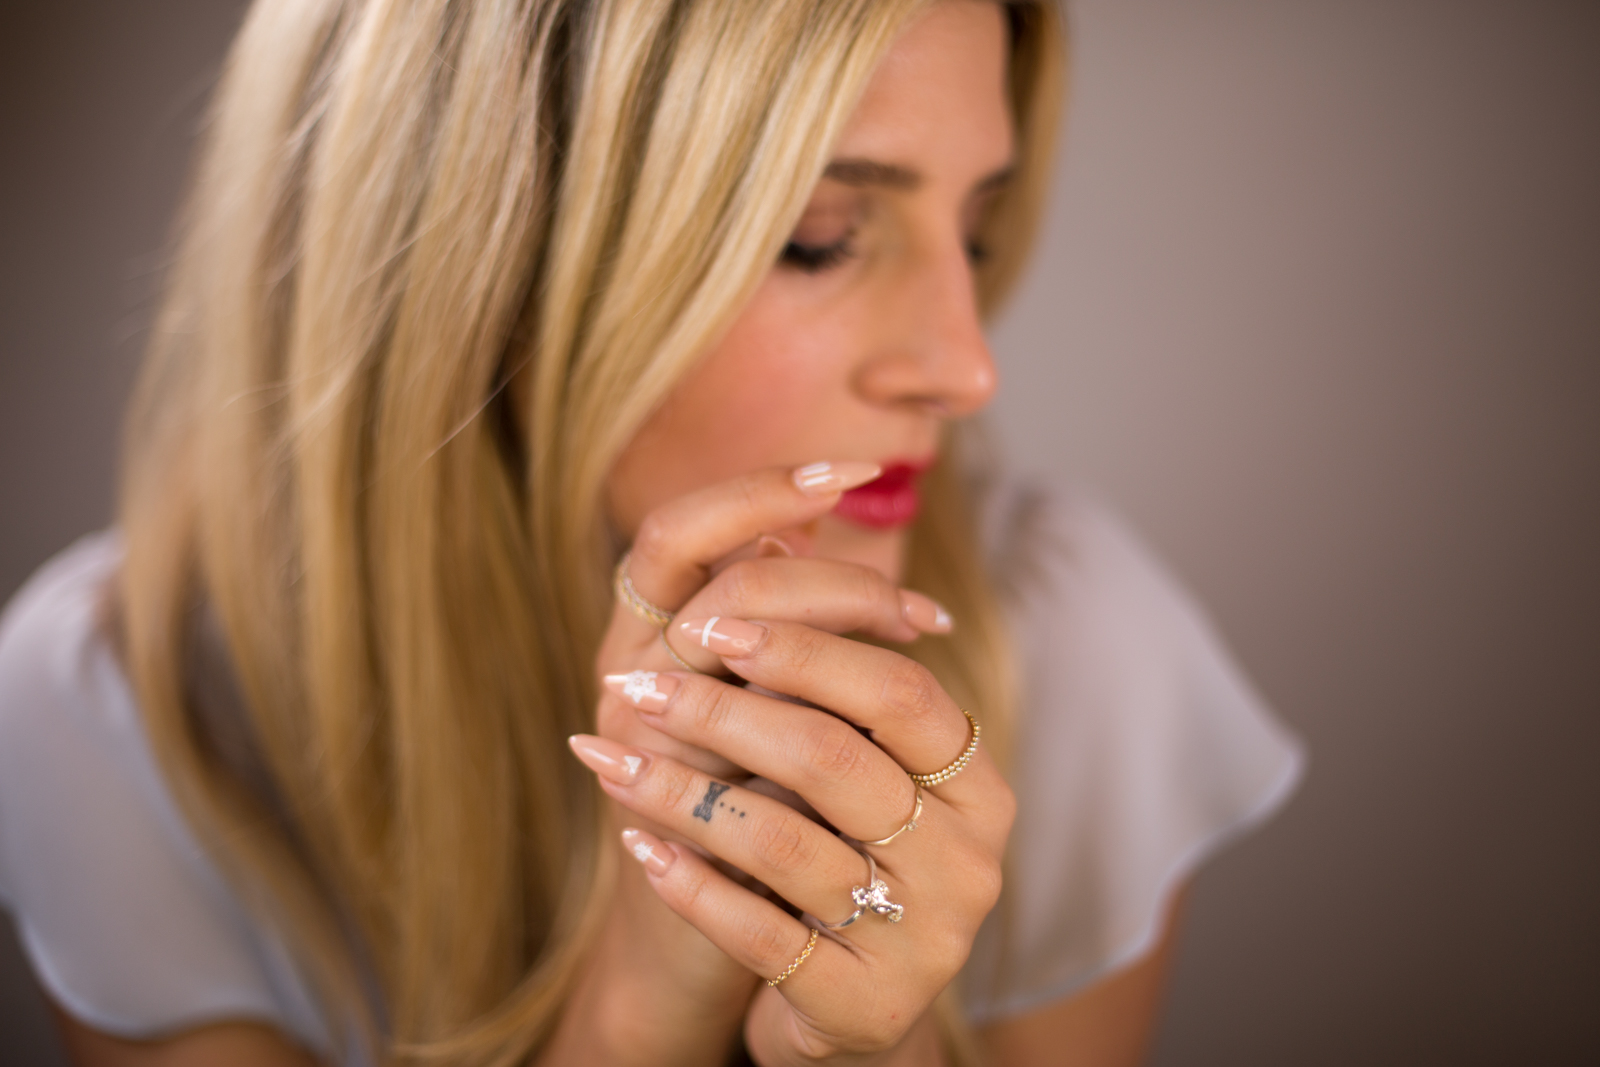
Ever since we released the White BeautyMarks, they've gotten a blizzard of comparisons to Frozen's Queen Elsa. Even though the temporary tattoos can't give you Elsa's snowy skills, they can definitely make you look the part! Inspired by the gorgeousness of winter ice and snowflakes, I used the White BeautyMarks to create a DIY Frozen Fractal manicure. With just a few pieces of the designs here and there, it's a chic and minimalistic take on those powerful icicle spewing digits of Disney fame.
Grab a pack of BeautyMarks from the shop, watch my tutorial above, put on the Frozen soundtrack, and get to work! The end result will have you feeling so much like a snow queen, you'll never let it go.... sorry, it will be stuck in your head for the rest of the day but I had to!
Want to make your (Beauty)mark elsewhere this holiday season? Check out these Decorative Cutting Boards!
 Prep It:
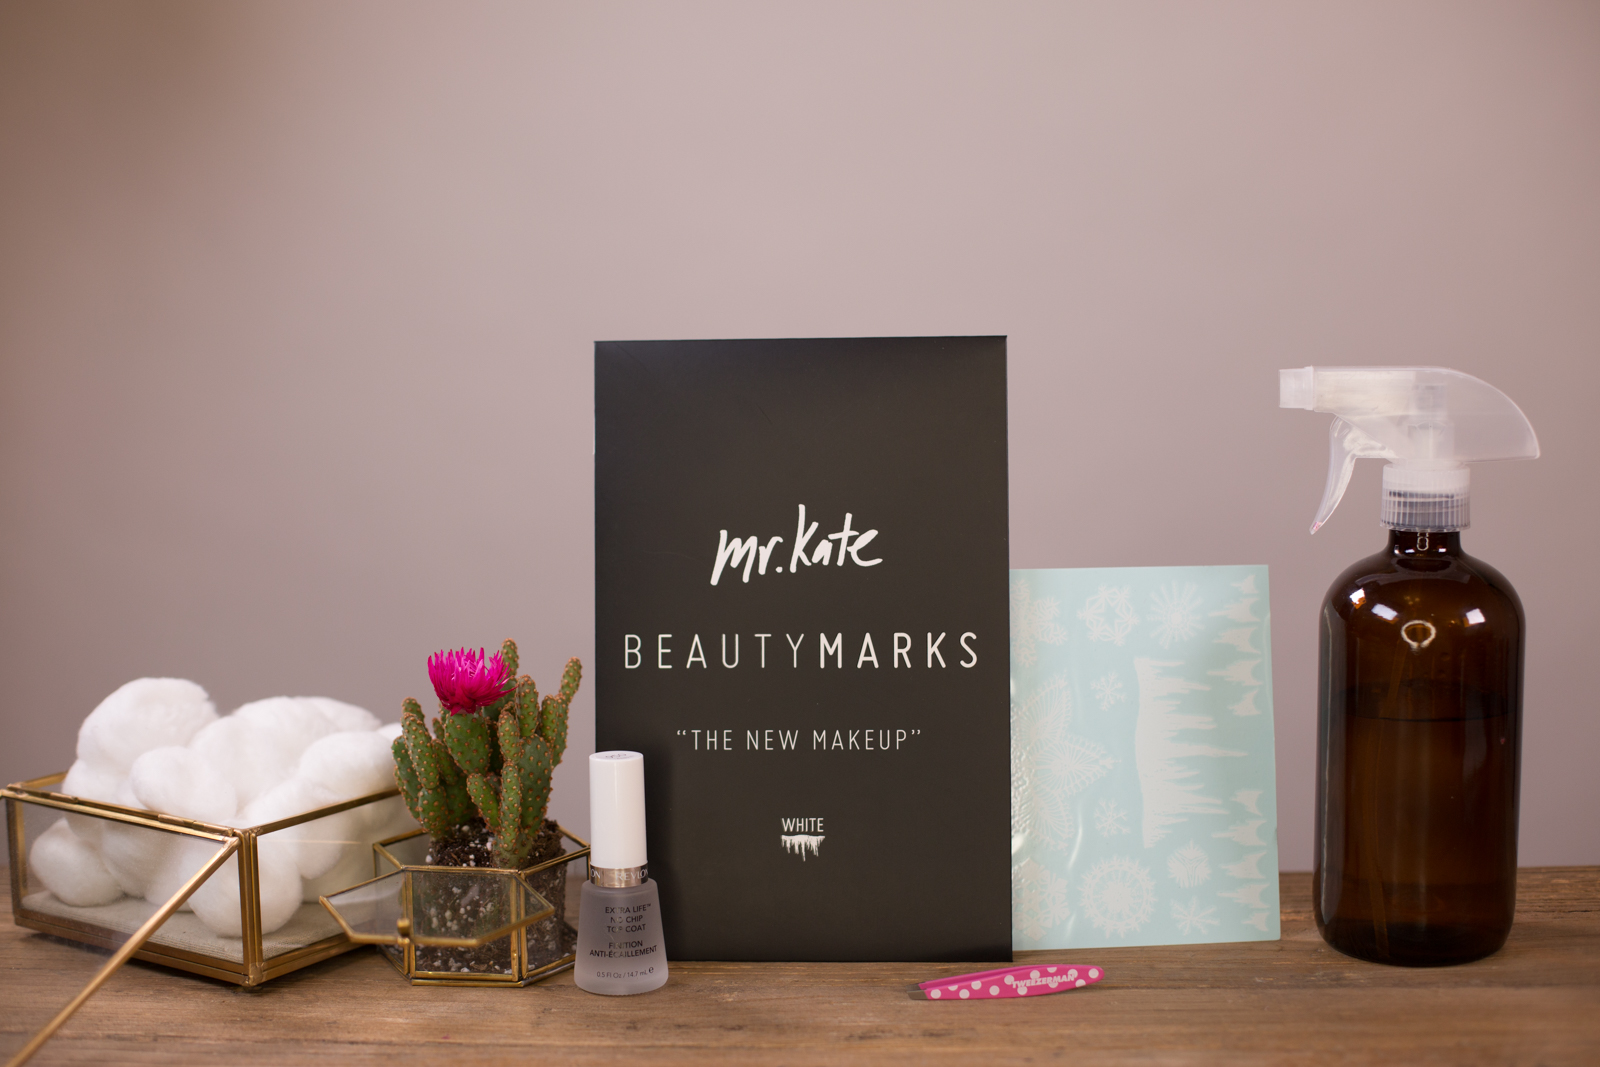
White BeautyMarks Tweezers Cotton balls Clear top coat
Do It!:
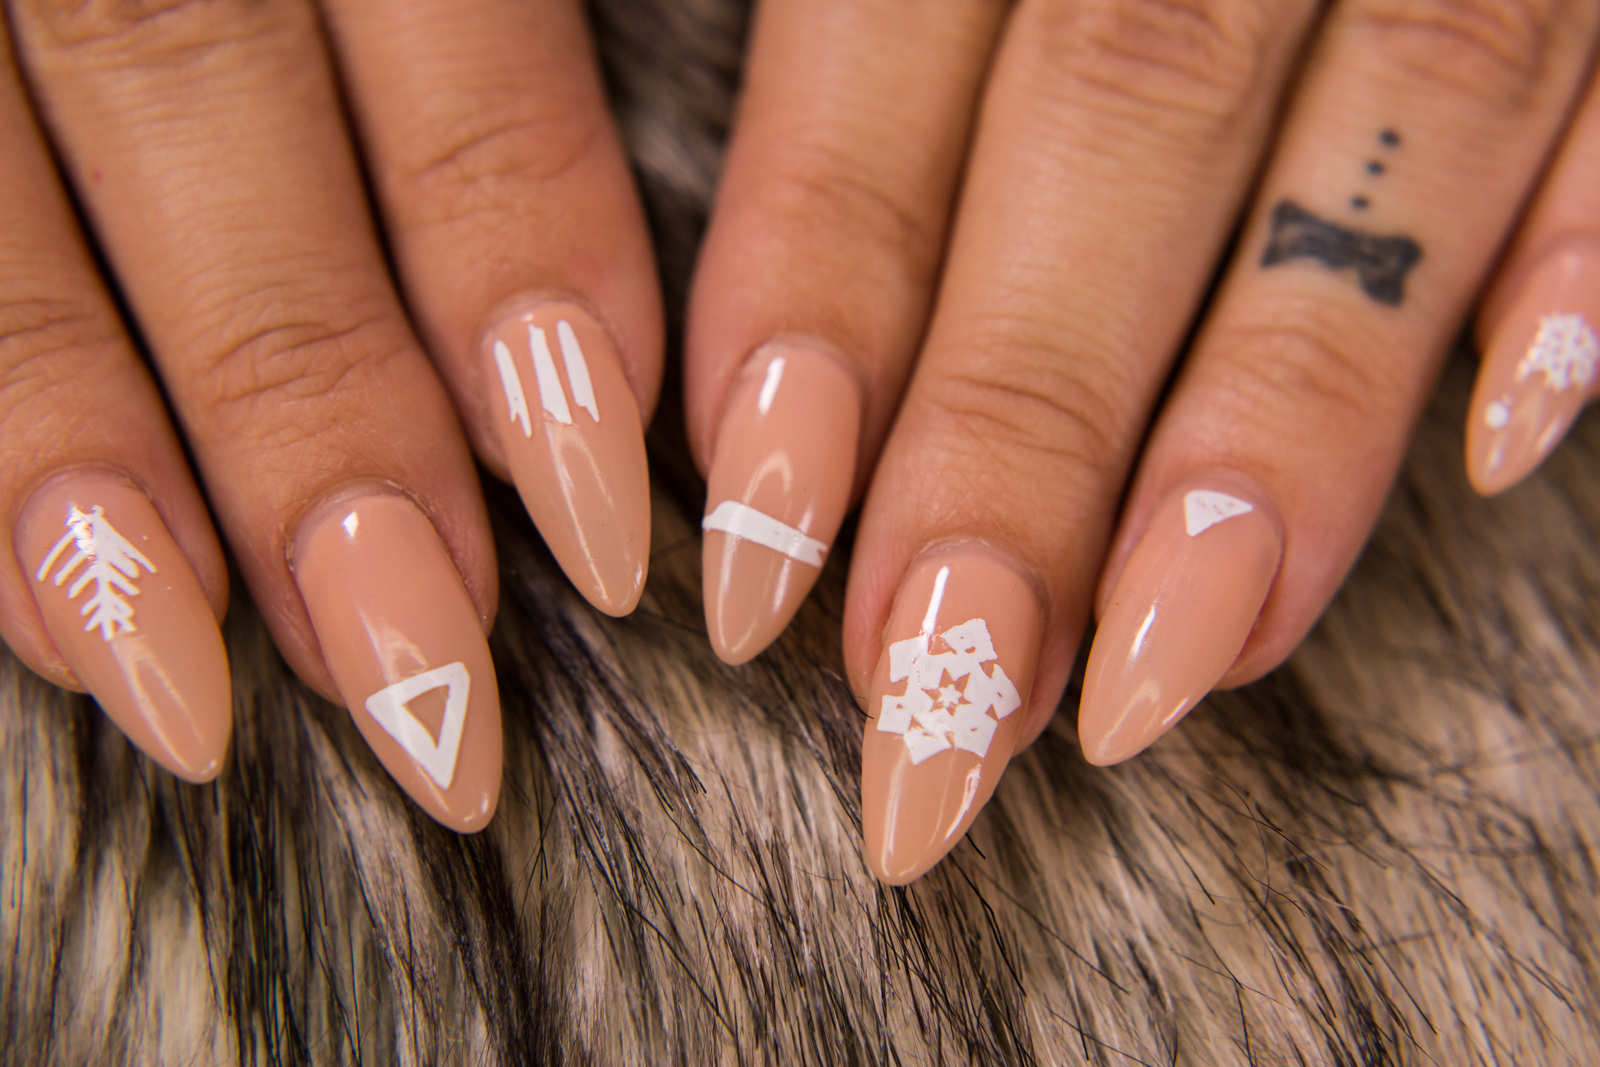
- Start by applying a base coat of whatever color you'd like! I chose a neutral nude, to really keep with the themes of the White BeautyMarks being shapes found in nature. Make sure this layer is completely dry before putting on any BeautyMarks, or else it can smudge!
- Choose the shapes or designs you'd like to apply, and cut them out. Remove the clear backing and carefully place the desired BeautyMark on the nail you'd like using tweezers. This will help you get accuracy in your placement, because once the BeautyMark is put down, it's tricky to move (and that's before water!)
- Moisten a cotton ball and hold it over the BeautyMark on your nail for 30 seconds. Peel it off slowly and carefully remove the backing of the design to make sure it stuck!
- Repeat on any and all nails! Get creative with your placements, and show me your ideas by posting the pics with #BeautyMarks #mrkate! If you don't have a pack of BeautyMarks, never fear, just use a thin paintbrush or toothpick and opaque white nail polish to draw some wintry swirls and shapes for the same effect.
- Once all your desired nails are decked out and 100% dry, finish with a coat of clear top coat to seal the design in.