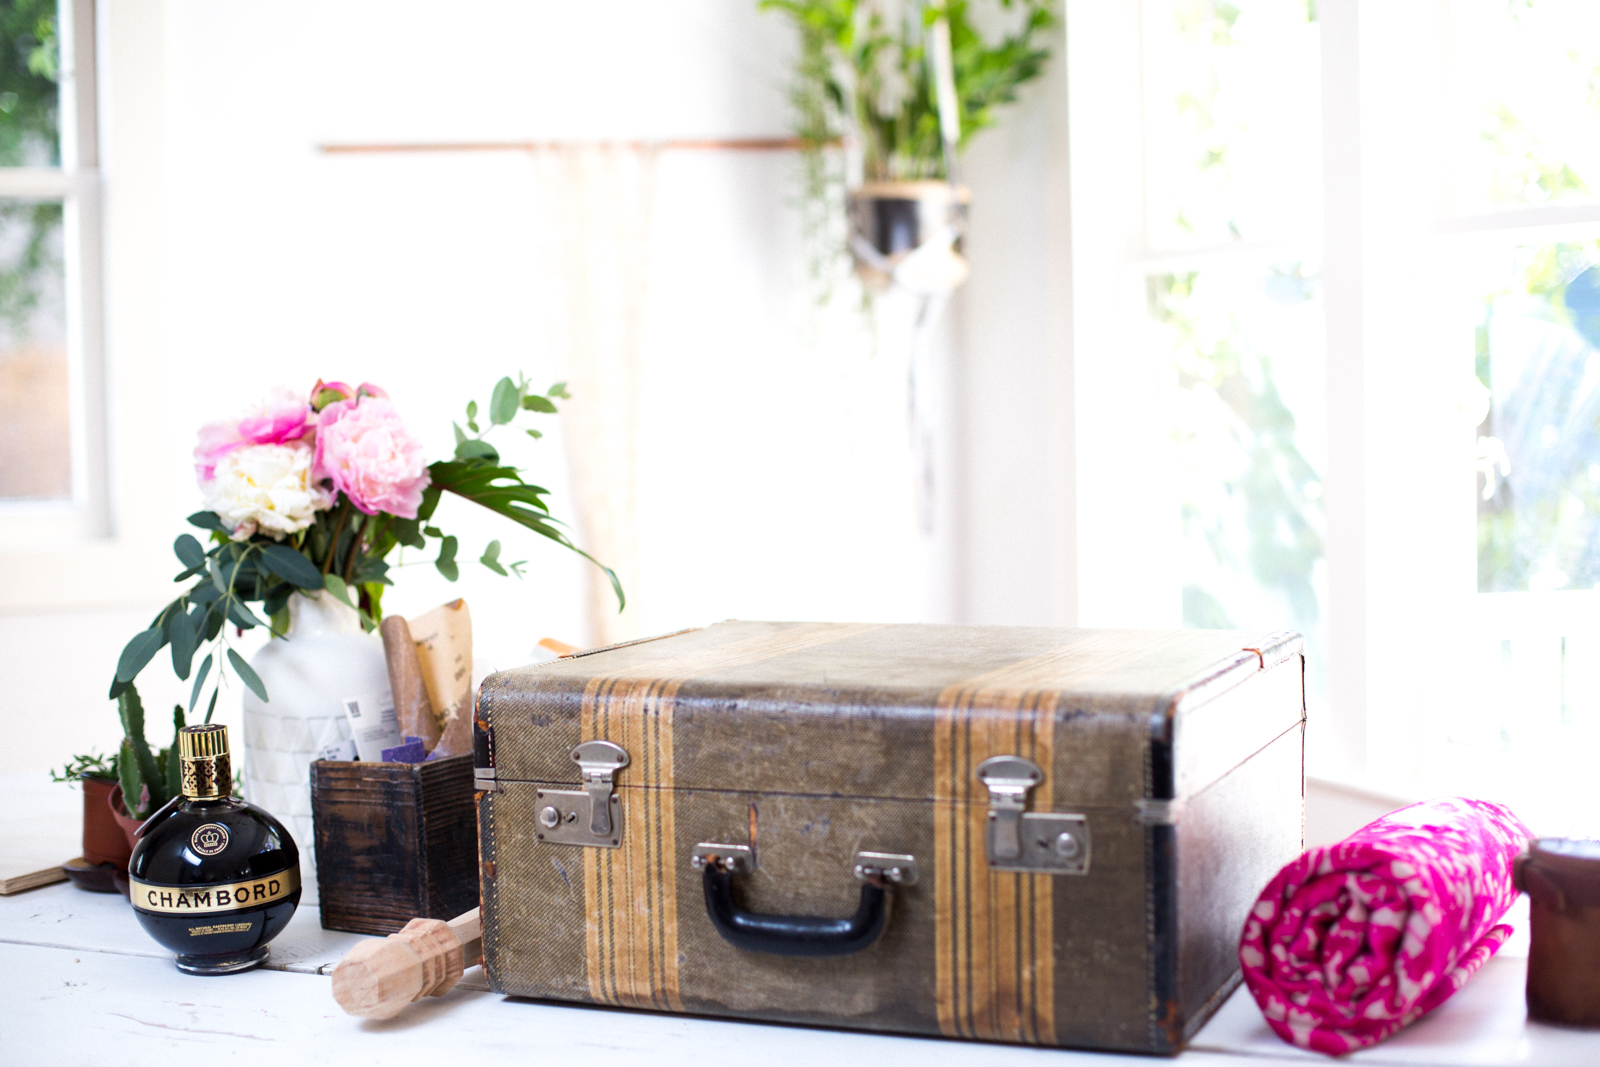
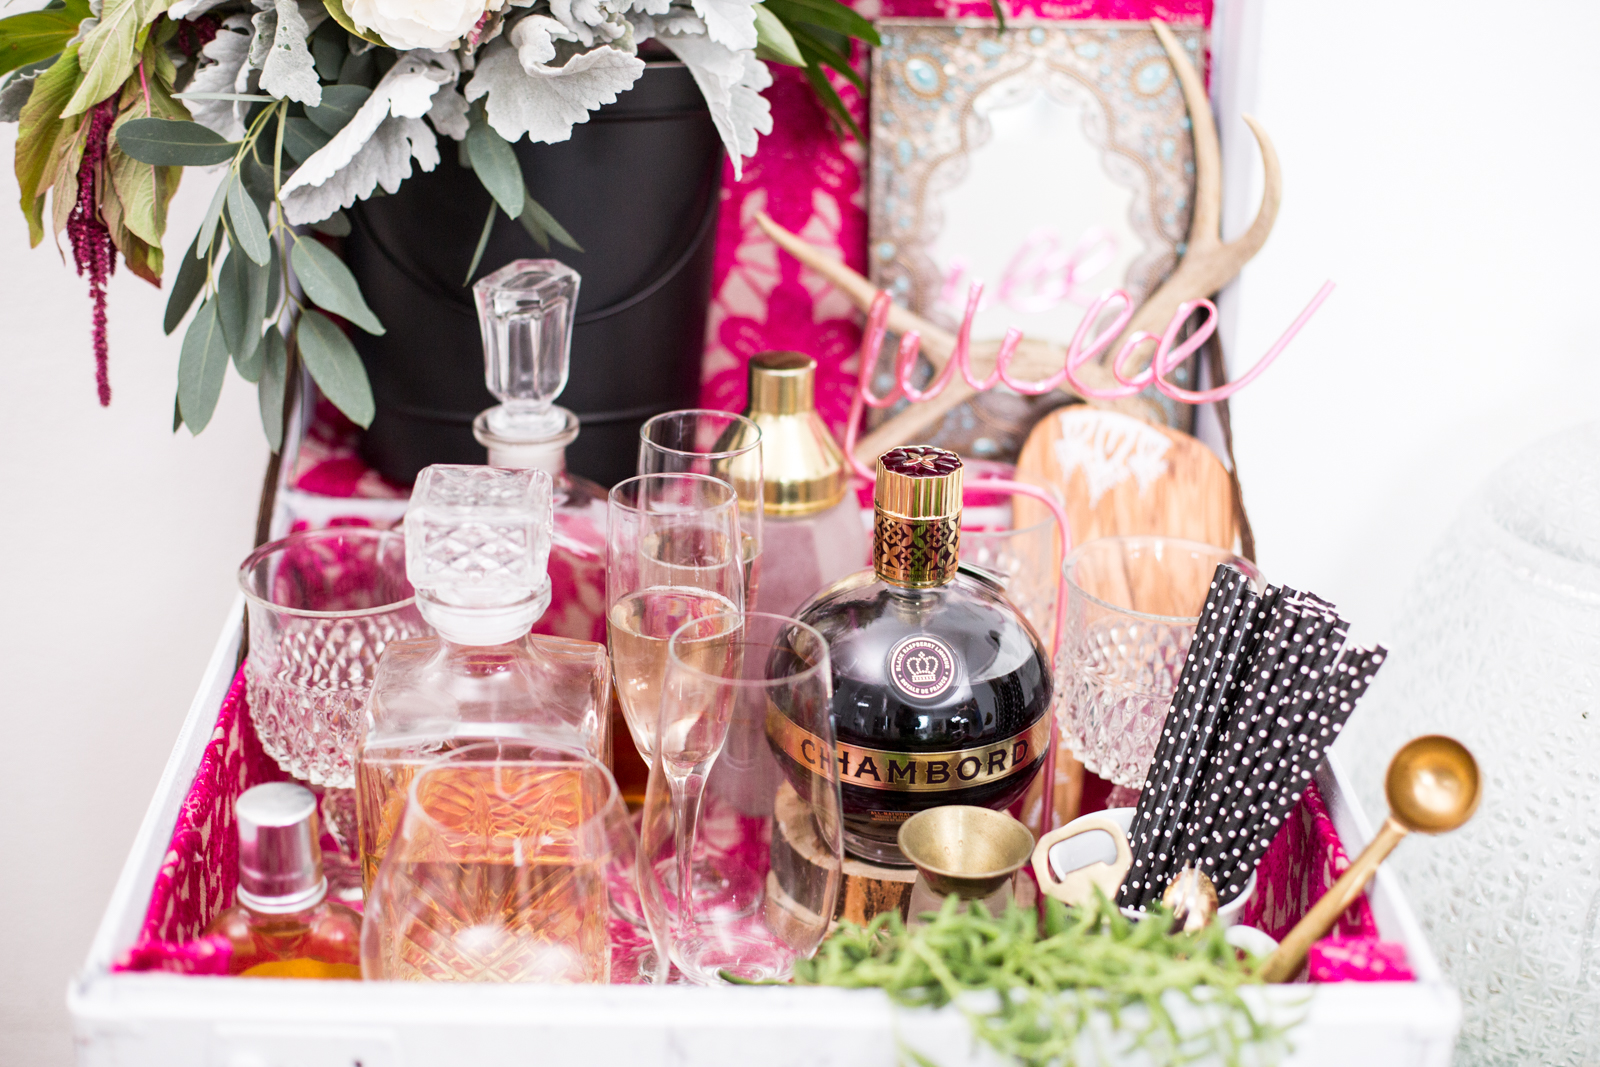
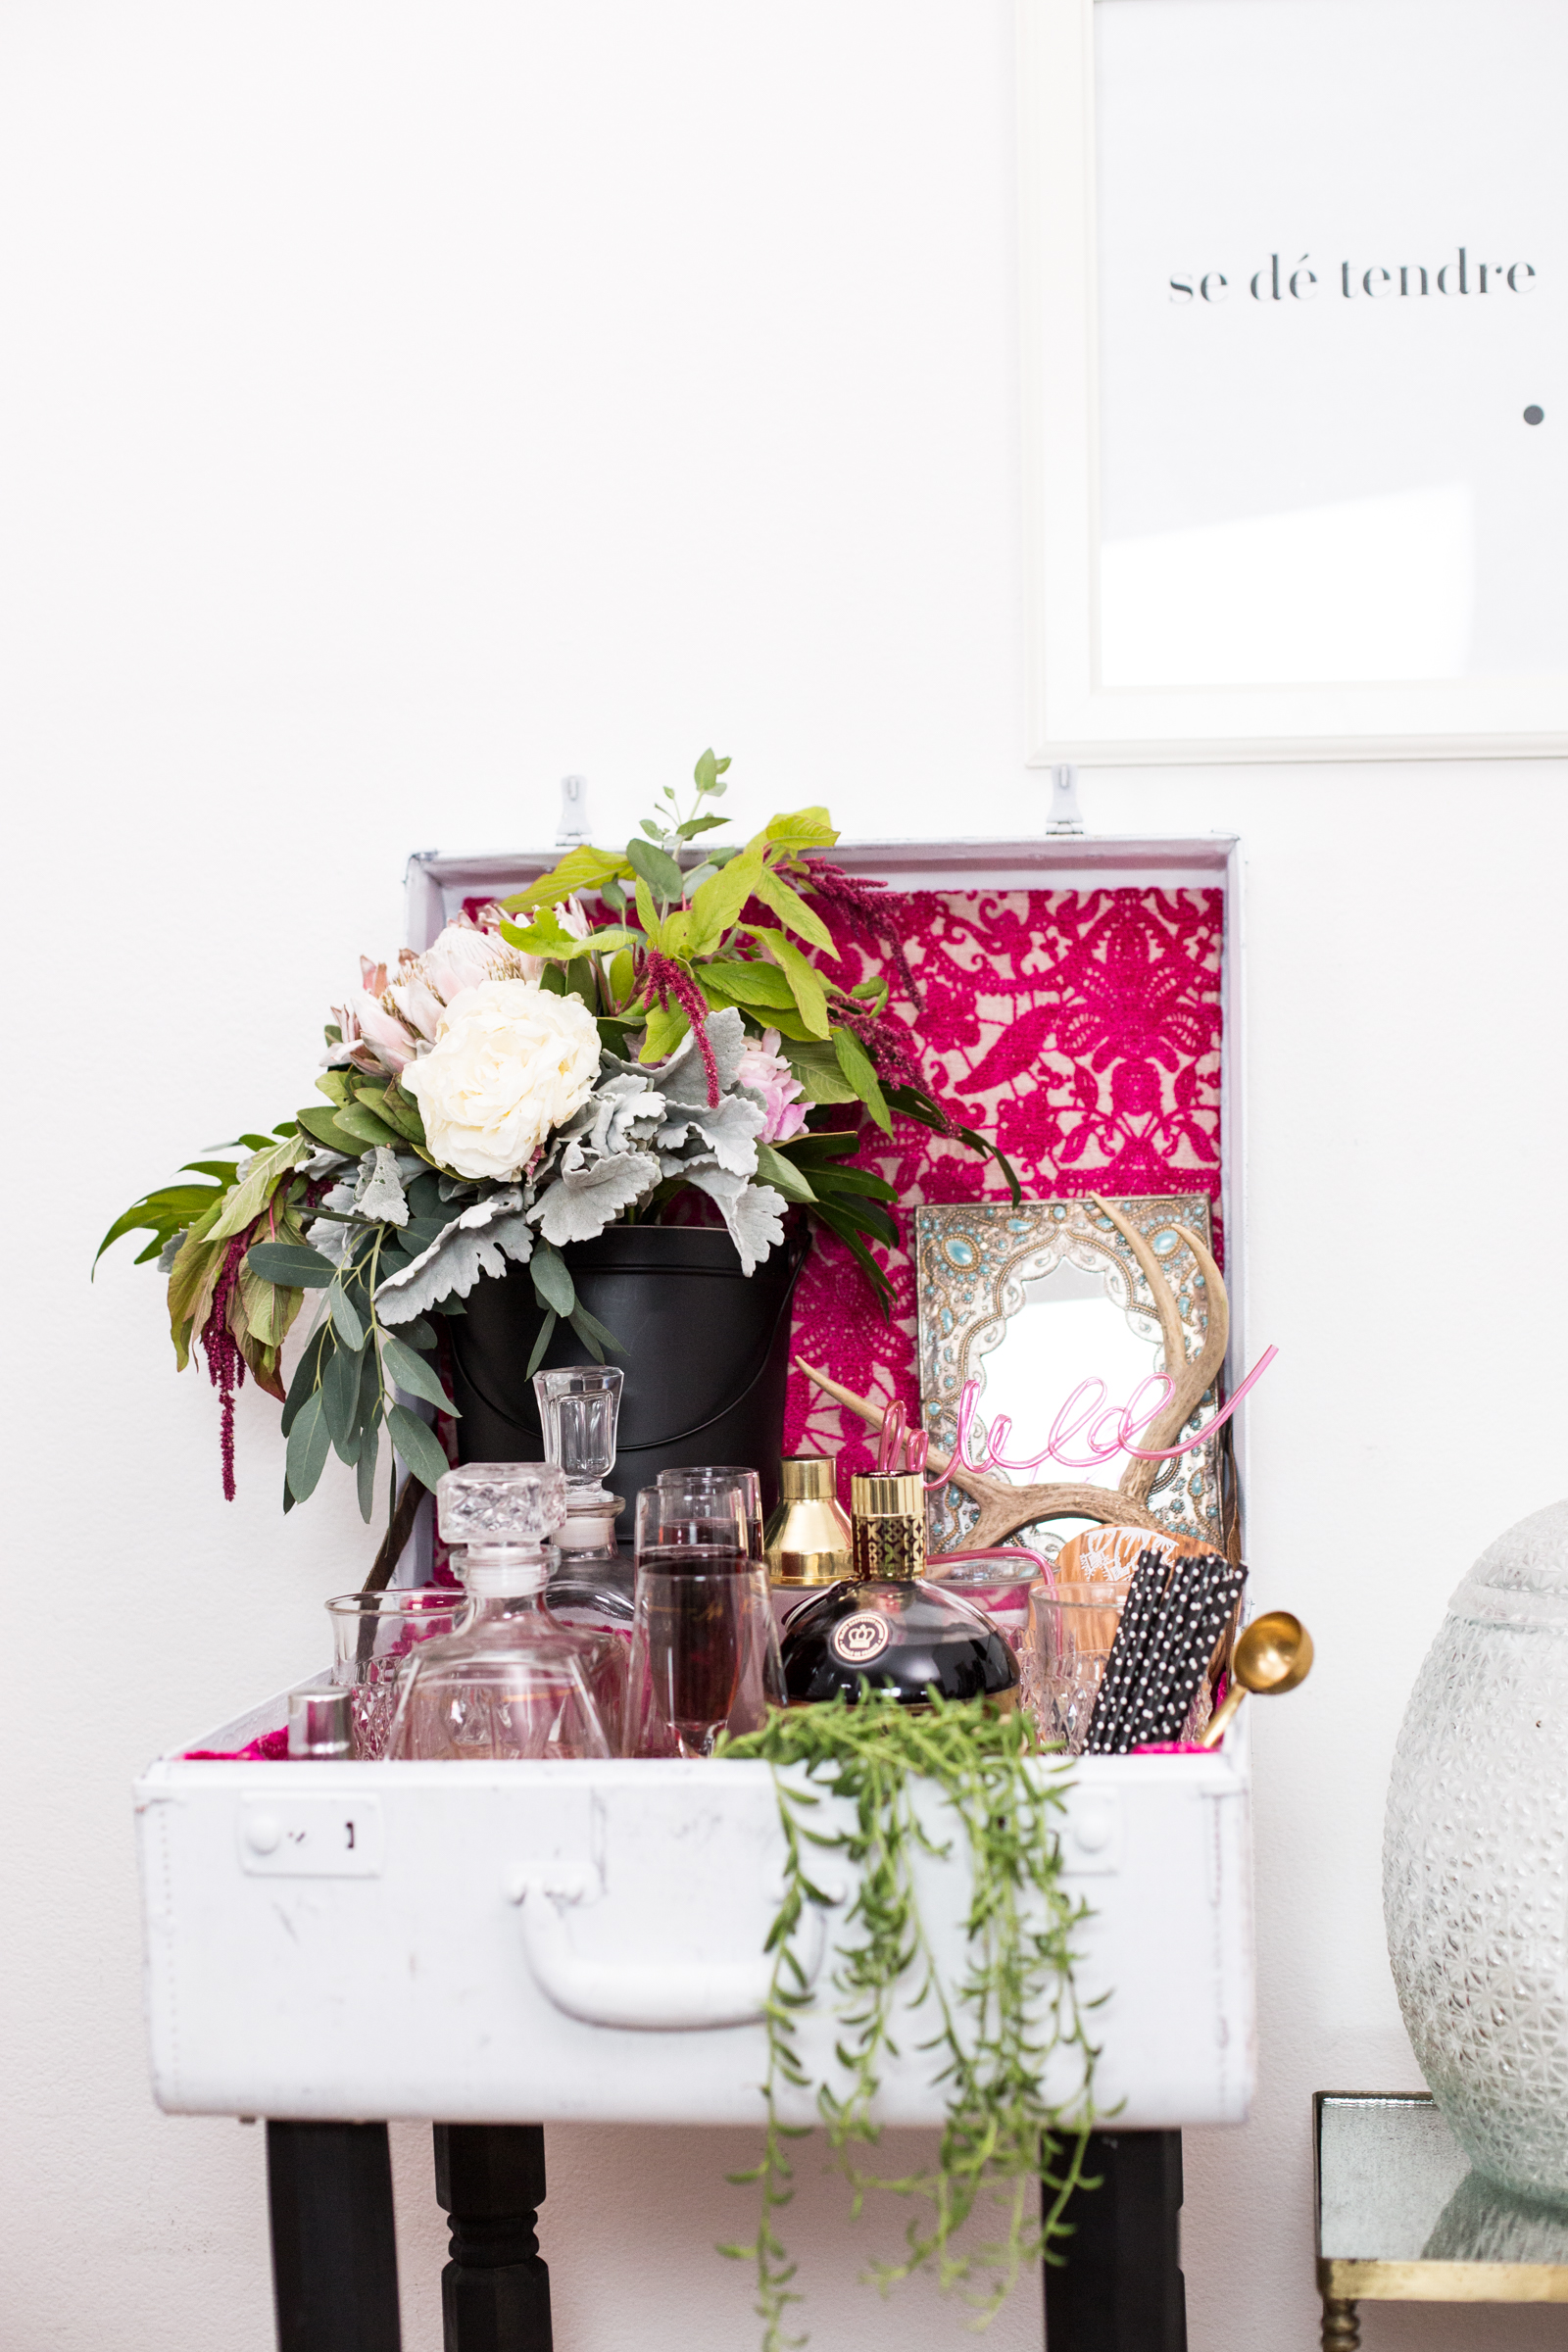
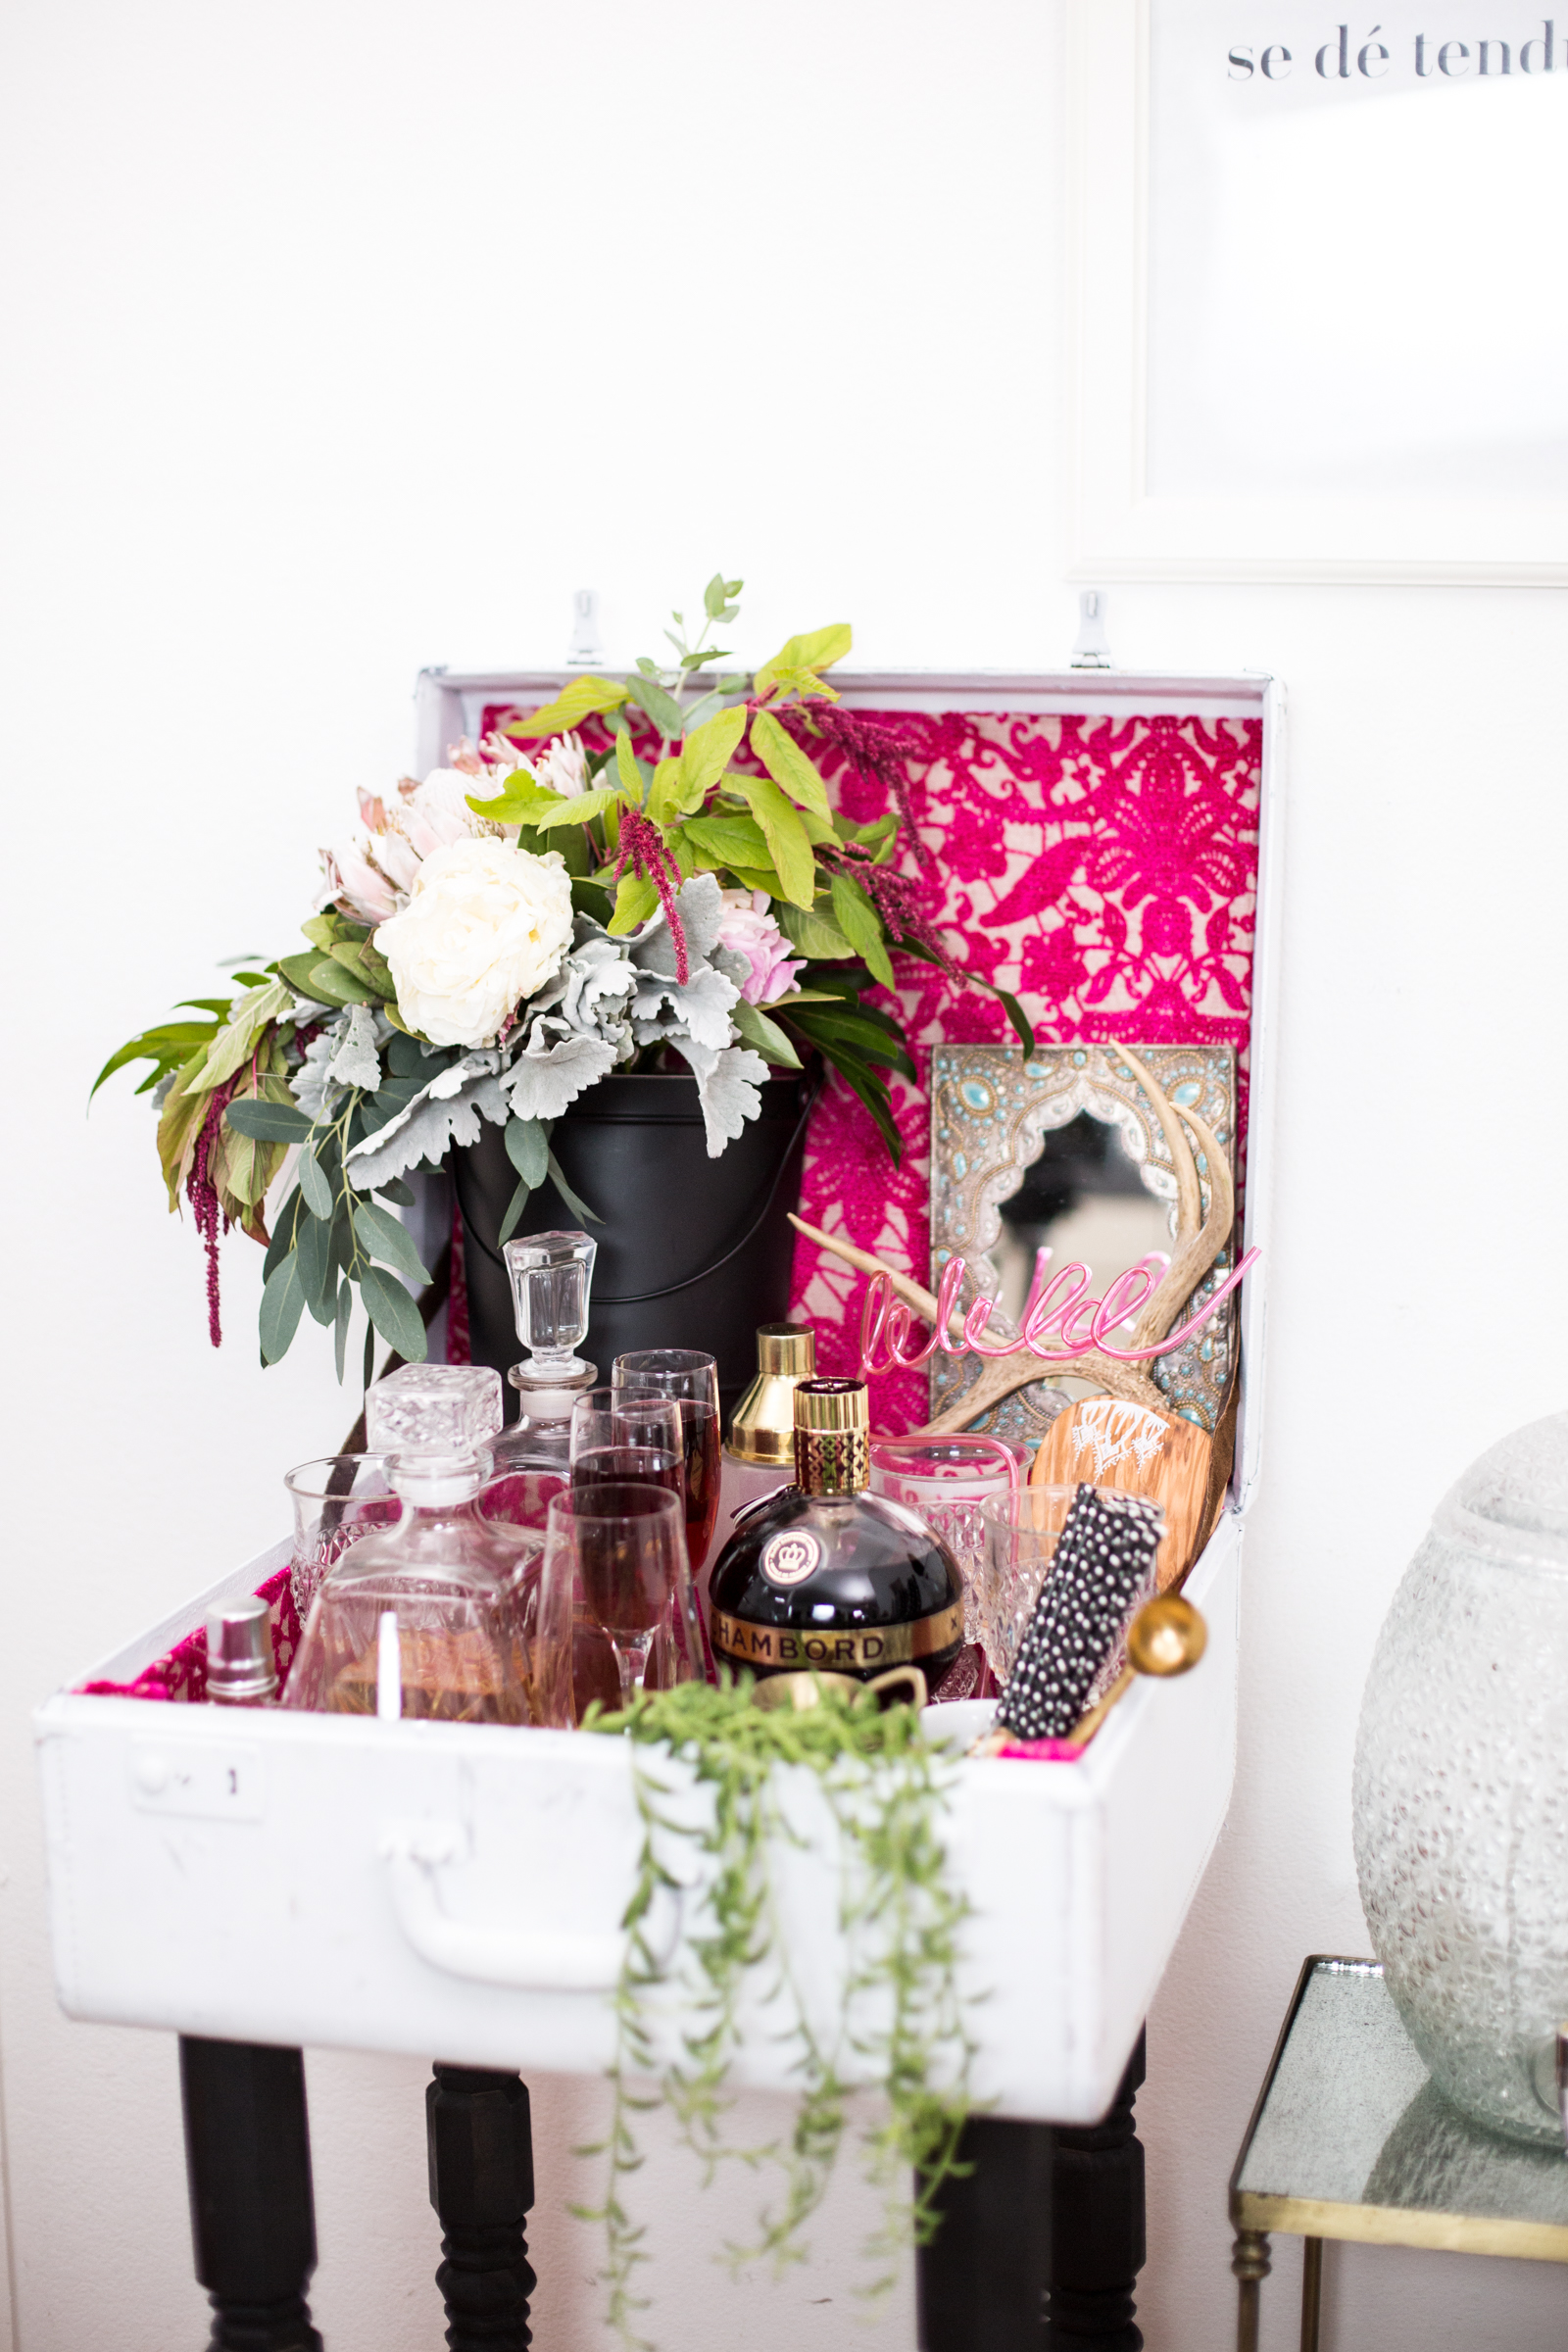
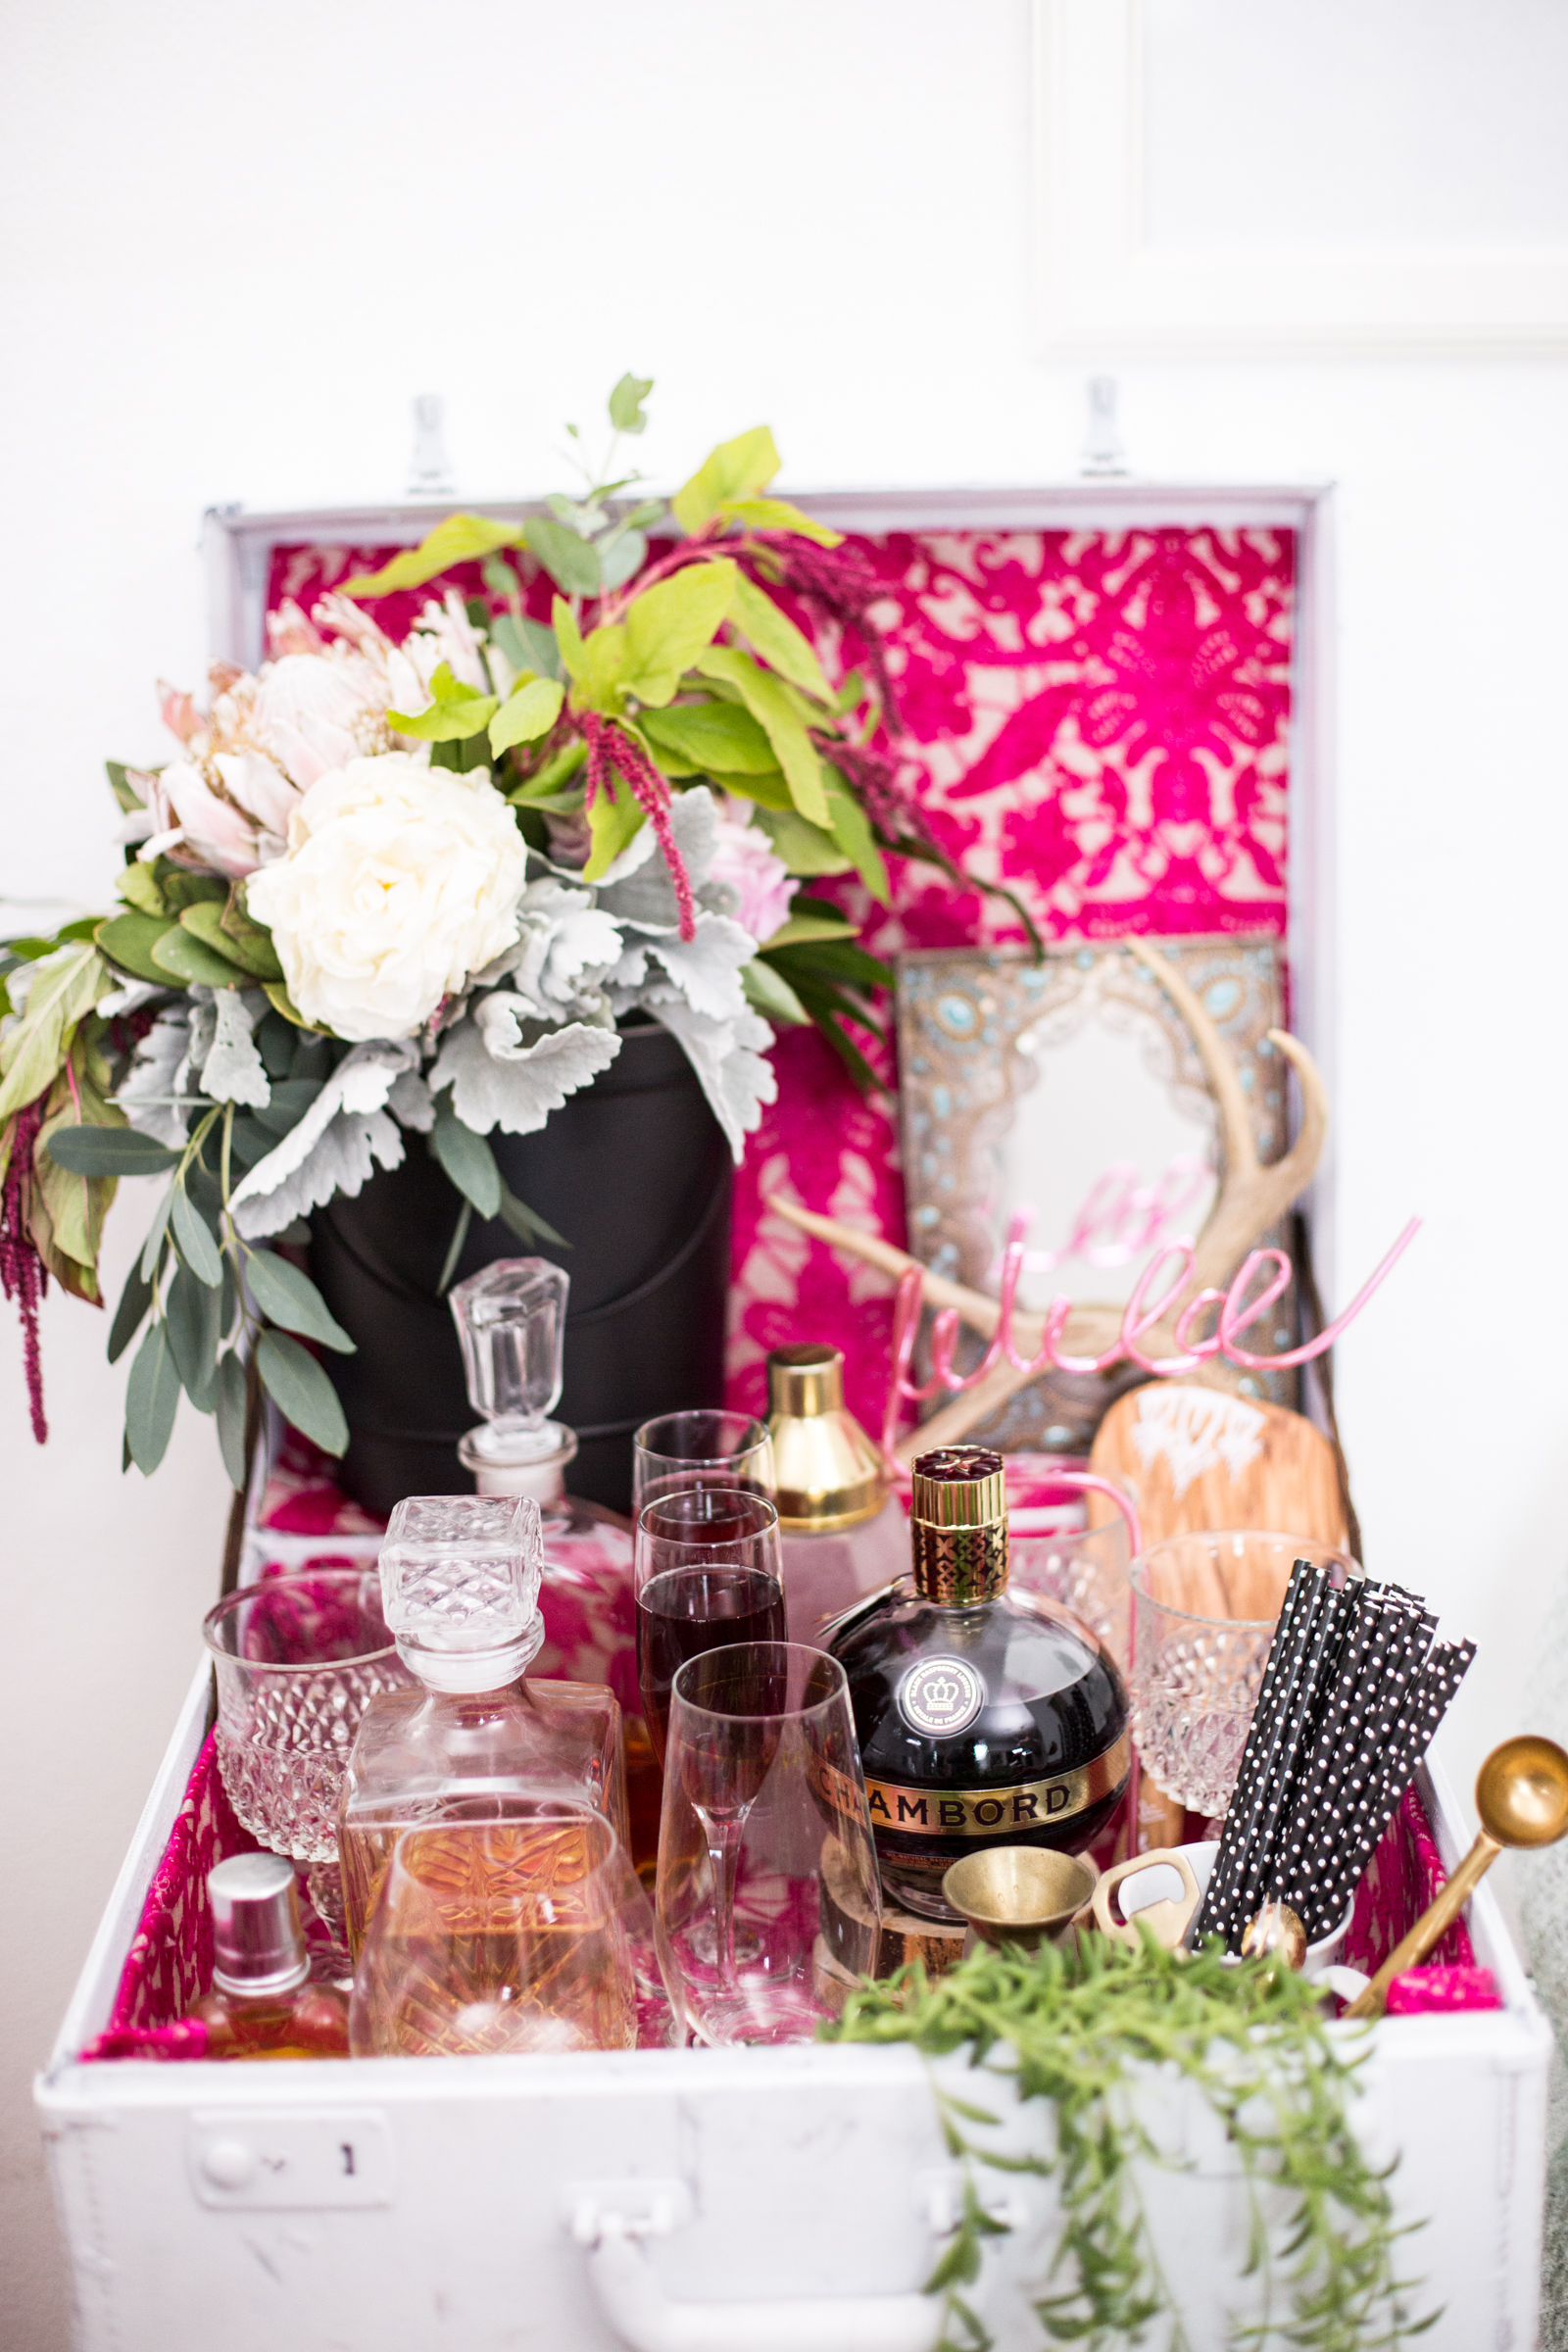
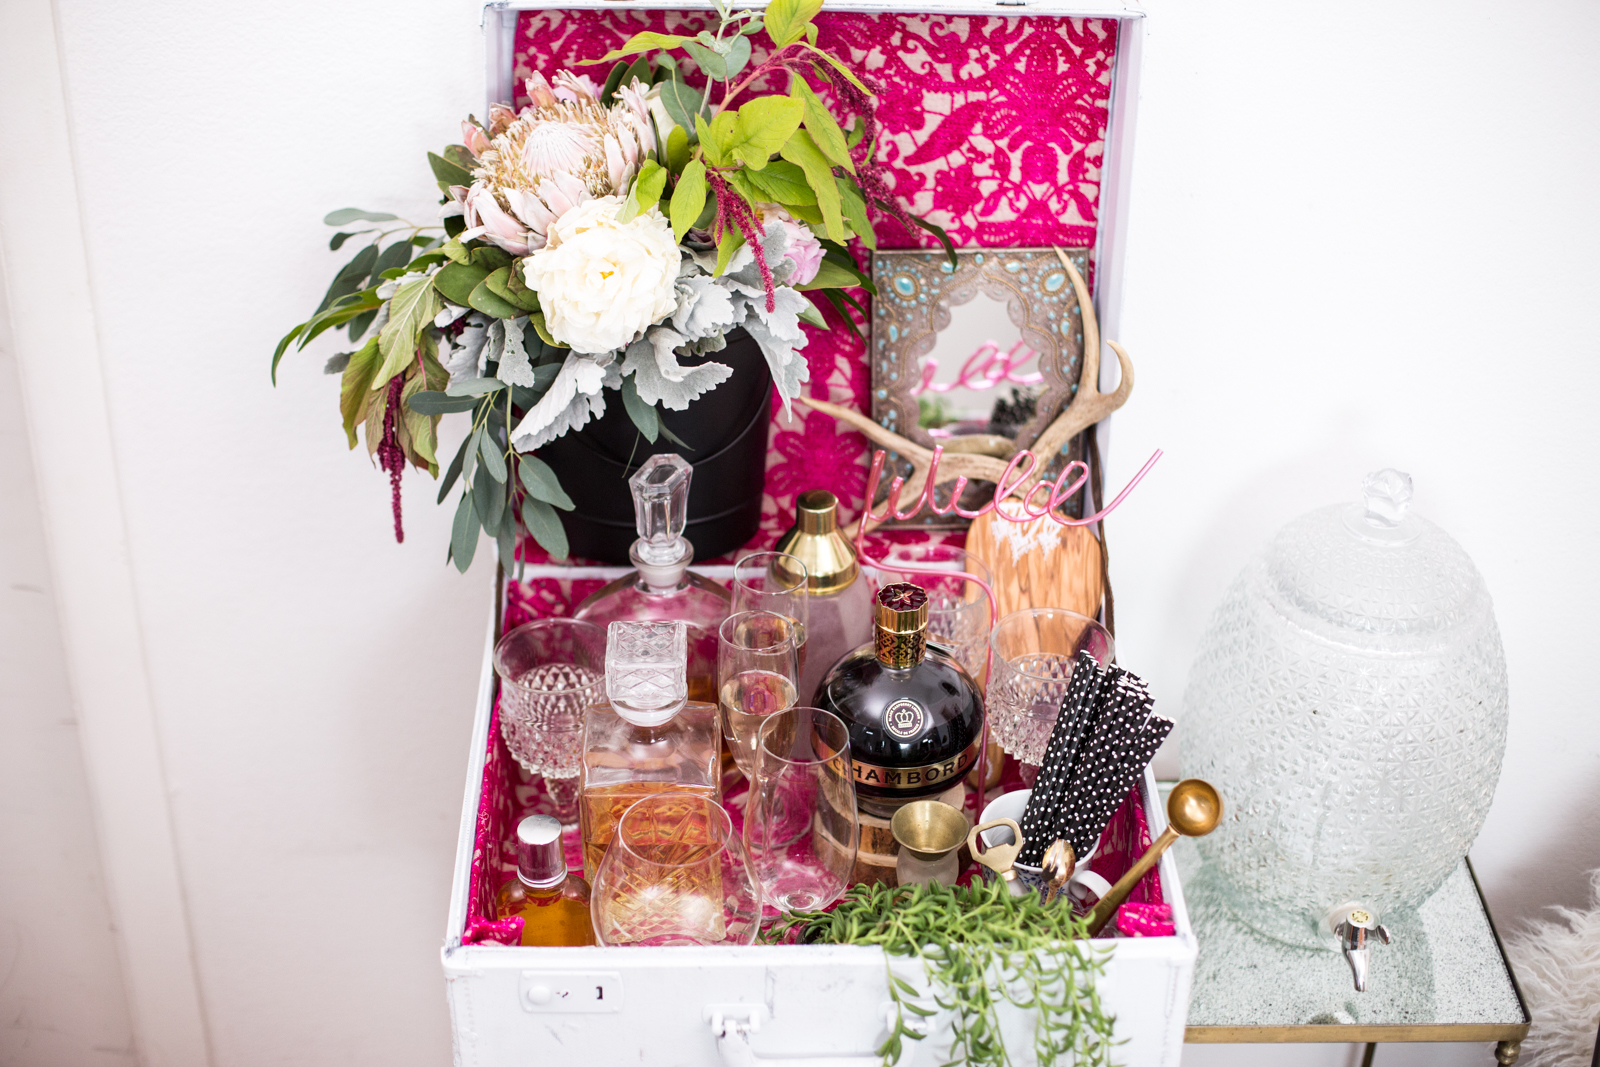
Upcycling is all about weighing the pro's and con's. For example — you know what no one needs? An old piece of luggage. You know what everyone needs? A new bar cart. It was that easy to decide to transform a well-past vintage suitcase I found at a flea market (errr, from my future grandma self) into a tropical-chic 192os-inspired DIY bar cart. With a little color palette prompting from some favorite cocktails (and maybe a few sips to kick start the creative process, too), I whipped up this upcycled project in a very ... eventful afternoon.
Watch the video above to see what I'm talking about, and check out the DIY instructions below!

Prep It:
Vintage suitcase 4 Wood table legs 4 Table leg top plate brackets Fabric (I got mine from an interior decor store, as it's thicker and heavier) 2 Strips of leather Flat white spray paint with primer Gold spray paint Black spray paint Painter's tape Power drill Hot glue gun
Do It!:
- Start by ripping out the interior upholstery of your suitcase. You want to strip it down to just the shell, if possible. If there's tough glue, scissors can help!
- Using the white spray paint, coat the inside and outside of your suitcase fully. You might need more than one coat, depending on the color and texture of your suitcase.
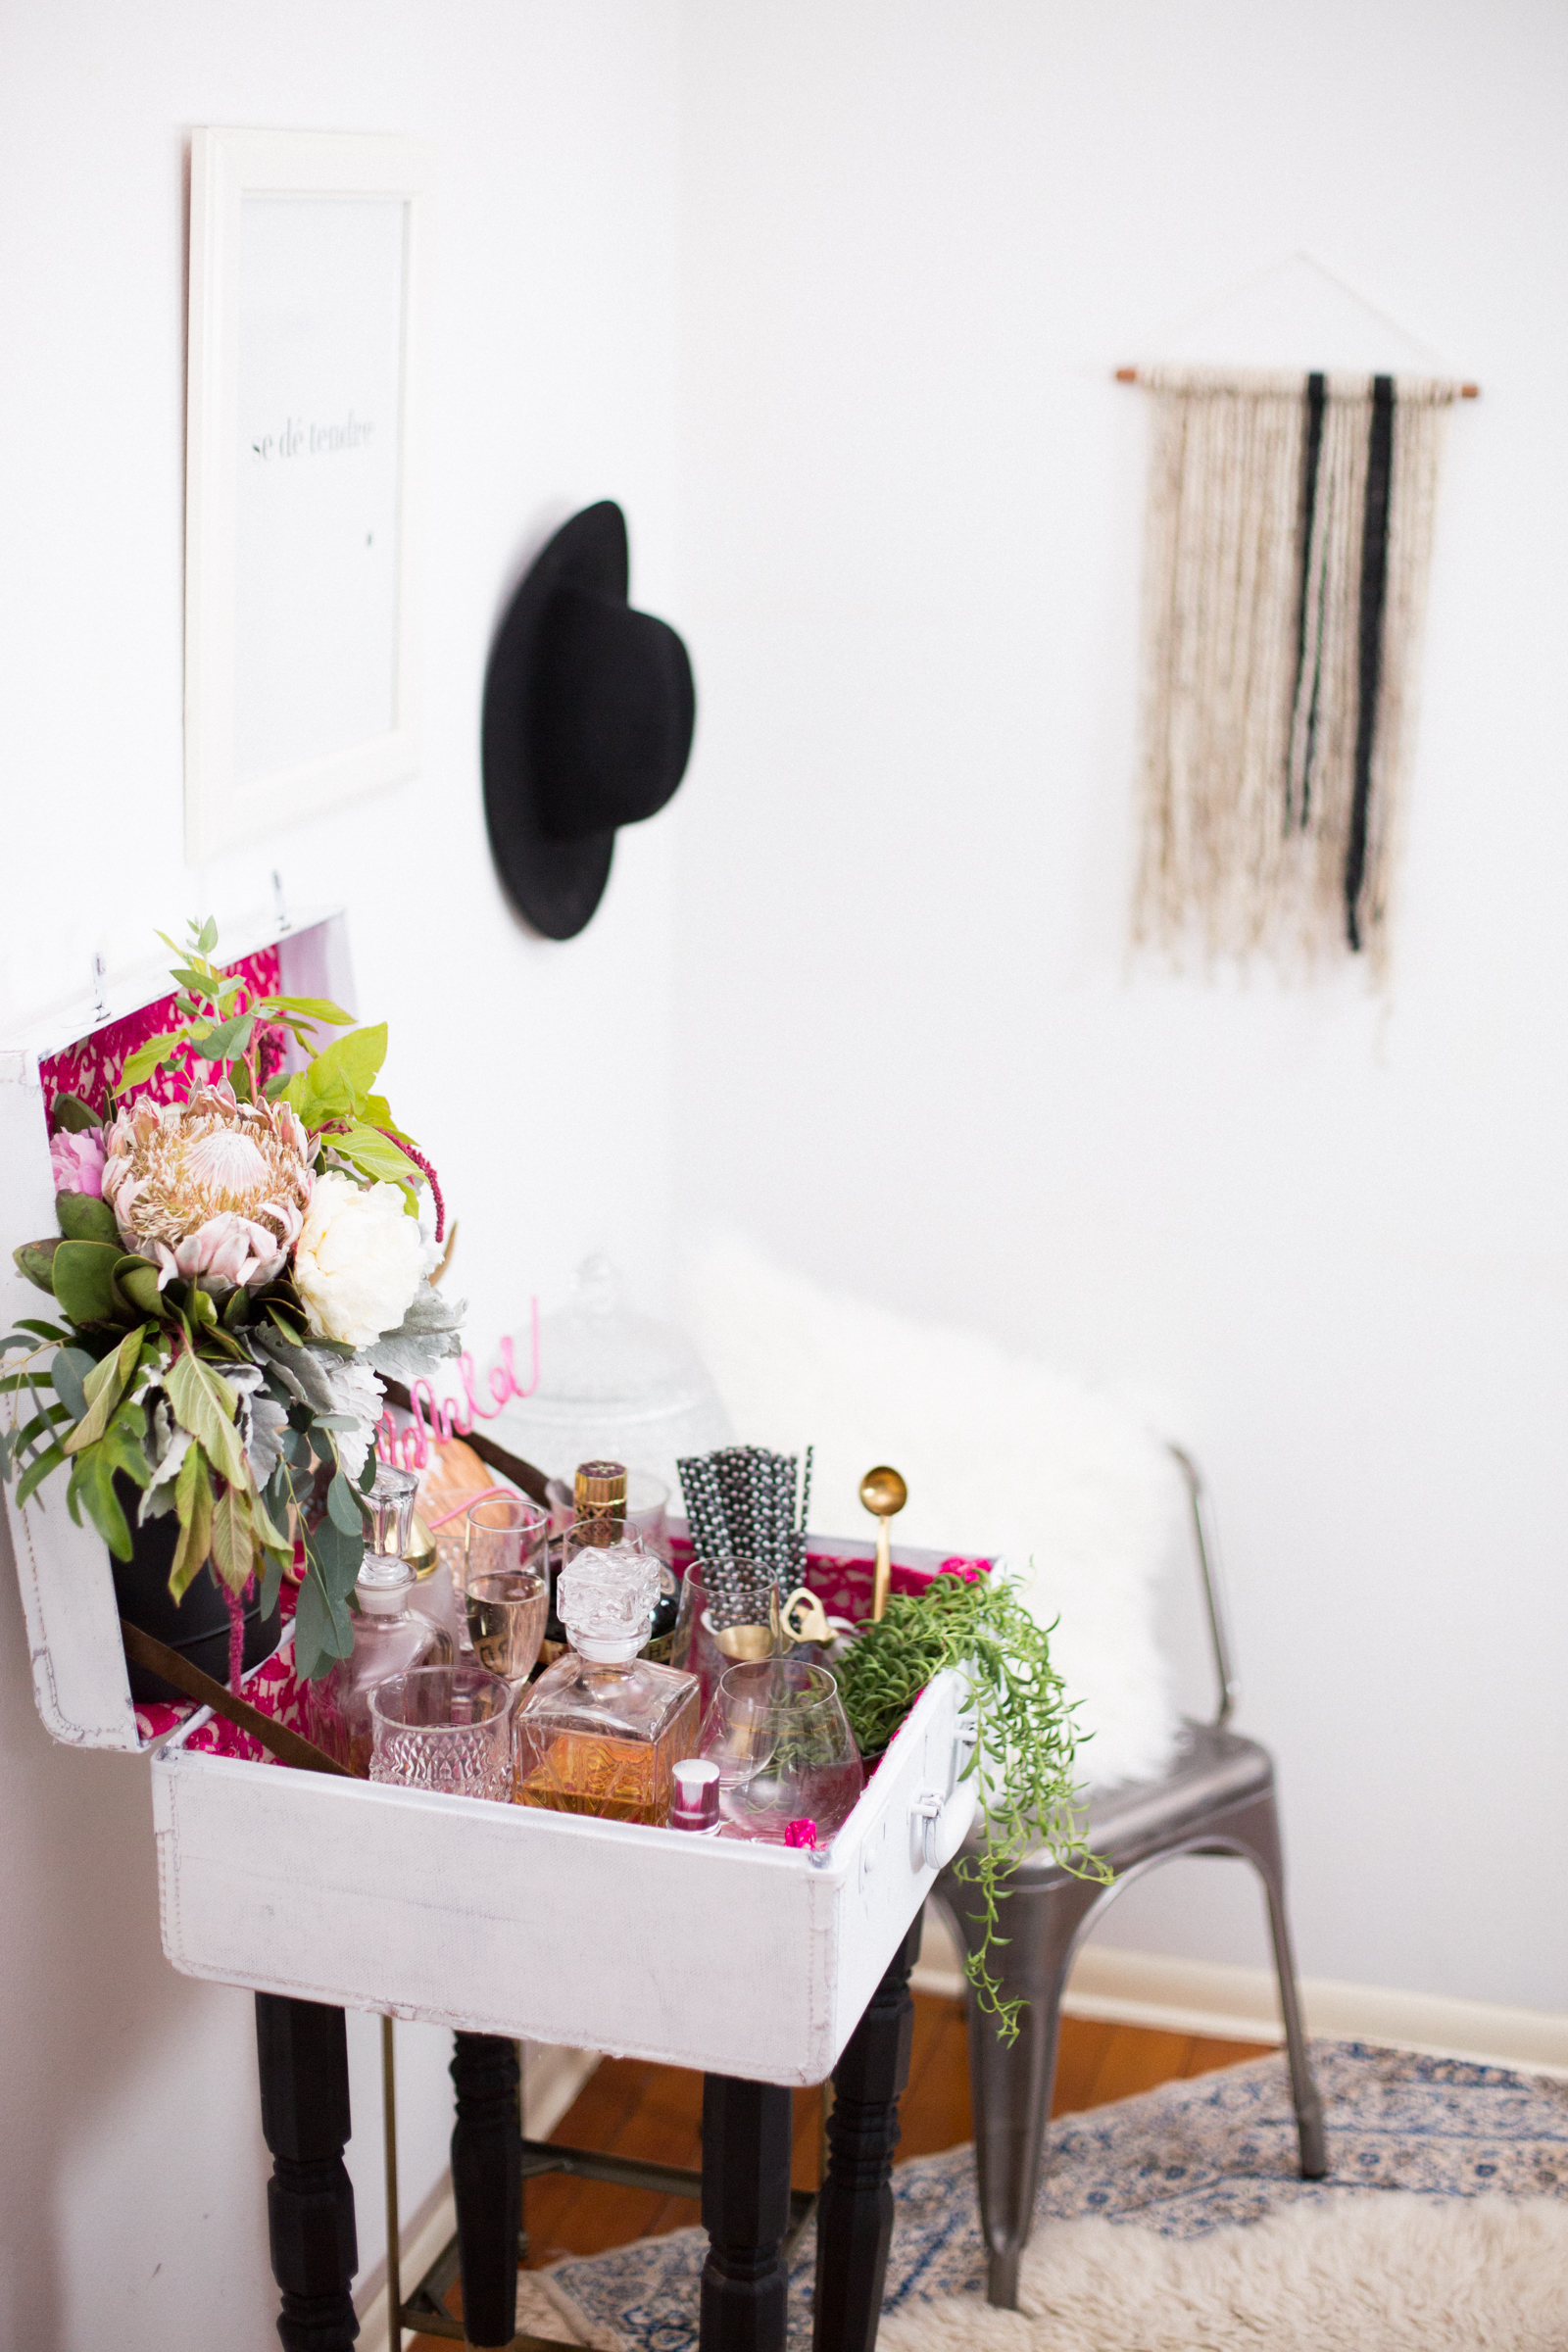
- Spray paint the bottom of your table legs gold. Once dry, use painter's tape to section that off and spray paint the top of the leg black. Make sure to section the same amount off on all of the legs, or they'll look uneven!
- Screw on the table leg brackets to the bottom of the suitcase, and use them to secure the legs.
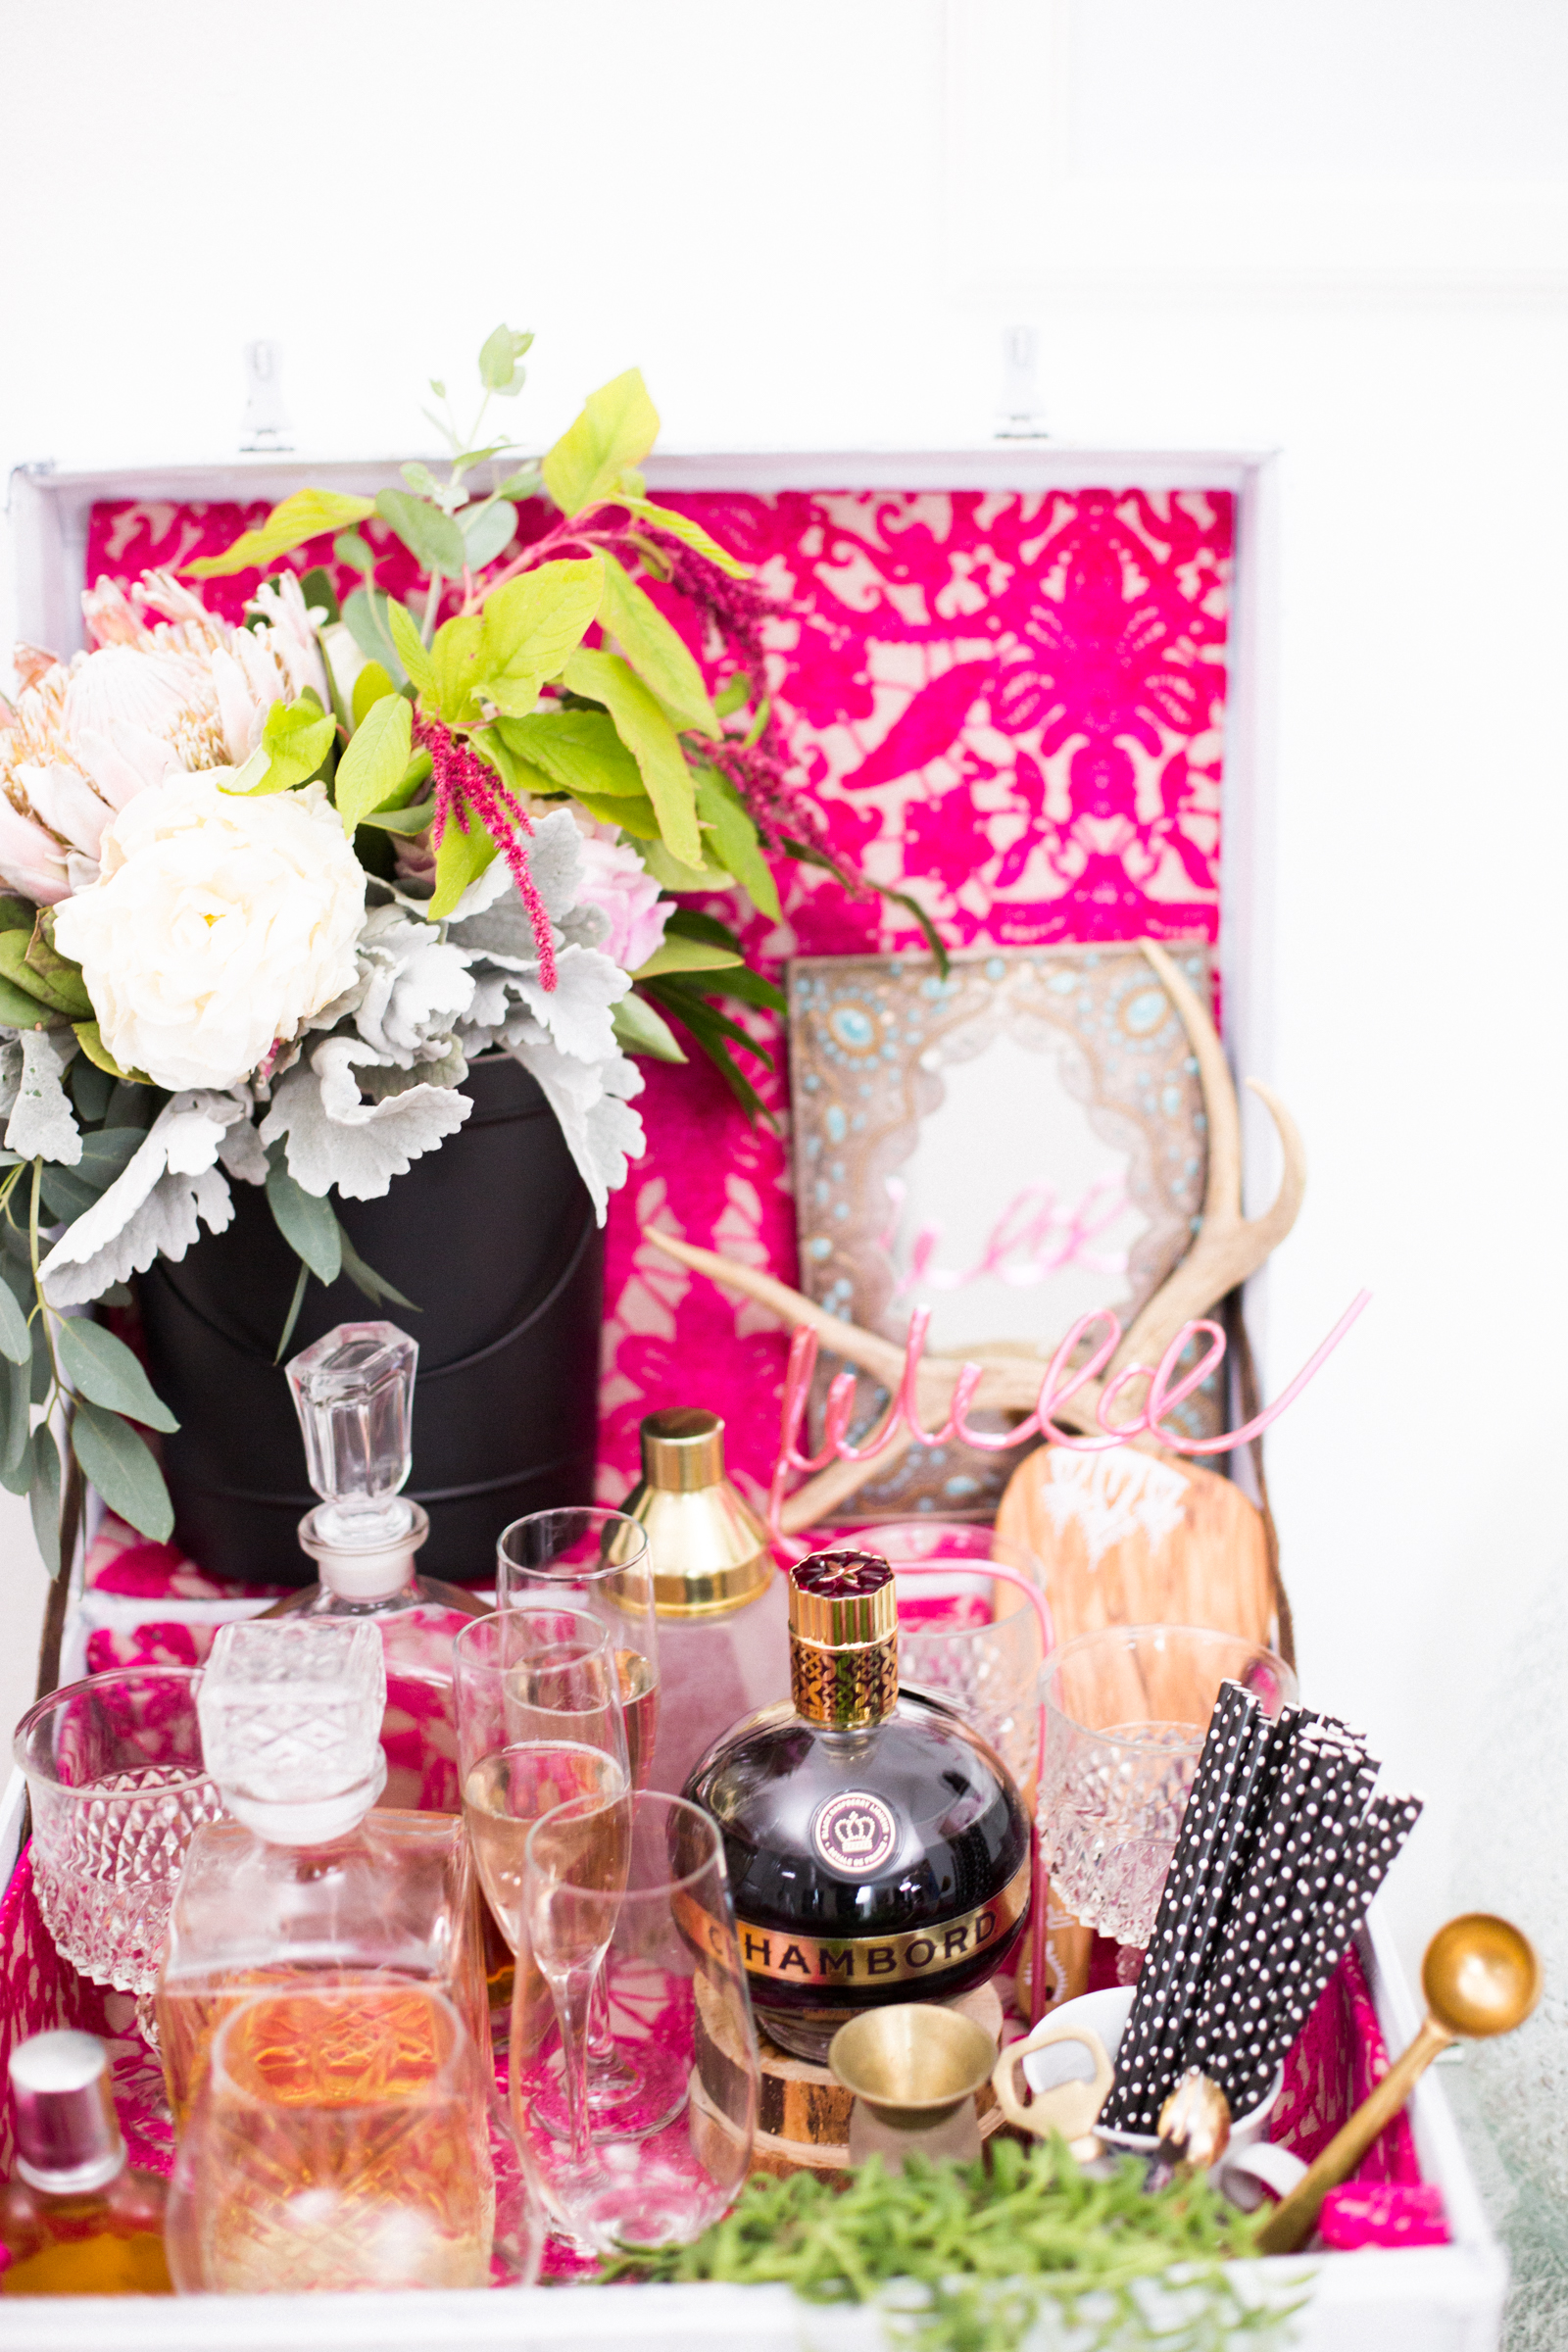
- Now, it's time to work the inside! Start by gluing the leather strips in the corner between the bottom and top, to act as hinges. This bar cart display looks best if the top is open at a 90 degree angle, so situate your leather strips as necessary to keep it upright.
- To upholster with the fabric, start by gluing it to the base of the suitcase, so it lays flat and even. No weird pockets here! Then, work it up the sides, making sure to tuck the edges under before you finish, to give it nice, clean edges.
- For the corners, don't try to maintain the angular shape. Create puckers of fabric, and glue into place. These look so much nicer once the bar cart is full, and leave a lot less room for error while gluing!
- For the top part of the bar cart, glue a piece of fabric along the base and down, leaving the edges exposed. Make sure to hem those edges by tucking under, though!
- And voila! Fill in with flowers, glasses, your favorite alcohols, other fun accents, and enjoy!


(Sponsored by Refinery29 & Chambord (Brown-Forman Corporation, Louisville, KY, Black Raspberry Liqueur; 16.5%, 21+)